Whenever I’m cutting out multiple things at the same time on the Glowforge I spend quite some time laying out everything and making sure that nothing overlaps.
I have played around with tools such as Deepnest but they take a long time and most of the time I’m seeing a better solution than what the software comes up with.
Most of the times it’s things like these, such as a set of letters and I want to cut squish them together without overlapping:
It would have been my recommendation. I often try to use a tight pack when I am designing, thinking of how it will be in the cut even as I am laying out the design. Thus if I can lay out all the parts of a box to be 2.9 by 17.5 including gaps I know it will fit on a 3x18 piece of wood, whereas if it were 3.2 x 18.1 I would have to waste far more scrap, and the look would not be much improved.
Inkscape’s arrange function is how I start for most packing. After I do an arrange I may tweak things manually to pack it a bit tighter.
The one thing I try to remember is that there’s diminishing returns when it comes to this. Most materials are literally pennies per square inch, spending 30 minutes to save $0.25 of material is simply not worth it. Your hourly rate may be different or your materials may be more unique or expensive, but it’s something to consider when laying things out.
OK lets do a quick example of my workflow since I have a minute.
This will vary depending on your material and a few other things, but in general I tend to align things about a mm apart. That’s where the align tool really shines. Let’s do a quick example, first something simple like a box:
First I use a generator to make the box and import it to Inkscape:
Huh, whomp! (I knew this from experience but it’s worth showing the result.) The problem is that the pieces are different heights and widths, and it tries to put it on a regular grid. What do to? Looking at the pieces I see that there are two basic “heights” to the parts. Let’s undo the arrange and I’ll color code them into the two types, red and blue – the color coding is irrelevant to the process but it’ll show what we’re doing a bit more clearly:
Awesome. Now let’s group the blue pieces and then group the red pieces. Now we have two groups… which we can arrange (into one column) like any other parts!
Undo that red/blue color coding (if you did it at all, I only did it here for illustration purposes) and we’re ready to cut. Easy enough, with a little practice this goes very quickly.
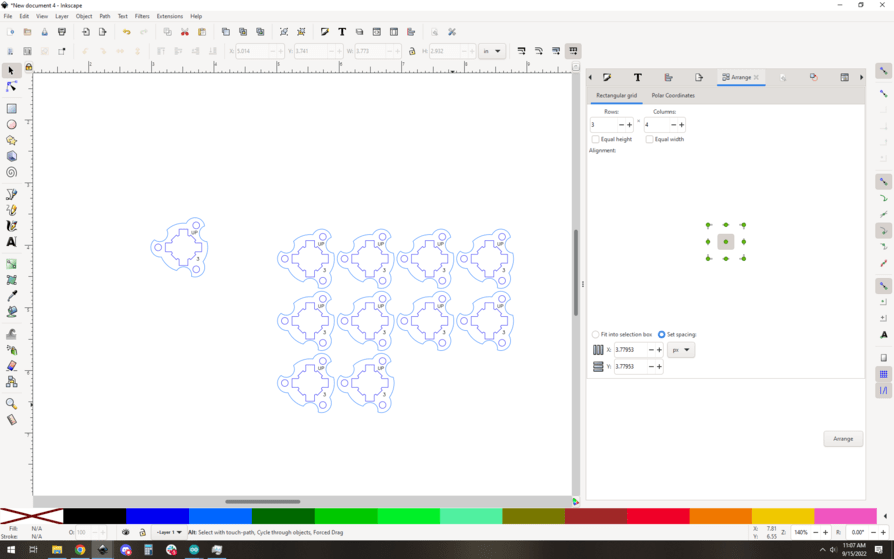
OK so they’re spaced by 1mm, but they aren’t very efficiently packed. The best situation here is to have shapes that pack tightly in rectilinear grids like the arrange tool is making. That limits you to mostly rectangles (don’t forget squares are rectangles) and parallelograms. Rectangular grid, parallelogram grid:
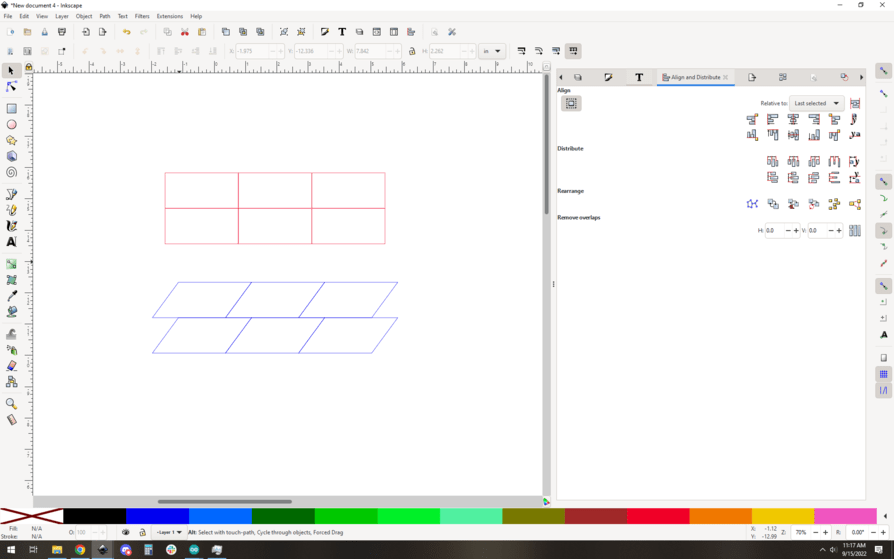
So, the trick here is to think how can you get your items to fit neatly into one of those two shapes. In this case it’s pretty easy, mate two triangular pieces into a parallelogram:
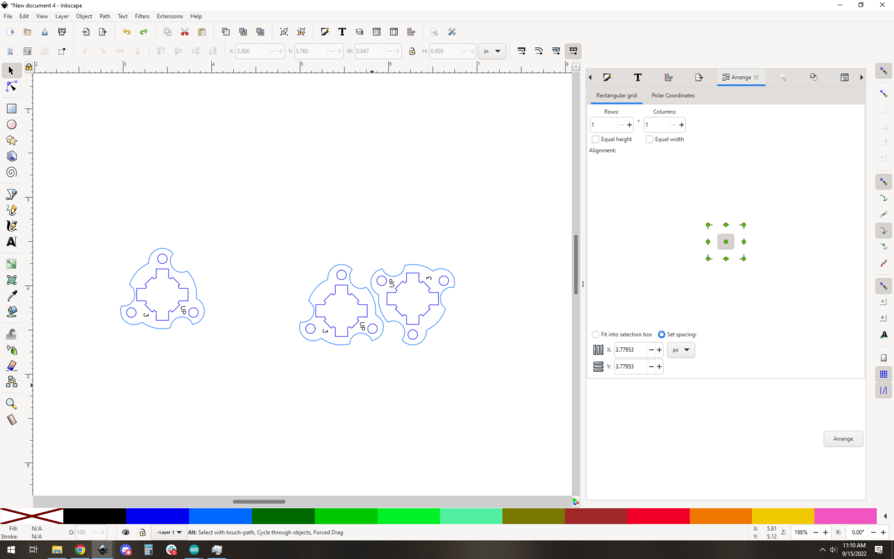
Then I group those two pieces into a single unit, and then copy that group as many times as I need to get the total number of parts. let’s say I need 10 parts, so 5 groups… then use arrange, and you get:
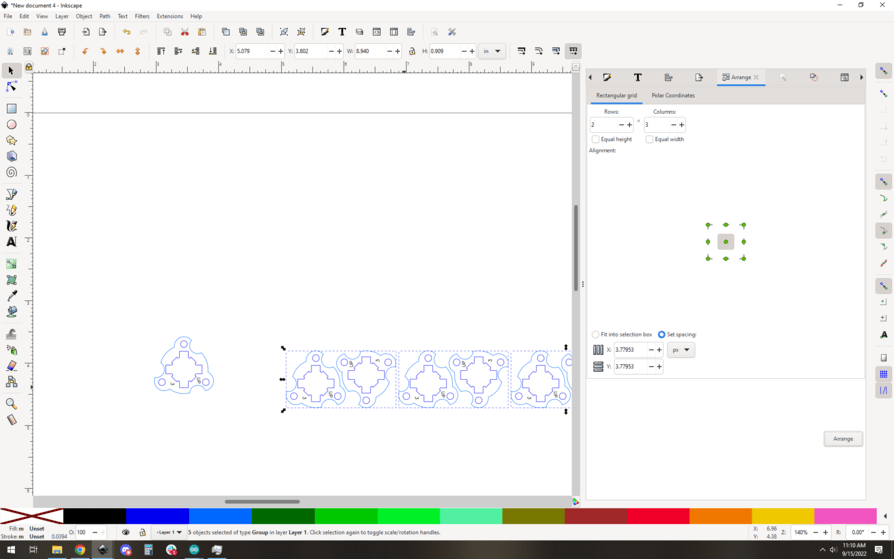
Hmm, so this is the only fiddly part. You see how there are gaps between the groups… it’s trying to keep the entire group separated by 1mm, which leads to too-large gaps. The solution is to do a little trial and error with the spacing. I told it to space X-axis by -5mm, and got this result:
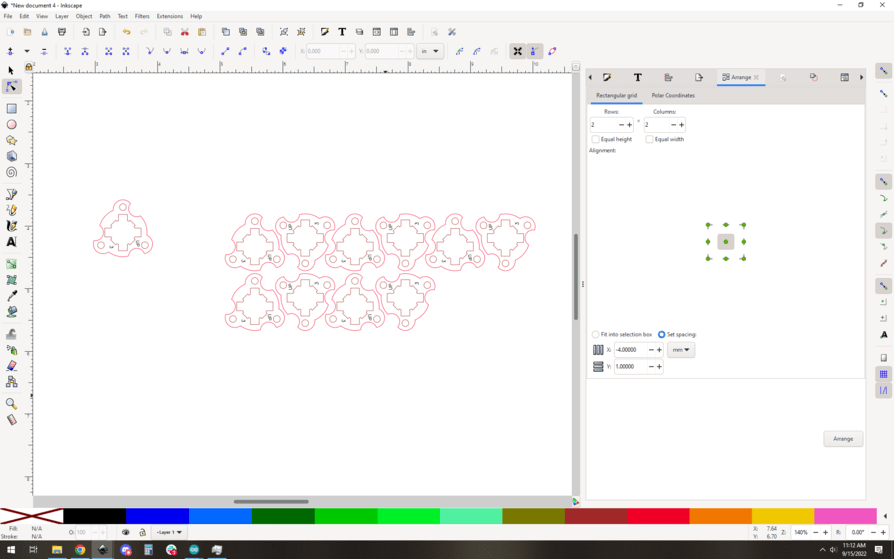
Ah, perfect! And that’s pretty much it for how I layout weird parts.
… or is it? A quick bonus, about why I use clones where I can. Let’s say you arrange this grid of sometimes hundreds of pieces… You don’t want to have to do it again if you make a tiny change to the part. If I want to change the color of the paths I can just change the one original part and all the clones will update:
Getting really familiar with clones + grouping + arrange + align will really make your process a lot faster.
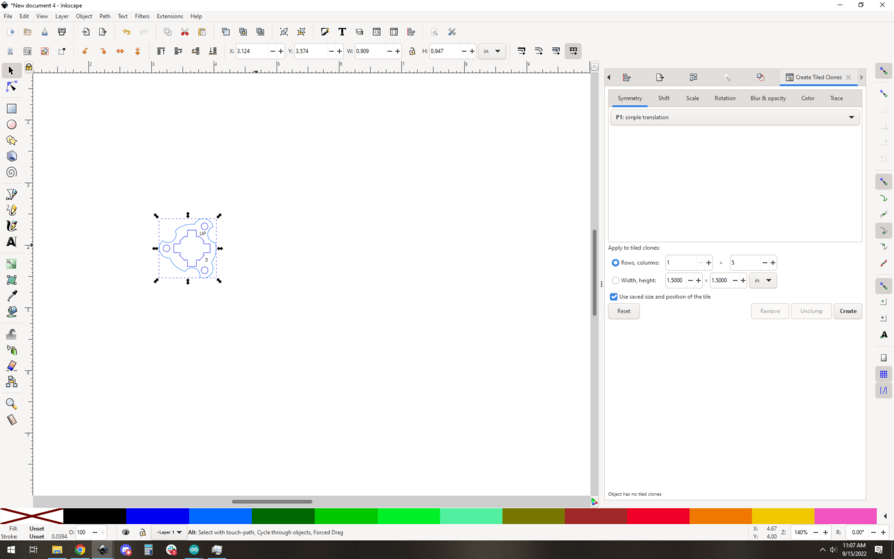
Extra extra bonus: Check out the tiled clones feature. It can do a lot of cloning and arranging in one shot, but uses % as offsets instead of fixed shapes. It is a little less intuitive to use in some cases, but it has some functionality that you can’t do any other way like rotation offsets and randomizations. I wrote up a process using tiled clones here: