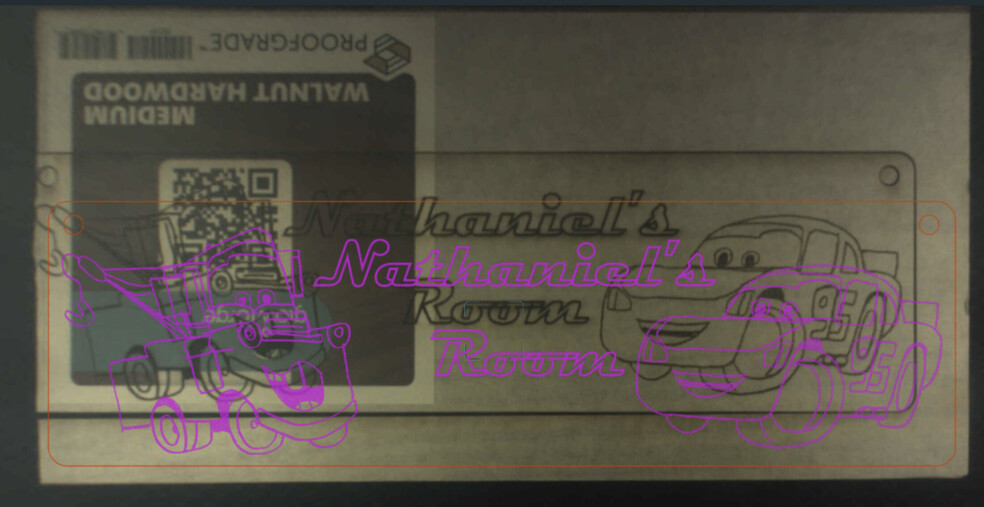
So earlier today we were making a door hanger for our friend’s son and the entire print came out about half an inch to the left (ending up off the board - PG medium walnut) the cut was the final step so it wasnt blatantly obvious it was going to be that far off it was too late. Wasn’t paying attention to the print position relative to the sticker at the time otherwise it would have been more obvious. Attached is the app image from the post print bed capture…
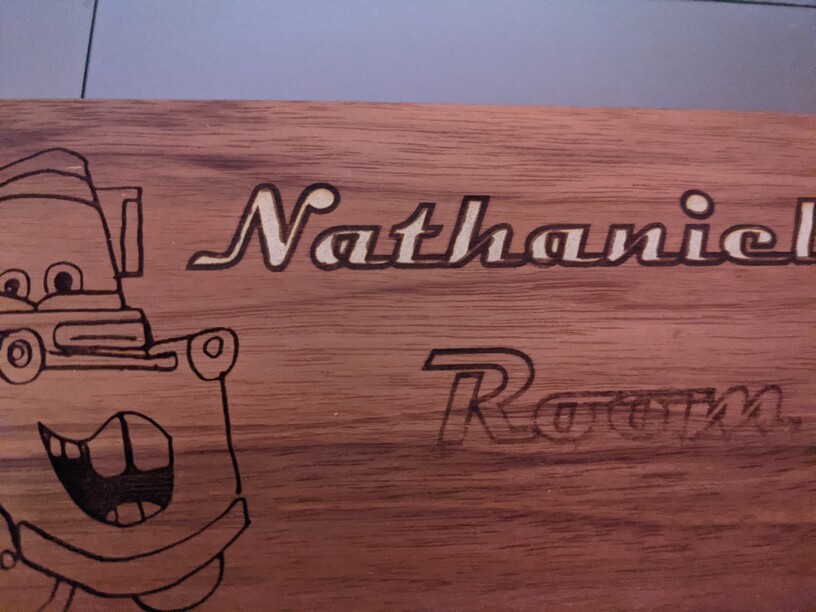
After this we did the beta calibration app run, this resolved this issue (but still amazed it was needed after barely a week or moderate use… After this, we re-ran the previous print with a few tweaks to improve the results (didn’t catch the engraves were set to draft, so bumped them up to SD) and we made the text a bit bolder to be more clear to read… Only to run that print and find that the proof grade sticker prevented the engraving from half the project from coming out…
We are obviously quite new to Glowforge but isnt the whole point of the proofgrade so these inconsistencies dont happen (not the position issue but the engraving isssue). I have not found anything in the forums the says the proof grade labels should be pre-removed (infact, GF says they should be clearly visible for the app to read them so you cant/shouldnt remove them?
At this point we’ve burned 2 proof grade medium walnuts on this project – being is for a friend’s son, we’ll probably flip over the 2nd board and just do the engraving on the back since the cutouts aren’t affected by this, but we’d like to understand why the stickers are a problem (in some cases?) if they are not meant to be removed.
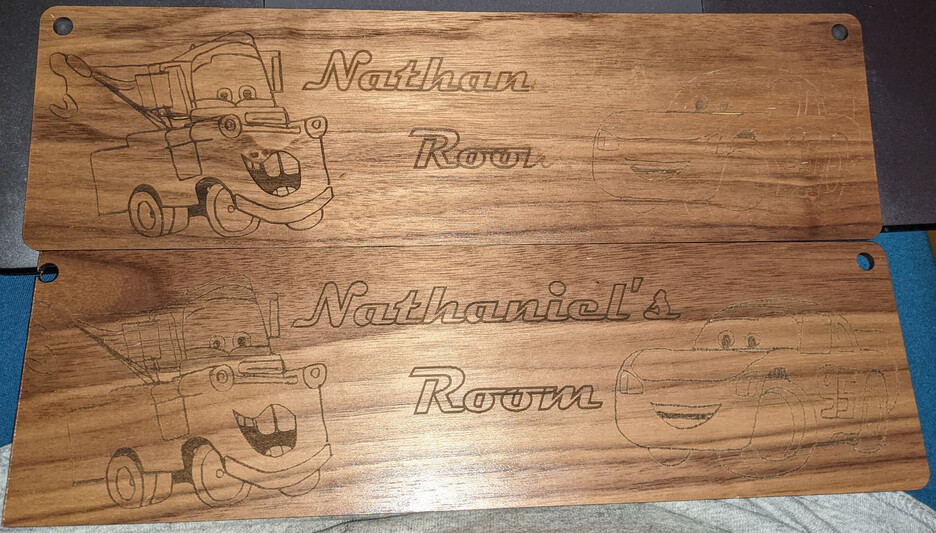
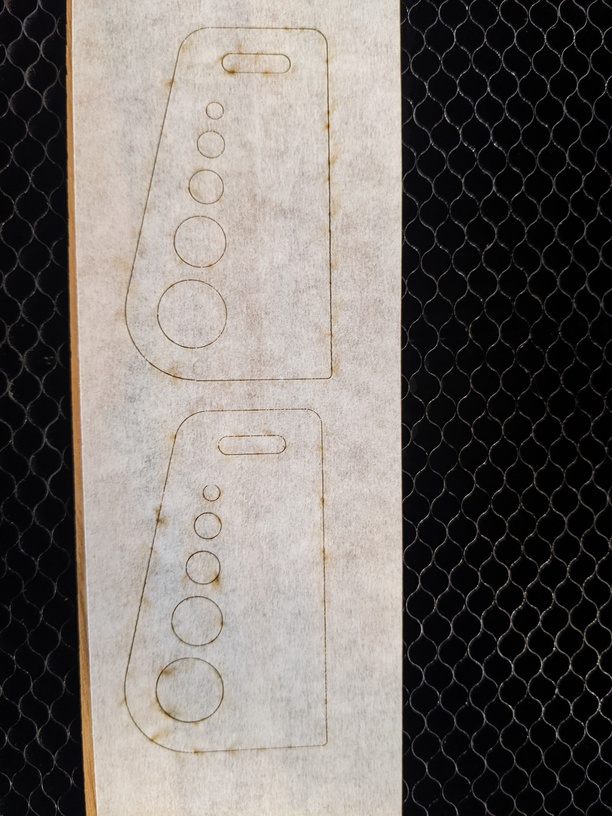
Top board is the 2nd print, sticker was on the right hand side partially covering the end of the words and the car. Bottom board sticker was top left, so blocking only part of the truck but came out better than the 2nd one still despite the 2nd being done with higher quality settings.
Were you getting better alignment on previous jobs before this one? If so, is there any possibility you bumped the head or arm of the machine after you turned it on and, it had centered? That can cause alignment to be off until the machine is next power cycled.
You may need to run the alignment again if you physically moved your machine but, it should not otherwise suddenly change.
As for the label: yes, the label adds additional material between the laser and the board. So, it can reduce the amount of energy getting to the board and, interfere with the engrave. Some folks here even remove all of the masking when engraving for that reason.
Posting in Problems & Support opens a support ticket with Glowforge. So, you’ll likely hear from them within a couple days. Some of the other forum members might have other suggestions before then.
Yeah we’ve had several projects turn out amazing without any problems… There has always been a slight offset to the print placement at finish (nothing crazy) but it was worse today as you can see above…After running the calibration app, the 2nd print came back slightly to the right once the bed rescanned after completion. We’ve never had the stickers pose a problem on any of the earlier prints we had done, admittedly it was mostly cutting though… I’ve now print this project 3 times, 2 with partial sticker covering and the 3rd with masking only… and now masking was enough to block the engraving in some spots… I would expect surprises like this from Lowes materials, but from a label that the manufacture uses to control the quality of their machines output… not so much.
As for moving the print head, nope, we had not touched the print head in any of this instances.
I’ll attach a photo of the dramatically different results (same settings, different layers) from my phone shortly. (I gave up on weeding the masking after finding the text didn’t come out again).
Many of us actually use the ‘bottom’ side of the proof grade board so we don’t have the issue with the sticker. Just use the pull down down option at the top left to select the type of proof grade. I haven’t used any of the newest proofgrade to see if the sticker is even thicker but it is obviously bigger.
Did you use an outside program for this design or the Premium software? You might want to weld your letters next time to remove the overlapping lines.
“As for moving the print head, nope, we had not touched the print head in any of this instances.”
I don’t think he meant intentionally but it is very easy to accidently bump it when placing a full sheet into the machine.
The artwork and the lettering came from PNG generated by Canva because we needed to use a specific font. The GF app did not handle importing the images originally, so we had to clean them up in Canvas to get good outlines (the drawings are the kids own free hand work, so they are really the special part of this project).
We just ran print #4 before your reply, using the backside with just the masking and AGAIN the lettering came out useless, but we left the cutout frame on the tray to reset and run just the engraving for the words again,… cant come out any worse than it did the first time anyways.
Each of the pieces are just black outlines in PNG format uploaded to GF… and we do have ONE print that came out good for the letters… but then the sticker ruined the other part… now we have been unable to reproduce the GOOD lettering, despite all our efforts.
Edit: Print #4 did in fact turn out messed up again… we did place it back in the cutout and burn the text again, not perfect but for what should have been a simple project… we are now on our final walnut board so… we make do.
Still will be very intrigued to hear GF’s response to these problems.
We aim to provide prompt and helpful support. We failed to do that here, I apologize.
I’m glad to hear the Camera Recalibration resolved the alignment trouble! It’s normal for an alignment to drift over time, especially if the Printer Head is accidentally bumped or moved. To investigate further, I’ve extracted the log files from your Glowforge to review your most recent prints and compared it with the details you’ve provided.
In regards to the varying print results, it appears that the three most recent “Nathaniels Room” all had different focal settings and engrave settings. Two of them utilized Set Focus, whereas one used the Autofocuser and each used a different engrave settings.
The print you performed on Saturday night appears to look great! It seems this was performed without masking on the material, did you notice an improvement in the print results with the masking remove? Did any of the prints turn out as intended? If so, could you include the approximate date and time of that print? Additionally, could you share the file in question with us? If you don’t feel comfortable sharing on a public forum, you can email it to us at Support@glowforge.com.
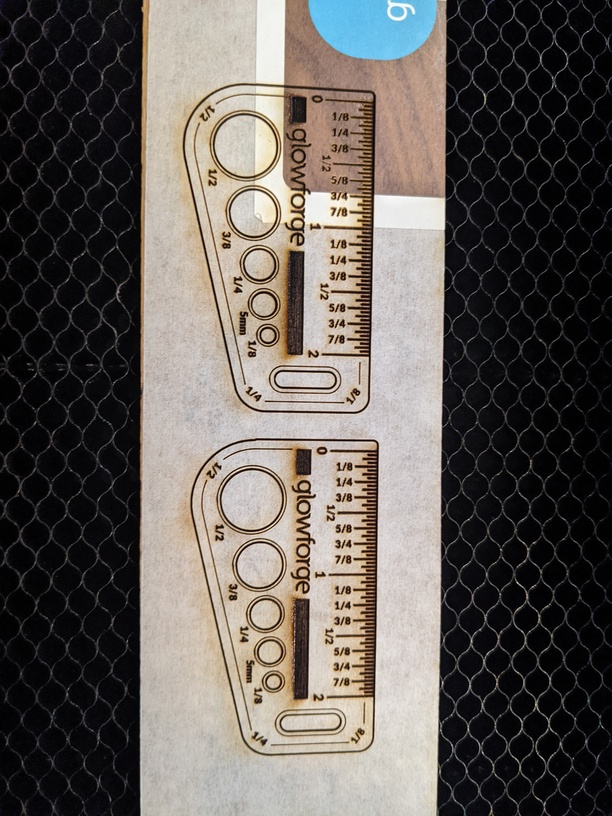
Lastly, I’d like to have you perform a standardized print for us to review. This print helps us ensure your Glowforge is working within specifications. Please print the Gift of Good Measure on Proofgrade material, using Proofgrade settings. When the print finishes, leave the lid closed and wait until the fans stop and the picture updates. If the Gift of Good Measure fails to cut through, take a photo of the front and back of the print and attach these photos to your reply.
Yes, we tried multiple methods to get better results… We did forget to manually focus on the final one I believe… Regarding the final print without masking, this was a REPRINT because again the words came out unreadable once masking was removed. We left the frame in place from the cut and put the board back in the frame (although we did end up bumping the frame slightly so it didn’t re-align perfectly… the reprint of just the words did come out in an acceptable manner, it was still not ideal.
We did find that we got better results from SD than HD settings for engrave, which seemed counter-intuitive…
And no, no single print came out as expected. We had to jump through hoops and pretty much all of our stock of small walnut planks to get a single, acceptable (but still not great) outcome.
Will try and get the test prints and the file over to you once I finish up work today. Thanks!
Gift of measure printed fine even with stickers in the way. I missed the part about waiting for the image to update. So I may have opened the lid before that finished. I didn’t have my laptop in front of me but I believe it should have had enough time.
Well… I get that holidays happen and such, but you’ve now failed on multiple levels… so much so that your automated system is “closing” my tickets because nobody has responded.
I’m so sorry for our team’s delayed response to this issue. I see that you also contacted us via email yesterday. To ensure that we don’t miss anything on your ticket, I’ve just personally sent you a response via email and our team will continue to assist you there.