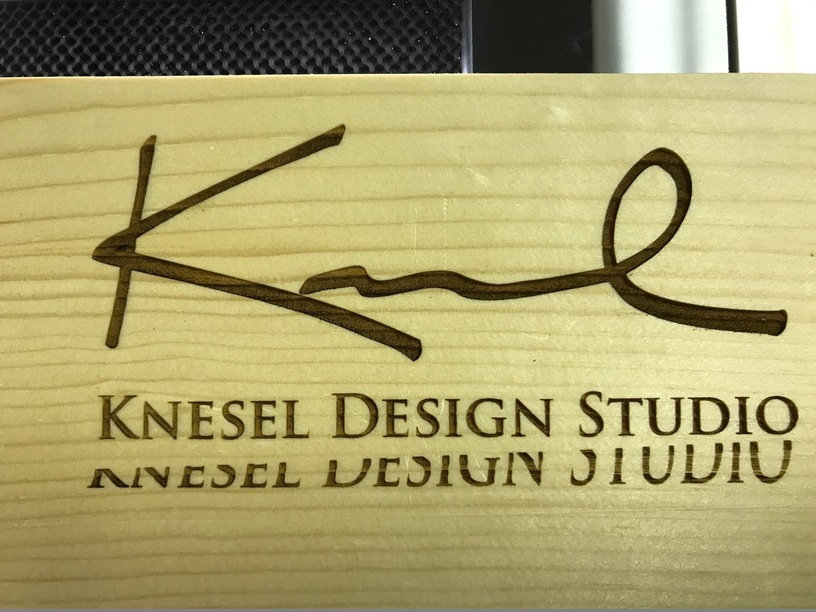
Just a heads up. I was testing settings for putting my logo on a piece of pine. It was pretty light, weight wise. I think the air assist was slowing nudging it on each pass. I stopped the print and put a loop of tape under it to stick it to the bed. You can see the aborted attempt below the good version has a funky angle to it. Just a word of warning that stuff other than paper might need to be secured to the bed.
17 Likes
I’ve never run anything (other than rocks) without strong magnets holding everything in place.
6 Likes
Yeah, I had some lightweight bamboo beads that went flying, but at least it was easy to spot what the problem was there.
That was some good detective work. 
2 Likes
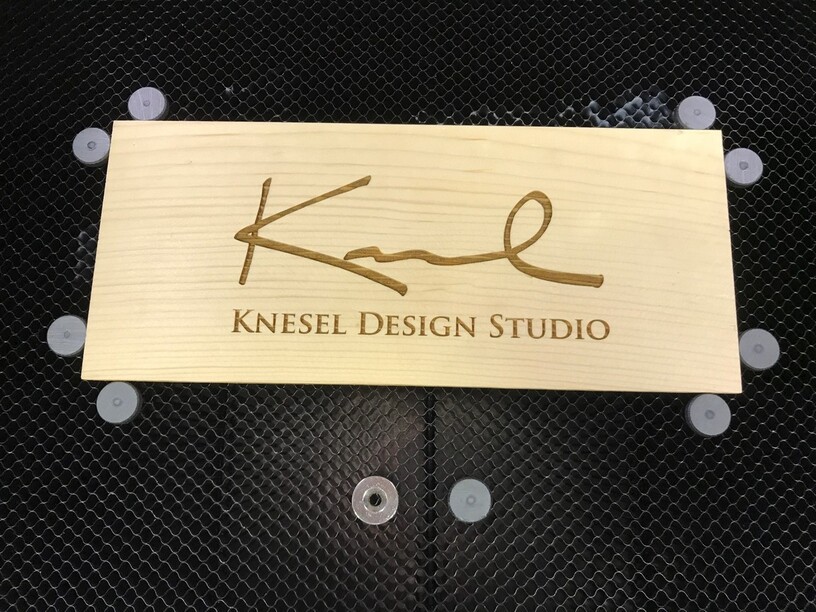
After securing it, it turned out nice.
2 Likes
Thanks. I used Thick Draftboard on the Graphic setting and it made the engraving deeper than expected in the soft pine.But it looks kinda cool.
1 Like
Stone, tile, and some proofgrade go in without securing. Pretty much everything else (including  leather) go in with magnets, weight, or tape. My last shift, though, was playing with something slightly too think, which actually ran into the air assist on the cut strokes, though not the engrave. (I got a great deal on some rift-sawn oak plywood and a few boards, but they are all 1/2-3/4 inch, and I was playing around with a small piece. I will have to pull the honeycomb and test my new base, which includes a rather sizable tile as a laser backstop.
3 Likes
I know it’s a pain but have gotten to the point where I never cut anything without a magnet holding it in place or down. If the material is light the air assist will do what you have seen. If the material is organic it is imperative that the magnets be used to flatten the object to the honeycomb, otherwise the laser may not cut through properly.
3 Likes
Is everybody just surrounding the material with magnets like this?
Interesting I have a lot of magnets around here because I am weird that way. The neodymium magnet sticks harder to the bed. But because it is smoother is it easier to push around and hard to pick up. The ceramic magnet is harder to push around and easier to pickup. So it might be better to choose different magnets based on if it is next to or on top of the material
9 Likes
Wrap those powerful magnets with a duct tape tail to pick them up with.
17 Likes
So far, I’ve been putting them on top, mostly to flatten the material. But my material and the magnets are thin.
3 Likes
Usually I put the magnets on top. I am lousy with positioning.
1 Like
Brilliant
3 Likes
It is, but not my idea. Can’t remember who here said they did that, but I thought “Oh yeah, huh.” 
I had been prying them up with my fingernails.
2 Likes
Or sliding them out the front. But this is the guy who just started using magnets today!
2 Likes
I’m so sorry the first print didn’t turn out, but I’m glad you found a solution.
I’m moving this to Beyond the Manual so the discussion can continue.
1 Like
I place magnets on top generally, but also lock material in from the sides depending.
If you place a stack of magnets in your hand, and then place them over a magnet on the bed, the attraction of the stack of magnets is greater than the attraction to the steel and it will jump to the stack in your hand. Or if the polarity is wrong it will just push it around the bed. Fair warning, sometimes you’ll pinch your skin as that magnet slams into the stack. Also, your magnets won’t last as long. That coating on them likes to shatter. With practice you’ll learn to minimize both. It is quick and effective.
2 Likes
You could cover the magnets with something like Plasti Dip or Sugru, and that way they’d give you some extra grip on the sides and make them a bit easier to get off the crumb tray as well.
4 Likes
I often use magnets placed around the piece, especially for thicker material. Also for doing alignment of 12"x12" bb plywood sheets for repeated cuts.
All of my rectangle ceramic magnets got wrapped in blue painters tape to stop them breaking up when they slam into each other or the honeycomb. Accidentally discovered the “tail” technique while doing that, shortly before reading about it here. Note for extra clearance; put the tail on one side, not on top!
2 Likes
So after all of the advice I added come duct tape tails to neodymium magnets. I use ceramic to surround the material and neodymium on top. On something like this cardboard I can even stack the neodymium and it will pull down pretty wavy stock.
6 Likes
This. I picked up this trick at the radiologist – X-ray techs wrap magnetic fiduciary markers in bandage tape with a tail for all the same reasons we do.
4 Likes