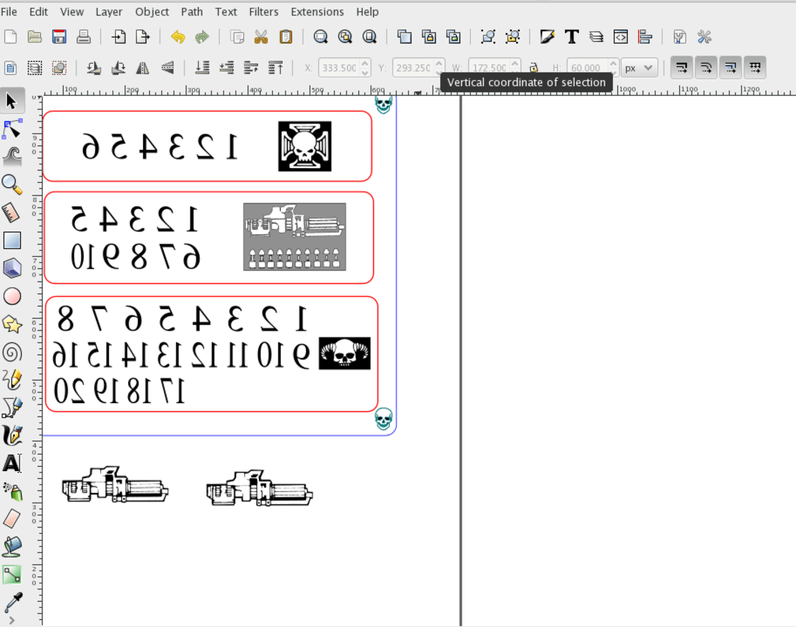
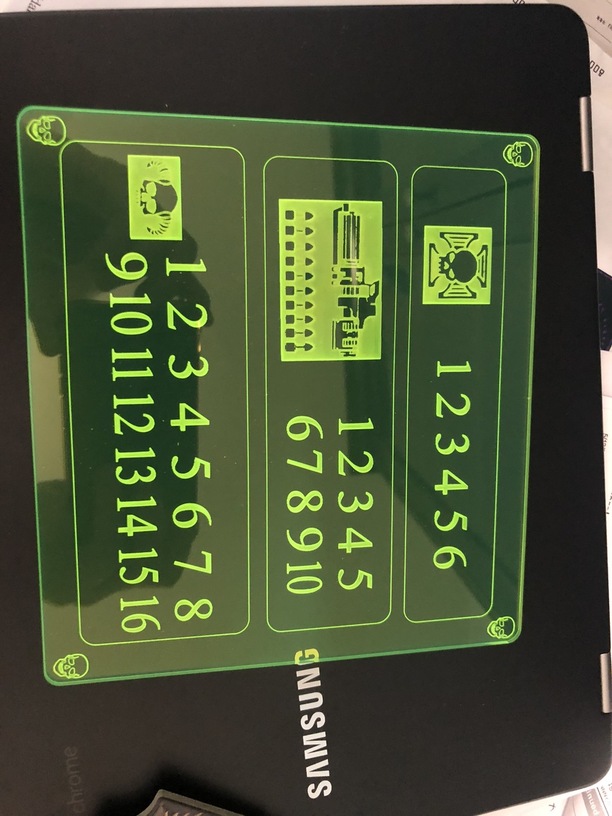
I’m trying to use the Bezier tool to remove the background of an image and then engrave the cut image using the Glowforge. When I upload the image to the GFUI it always shows and engraves the background I cut from the photo. The attached photo shows two guns that I cut the back ground from and one that I didn’t. The gun that still has the background (on the screen shot of inkscape) is what always gets printed on the glowforge even when I remove the background. This is a game piece for a board game called Space Hulk, by the way. I included an image of the finished product. I used the Bitmap tool to make a gray scale of the photo and the background always comes back after using the Path > Bitmap. What am I doing wrong?
2 Likes
Your rasters or vector images that you’re engraving are inverted. Black means “engrave this”, white means “don’t”.
So your skull should be black on white in order to be engraved as a skull on an untouched background.
1 Like
I’ve tried to invert the images to achieve what you described and can’t get it to work. I’ll have to watch more tutorials.
This might be easier in a pixel-based editor. But, you should be able to do it Inkscape similar to how you would do it in Illustrator.
You’ll basically be making a clipping mask. But, the Glowforge doesn’t recognize clipping masks. So, you’ll have to make the clipping mask and rasterize the clipping mask and the image together.
In Inkscape, I think that means exporting out an image and importing it back in?
Cover the guns with a plain white filled rectangle, no stroke color. Then you create a Bitmap. They will be gone in the Bitmap.
Be sure to move the Bitmap out to the side and delete the originals underneath - I think you have to do that with Inkscape.
1 Like
The important part to remember is that you can’t cover something up to make it go away from the GF’s point of view. It absolutely positively has to not be there. I would recommend just doing something like this in GIMP and having done with it.
Thanks everyone!
This is probably a convoluted way to do it, but I think I would throw the image into GIMP, invert, color to alpha the white, then throw it in Inkscape and do an edge detect.
2 Likes
I ran into exactly that problem a while back. Inkscape can trim out an image but the GFUI cannot use that. only pure white will be ignored no matter what is supposed to be trimmed, you can create a mask in Gimp and just flood the mask with white or use Inkscape to output a png file bitmap and replace the start bitmap with the new one but the GFUI will always see a rectangular image unless the folks at Glowforge get the GFUI to read and use everything in the Svg file appropriately.
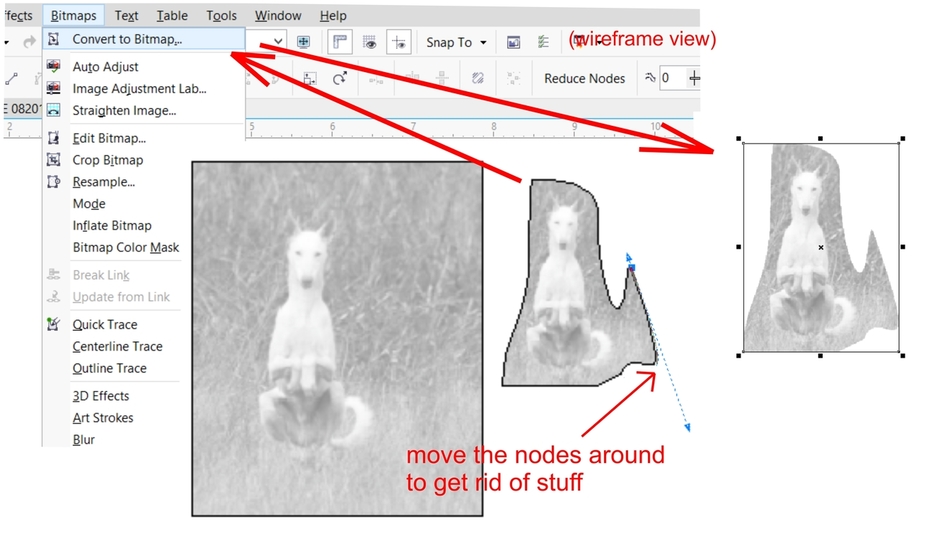
Just to give example of the clipmask work-around in a different program, here’s what I do. I use CorelDraw about 90% of the time and Corel Photo-Paint the rest. I import a bitmap/rastor into Draw and I move the edges/nodes of the bitmap to get rid of the parts I don’t want. (Basically I’m manually creating my own clipmask.) When I get everything looking how I want it, the last thing I do is convert the clipped image to another bitmap.
2 Likes
The glowforge GUI ignores clip masks
That’s why she is creating one manually, so to speak (or more accurately just covering up parts she doesn’t want), and then exporting the whole as a bitmap. That effectively knocks out the parts she doesn’t want.
The other thing that you can do is create actual clip masks and then rasterize the clip masks along with whatever is clipped : you get rid of the clipping masks and your image is “edited”.
2 Likes
No, all you need to do in Inkscape is right click on your clipped bitmap, select the “Make a Bitmap Copy” option, and the new bitmap is created directly in place and the GFUI reads it as a bitmap image with a transparent background, thus no fussing around with filling an area with pure white is needed.
It’s easy as pie. If you like pie. Or maybe you prefer pi, that’s easy too.
3 Likes
Thanks for the help everyone. Lots of great options!
I’m going to close this thread - if you have any more questions, go ahead and post a new topic.