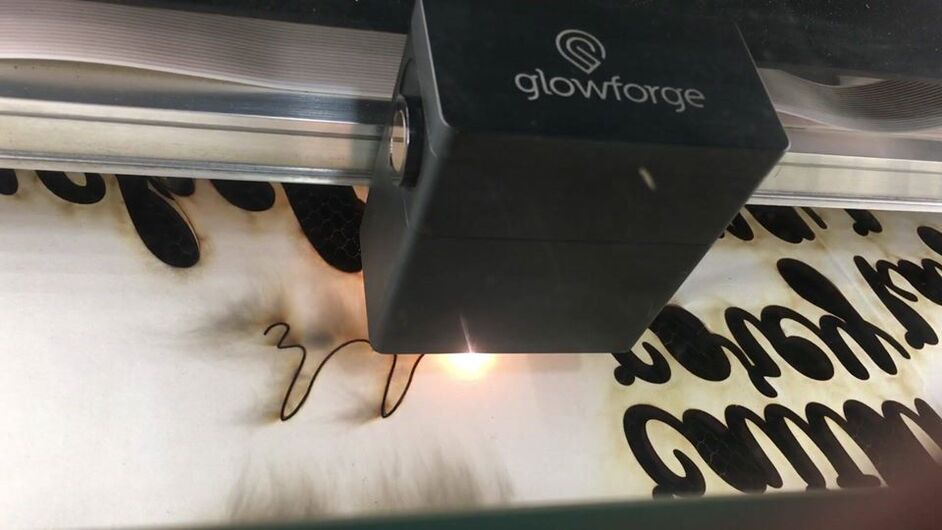
Help, please!!! Lately I have noticed a larger than normal flame when my GF is cutting/printing. I’ve been having a lot of issues with charring and then I notice this. I didn’t notice it in the beginning. I’m not sure what to do as I have ton of Christmas orders to get done. Any help is greatly appreciated.
I have cleaned all mirrors and the air assistant fan and all mirrors. I have noticed that the lens does seem to slip a little downward as well
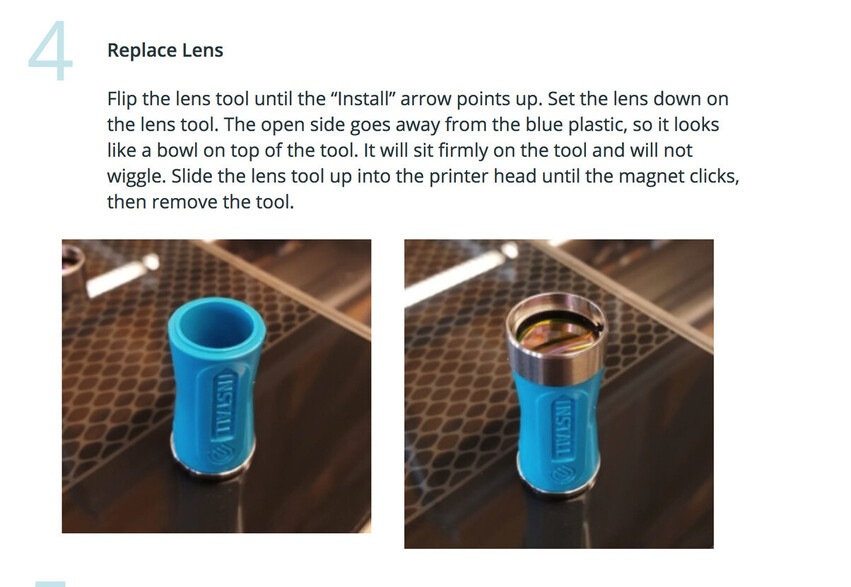
The lens is supposed to move in the head; that’s how it focuses. Did you get it in the right way? There’s a little arrow on the side showing which way it should go.
Check your exhaust fan, hose, and outlet to make sure nothing is blocking the air from getting out of your machine. And yes, as @dklgood said, photos would be helpful.
It’s doing it on white acrylic and also baltic birch from Home Depot. At first I thought it was the acrylic but it’s doing it on the birch as well. Settings on birch is 150/Full. I’ve cleaned everything(air assistant fan, all lenses, lens in correctly. Here is a quick video. I don’t want it to go too long for fear of doing damage to my GF. video|690x388
That does seem like a pretty wide cut path, like @geek2nurse said make sure the lens that you used the magnet to remove is in correctly, not upside down. Otherwise I would guess the air assist fan isn’t fanning.
Did you remove the air assist fan when you cleaned it? The reason I ask is It appears as if the soot from the flames are going in the wrong direction as if the air assist fan is in backwards and is sucking air rather than blowing it.
Looks like this to me too. Definitely something going on with the air assist fan. That flame should be blowing forward.
@cmorris1015, just to make sure you are addressing the correct fan…there is one hidden on the back of the carriage plate (called the air assist fan) that is not easy to get to without disassembling the carriage plate and belt, and that one is the one that looks like it might need cleaning. There are instructions for doing that here:
If that was what you did, you can wait to hear what support has to say. But if not, you might want to take a look at it.
We did clean air assist fan on Sunday but thought we put it back correctly. Kept looking at pictures to make sure. I’ll definitely go and recheck that though. Lens is definitely in correctly.
I’ve extracted the log files from your Glowforge to review your most recent prints, and compared it with the details you’ve provided.
I don’t see any current alerts related to your Air Assist Fan, that’s excellent news! However, it looks like your Glowforge is having trouble communicating with the printer head. There are two key connections I’d like you to check for me.
Could you please do the following?
Turn off your Glowforge.
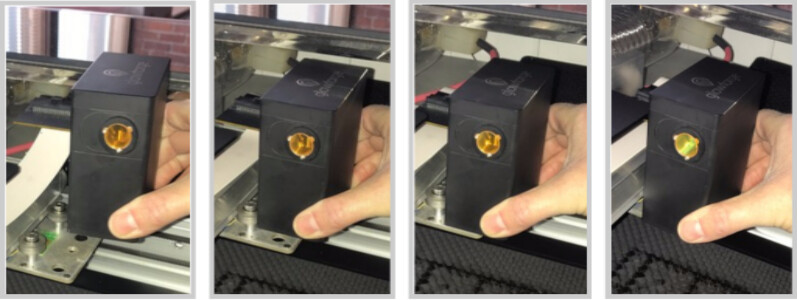
Holding only the finished black surfaces, grasp the printer head as shown. Pull gently up and back to disengage the magnets and remove the head.
There is a small tab in the center of the wire ribbon. Push down fully on the tab to release it, and gently pull the wire ribbon plug from the printer head.
Pick up the printer head and wire ribbon. Make sure the tab on the wire ribbon is facing up. Slide the ribbon back into the head until it clicks.
As shown, lower the printer head over the metal plate so that it rests next to the two round posts. Then push it gently away from you – you’ll feel a “click” as magnets pull the printer head until it sits snugly atop the metal plate.
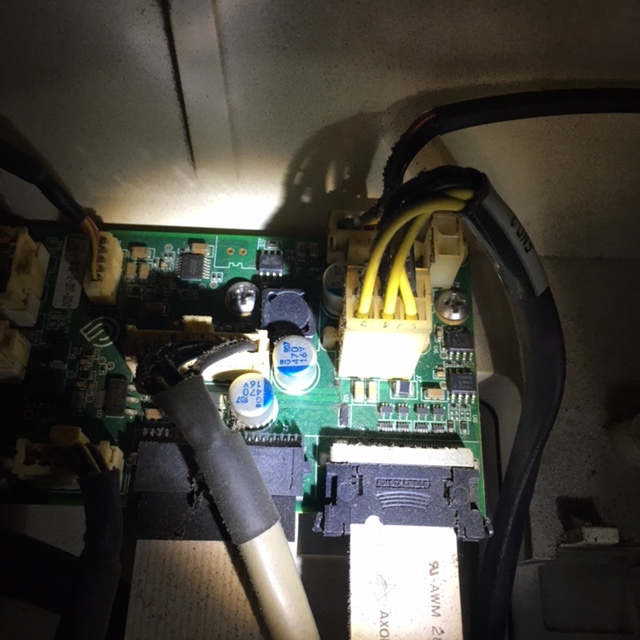
Take a photo of the circuit board. If the cable I’ve indicated above with the red arrow appears to be loose, please reconnect it and try printing again. This cable should ‘click’ back into place.
Thank you for the photos. For next steps I have sent you an email. To avoid duplicate communication and expedite your process, I’m going to go ahead and close this topic.


