You might want to consider treating the whole project like you would a polymer plate and engraving around your text block.
That way you can do all your typesetting in illustrator (or whatever) and then just print it.
Trying to print individual wood blocks and stick them down in perfect alignment sounds crazy making to me!
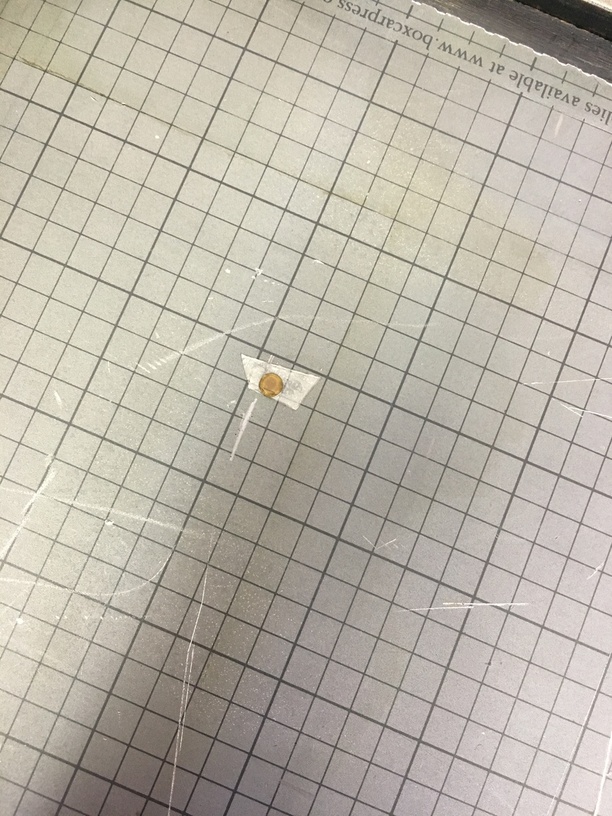
It is basically what I did here:
I milled a Delrin block that when combined with the early proofgrade plywood I had made it exactly typehigh, but you can certainly get there by stacking things up.
You might want to consider treating the whole project like you would a polymer plate and engraving around your text block.
That way you can do all your typesetting in illustrator (or whatever) and then just print it.
Trying to print individual wood blocks and stick them down in perfect alignment sounds crazy making to me!
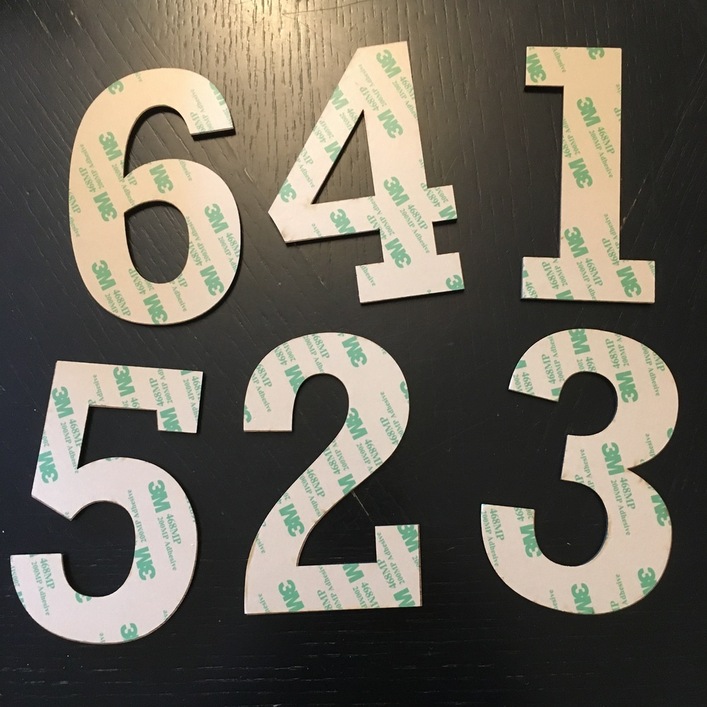
This is just for some large numbers used for chapter openings. You would not believe the nonsense I’m registering, though.
I’m also a letterpress printer. I do a small amount of bindery work, and what I know about Elmer’s, or any other ‘white glue’, is that it is not archival. It will fatigue and turn into a yellowed, brittle mess. I use PVA because it is reversible, stays flexible, and makes a good paste when mixed with a non-nutritional wheat flour. I use Wondra because it is so devoid of food value that nothing wants to eat it.
As far as individual types, go with a plate and forget the separate types. I use a pantograph to cut new wood type if I have a model when I run short in a case, but if I had a choice, I would cut a plate.
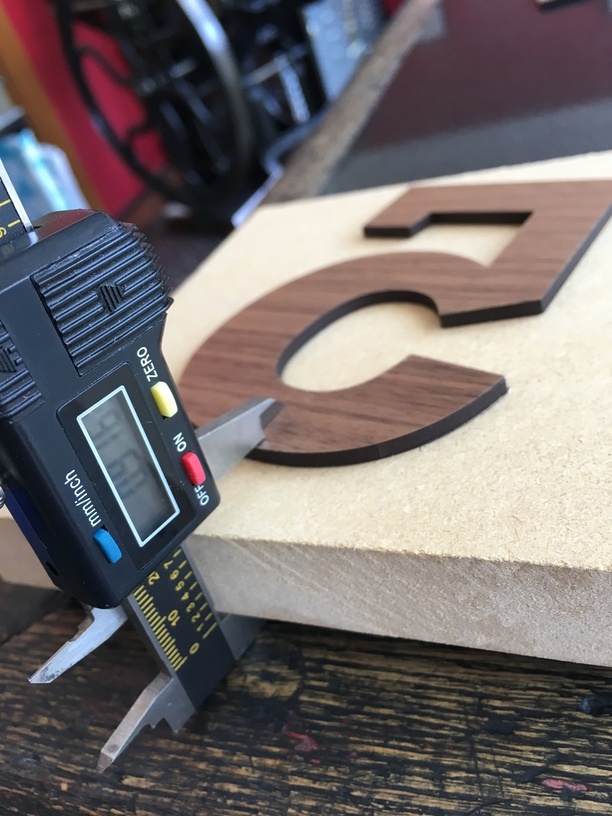
Totally foolish of me—I’d mistaken what my bookbinder said. She’s using a standard PVA glue. In the end, I used a 3M 468MP material cited above without any trouble! I was able to tape it to the bottom of 1/8-inch Proofgrade plywood and the cut went perfectly through it.
In my case, I didn’t stick it on first, as I was concerned about how it would all work together. I later had some 3/4-inch MDF cut to a square of a slightly larger size, and then adhered the numbers individually to those blocks. And, wow, Jules was right—once adhered, it doesn’t give a micrometer. I stuck a putty knife underneath to see if I could pry it gently off, and it was effectively impossible without ruin the wood, as Jules noted.
I realize my confusion—I wasn’t cutting veneer, but the 1/8th-inch plywood. The veneer doesn’t offer enough of a relief for letterpress printing. You need some minimum offset between the printable surface and the surface onto which it’s mounted to allow ink rollers and then paper to pass without picking up any background.
Very nice prints from the wood and glad the 3M worked. I haven’t tried it yet and the verification that it instantly sticks is something I will need to keep in mind.
Wow! Now I’m really disappointed to have missed out on an earlier order
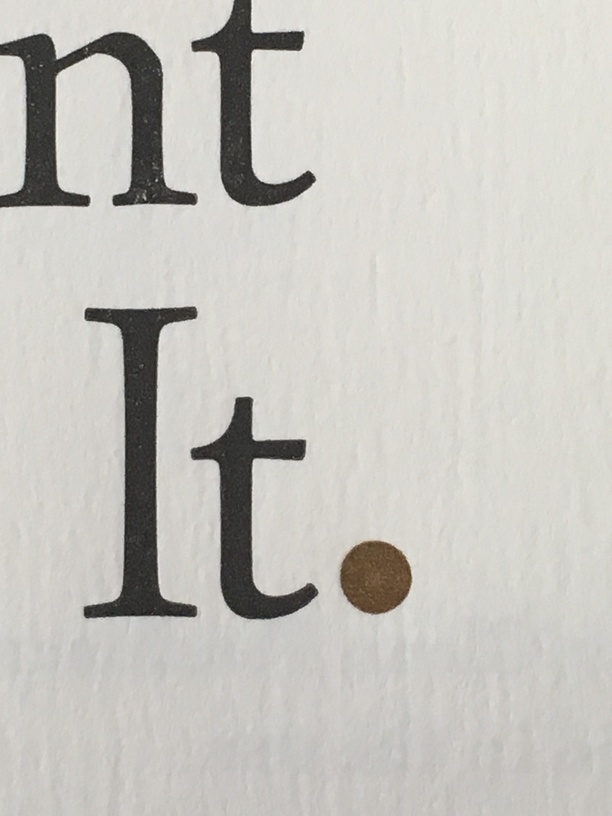
date. Are you using transparent white (such a confusing label) to achieve
the tan? That’s one clever type high gauge.
Yes, that’s right—we have opaque and transparent white in the shop, and this is a mix of about 90%+ transparent to the remaining ratio being a light brown.
Thanks, Dan! That should be the goal of every artistic project, I guess!
And this is still scratching the surface. (Uh, pun maybe intended.) There’s so much to explore with printing on very interestingly engraved wood, metal, and acrylic; and with “pressure printing,” in which you raise the paper from behind to push into a solid block of ink or other surfaces!
I’m imagining cutting a wood with pronounced rings, like pine, and then doing a defocused engrave so you remove more of the wood between the grain lines, and then engrave so you get a distressed appearance based on the grain.