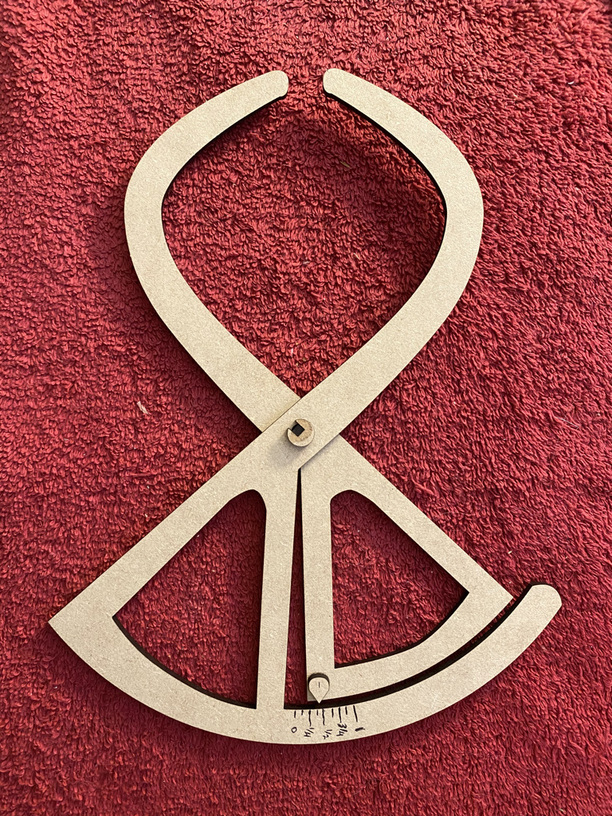
When turning bowls it can be handy to have a gauge to check the thickness. This design features a scissor grip and an index point for calibrating measurements off of.
The post can be assembled with some judicious use of CA or similar fast drying glue. Gauge index is attached in the same way.
Once gauge index is attached, you can use calipers or a ruler to measure the spread between the tips and mark the handle with a pen for spacing distance marks. I’m in the US, so this one is marked in portions of an inch.
WOW - thank you!!! I turned for a few years when I had a mini-lathe and really enjoyed it. Sold the lathe when I moved 9 years ago and just recently got a new one as an anniversary gift from the wife. These will come in handy!!
I’m just learning, but here’s one I made over the weekend. After making it I decided I needed to start focusing on making the walls’ thickness more consistent (these have a bit too much taper), but I didn’t have a good way to check it other than feel, which motivated this design (adapted from a picture of something similar I saw on Tools and Jigs).
That is a terrific piece! When I threw Porcelain bowls I left them stuck to the throwing bat and turned them upside down until they were dry enough to hold their shape. As a result due to the downward strain when they were turned over they looked ready to float off the shelf.
I know that trick won’t work in wood but if you have that thought as you are thinking about the shape you could get amazing results.
Hey there…can’t WAIT to make one for my son. Is there any way you can update the file WITH the measurements9 in inches) so they can be engraved on glowforge?? If so, please upload. Thanks very much!
I’m still thinking about a redesign that would allow it to be pre-engraved, but using the physical point that you have to glue into position introduces variability into where the marks on the gauge itself have to be. The tricky bit here is that you want it to zero out when the tips on the other end of the mechanism touch, and the easiest way to guarantee that was to mark the gauge starting from where the indicator turns out to be pointing when they are touching. It also meant I didn’t have to do any math relating the lengths of the arms to the scissor arm. That made it a nice quick and dirty solution for the task I needed it for, but this has gotten enough interest/traction that I may just have to put in the time .
p.s. I should probably use it for a little while to see what other improvements to the design might be worth doing.
Please let me know…it SCREAMS to be engraved. The only way to figure it out is to make a template and then do the measurements…That’s on you, i would think since you are already there. Else EVERYONE else has to make the sample first. I want to make mine of acrylic for durability. Thanks very much. Jan. Cool idea

 .
.