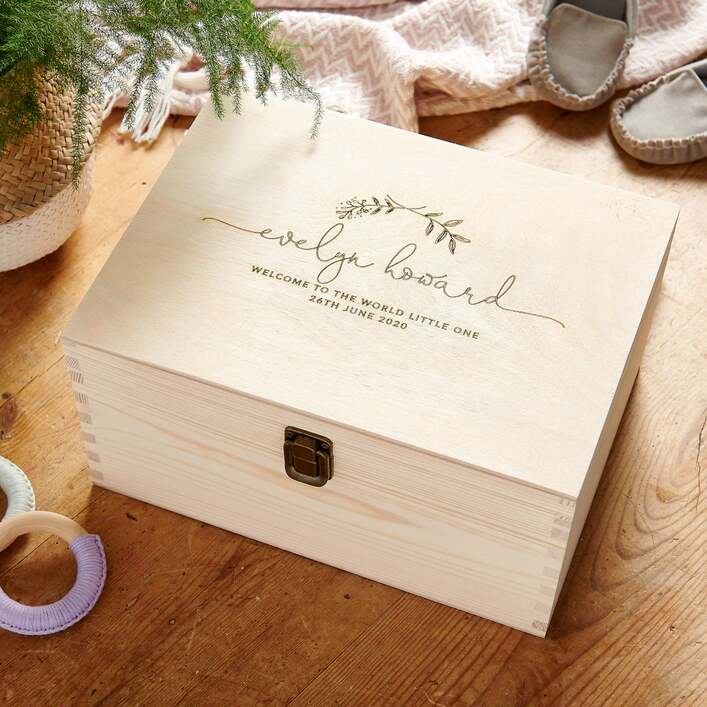

I am wanting to make a box similar to this - where the teeth do not show burn marks. Does anyone have suggestions about how to do this with the Glowforge? Would you put the box together and then sand away the burn marks? Is that even possible without sanding away too much of the wood? Thanks for any quality suggestions:). I’m a newby and would rather learn from the masters rather than frustrate myself.
2 Likes
Make the tabs longer.
Sand them back.
Done.
14 Likes
If you use unfinished plywood, you shouldn’t sand away the face, but it is a concern. If you use a pre-finished plywood like proofgrade the face will have a protective finish so you will be less likely to sand it away, but no guarantees what the finish will look like. The issue with plywood is you’ll see the core and it may not be to your taste. If you use solid wood and you sand off too much you need to practice your sanding.
My only caution is you may find yourself rounding the edges.
2 Likes
I would second this suggestion. you would need to experiment perhaps to see how deep the char goes in the cut. being mindful that depending on the core it could be a little or a lot.
trial and error…
the box in your picture was likely machine cut with a router or milling machine, in giant batches.
2 Likes
The provided example is obviously not plywood.
Plywood would be a poor choice for this, as the laminates would be visible even after being sanded back.
2 Likes
I don’t see how you can sand all the concave bits of the tabs well enough for it to look clean. It sounds tedious and frustrating. I would explore other options, such as: cutting straight sides, painting the whole thing, veneering wood onto your box, or manually cutting the tabs.
3 Likes
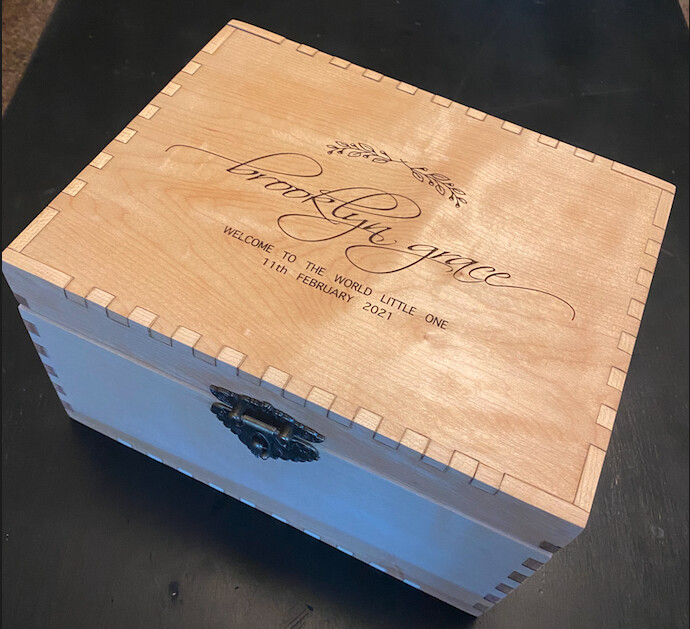
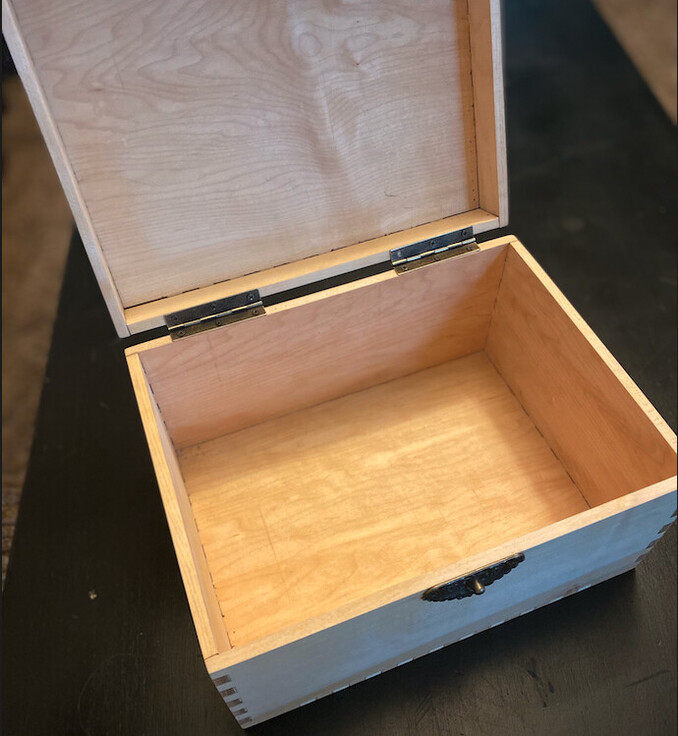
Thanks everyone! I appreciate everyone’s suggestions. Here is the finished product. It was very tedious. I never got the kerf correct and the tabs seem to have been cut with a skew??? I learned a ton doing it as I’m brand new to Glowforge, new to having a Mac, brand new to design software, and brand new to woodworking. With all that said. I’m happy(ish) with the way it turned out. I will probably redo it after I get a CNC router because sanding the burned edges added additional problems. It was definitely worth the time though, since it was for my first grandbaby:
12 Likes
This is just so lovely. I would never have known you were new to all of this …at.all. Nice job!
5 Likes
Great Job! It looks so nice! You did well! =)
*sorry for my bad english =) *
You are way ahead of the learning curve and this is incredible for being new to everything! I’m sure it will be treasured.
About the skew; are you referring to the cuts not being perfectly straight up and down? If so, the beam is shaped like a cone and that’s what causes it. Here’s a good look at it, and it also shows why having the right material thickness setting is so important.
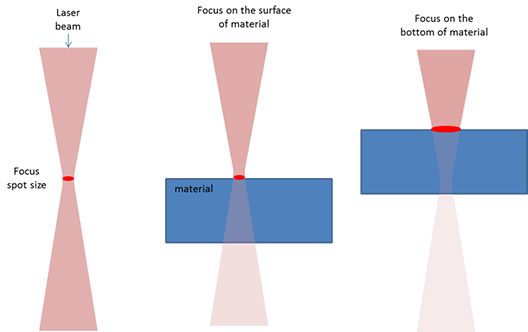
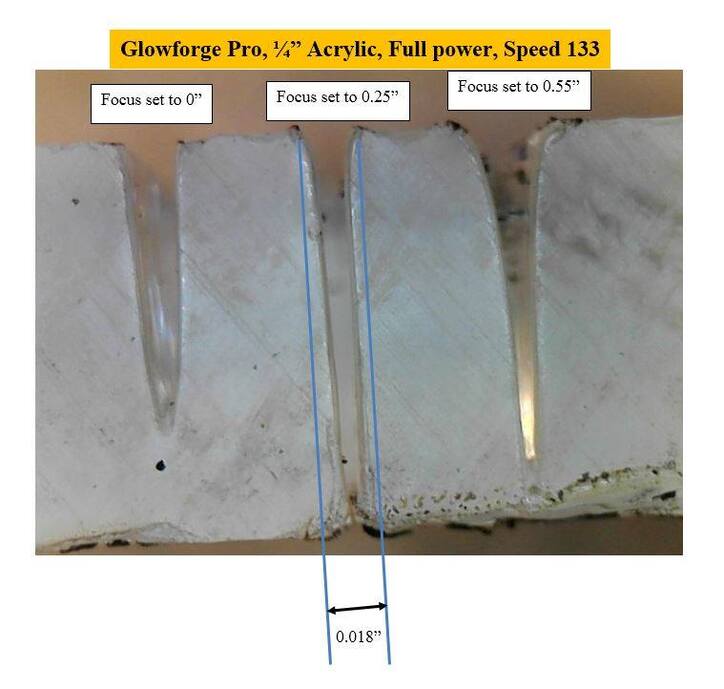
(I can’t find the original link, sorry to whomever posted this.)
4 Likes
Yep, that’s exactly what I was referring to. I have only been using the auto focus and have not been listing the precise material thickness yet. Should I be listing that somewhere? I have learned how to read calipers and attempted to use those measurements to play with kerf but, like I said, I never could get it to work out precisely. Thanks for explaining the why.
2 Likes
Most likely machine, doesn’t have to be in giant batches. It’s very common woodworkers technique using a tablesaw and a boxjoint or dove tail jig to cut one shot at a time. Before powered tools they were made by hand with fine saws and chisels.

4 Likes
oh I know about that. it just appeared to me it was mass produced.
2 Likes
There are two measurement the GF needs; material height and focus height and the difference between the two can be a bit confusing. The focus height is where you want the narrowest part of the beam hits the material. Most of the time (like 99.5% of the time for most people), you want the material and focus heights to be the same, and luckily the GF takes care of that for you. (Sometimes it’s useful to “defocus” the beam, and you can change the focus height manually. If you search the term you can find some good uses for it.)
The exact material height is needed for the GF to focus the camera on the top of your material so you can line up your file correctly, and that’s what set focus is for. (You can also set the height manually if need be, but obviously set focus is much easier.) Even when you don’t use set focus, the GF does its own auto scan and determines the material and focus height, but your file placement may be way off.
As for kerf, this is the best explanation I’ve found. It is tough to wrap your head around though, and each material can need a different kerf and even the same material can have different kerf depending on the file. I don’t have the need to worry about kerf much, but I know there are some useful kerf tools floating around the forum.
Good luck!
1 Like