So this seems to be a problem with more people then not. I thought I had this problem fixed.
-First having to restart my computer and everything else every time I turn on my GF.
-Second having to restart the wifi connection from time to time.
-I now have started with the closed window blind thing because too much light is coming in. Even tho its not sunny out today.
None of this works now. Every time I turn the GF on to cut it takes me hours to get it to do a calibration. Its been almost 2 hours now after doing all the above, more then once, and the camera just sits dead center of the bed. This is getting old fast.
2 Likes
Ok everyone, I now have a new magic trick we can all try every time we turn on our GF!
I decided to try and move the laser head and everything else back to the default spot, back left corner. This is where we had to put it when we set it up the first time. I then turned it off and back on. I only waited a few seconds between on and off. It did the tick tick thing it does, then the laser moved to the center under the camera and finished its calibration.
Not sure why its so picky with its first calibration. Hope this helps some other people out.
4 Likes
Wow! I just turned it on and it calibrated in about 70 seconds and reports ‘Ready’. All I can guess is a problem with connectivity. The “sometimes yes, sometimes no” suggests a changing variable, and connectivity is the first thing that comes to mind.
Glad you finally got it to cooperate!
3 Likes
The problem is with absolutely no diagnostic error messages everybody is left guessing. I suspect the homing problems are a mixture of poor wifi connection, cloud server problems and lighting conditions that prevent the head being visible. @scott.wiederhold’s recent pictures show what a poor view of the head the lid camera has when it is parked in the back left corner.
I think at least the button should turn a different colour when it can’t reach the network and another colour when it can’t reach the cloud server. If the cloud is able to reach the machine it should report the progress of the calibration in the GFUI.
7 Likes
i had so much trouble trying to get my second project to work i had to walk away from it. first it was calibration glitching, which in theory i solved. but then after hitting Ready, it would begin to prepare the print then completely fail. tried it 3-4 times (waiting 15-20 mins for the GO button each time) only for it to fail again. not fun. my patience wore thin and walked away mumbling to myself. need to go back and try again …
1 Like
Did any of our design wizards get a look at your file to see if anything might be amiss? 
i was too frustrated to deal with that. my design is a very clean AI file. saw another post suggesting the settings for proofgrade maple ply might needs adjusting (dpi too high?) … something to try. also could try a different file to see if it’s the file not the machine.
1 Like
okay, got back to testing …
- successfully cut a different design, so not the machine
- tried the same file again, again failed (gets through ‘preparing’ the design, but fails just as it gives me the ‘go’)
- tried the same file (didn’t restart or turn on/off anything) but changed the DPI on the plywood settings from the auto 450 to manual 270 and that worked!
file is now running smoothly.
of course it’s not as sharp, but there may be some better number in between the two that runs. but that’s a test for another day.
3 Likes
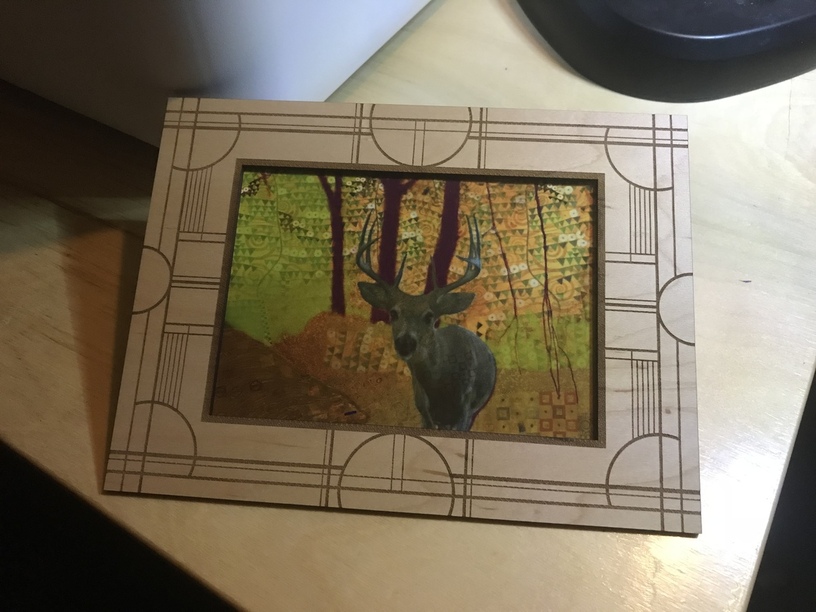
That frame turned out very nicely!
I am curious about something. From your description, I am surmising that all of the engraving was a single operation. Is that correct?
I am wondering if the laser head travelled the full width of the frame when it was doing the middle portion? Or did it do short passes engraving first one edge and then the other?
1 Like
it did full passes across the whole frame. all the etched portions were combined in Illustrator.
1 Like
Very interesting how some folks are having long calibration issues and some are not. Thru the many PRUs and the unit we used at makerfaire that was not something we have experienced. The current issue are failures without errors. i.e. upload a file or use one that is already in the design library, and it just churns at ‘preparing your file…’ Then minutes to an hour later just fail with a generic error. It does not do this with every file (which is more confusing/frustrating) So I am not sure what or why it’s doing it.
But ultimately, since they are all the same machine (production units) and we are all using the same interface to control it (da cloud) I wonder why it affects some people more than others?
6 Likes
That suggests that the print could be made more efficient if you separated it into 4 engrave operations: top, bottom, left side, right side.
Since the middle would not have any “engraving” the time would be decreased, and thus the volume of stepper motor data would be decreased.
This would let you increase the LPI to get the quality you want, and split it into smaller sections so you could run in multiple steps if the higher density still is too large of a print to run as one job.
2 Likes
but wouldn’t there be overlap (or gap) between the halves? if a design element stretches all the way across? i understand the concept tho.
need to consider this for my next design. thanks.
I would split it so the top and bottom would be full width. The sides would be just the narrow parts between the top and bottom.
Alignment of individual parts of a single design file are very good. There shouldn’t be any gaps.
If you were designing with vector shapes in AI, I think you can draw a line to cut shapes into separate pieces. Do that across the full width at the top and bottom of the opening. Then make the parts of each section a different color so they show as 4 operations in the GFUI.
For raster images, there is this recommendation for large engraves, tiling multiple images to form a single whole.
2 Likes
One variable as a common denominator i can think of would be connectivity, right? Wouldn’t a spotty connection give results like that?
Hard to imagine that that many people would have broadband issues that didn’t also manifest across their experience like streaming though…
Possibly. But one of the very first questions I asked GF was the unit tolerances for absolutely garbage wireless/internet. They said it was not an issue. Furthermore, at makerfaire we were in a zone that had 100s (even 1000s) for broadcasting SSIDs. And the issue then was the UI was slow on the material detection and starting an op. (A hotspot competing with 1,000s of other cellular devices)
shrug
Since the glowforge is marketed more as an appliance (blackbox) and there is no ‘admin’ page that shows you signal strength or error rates. This is going to be hard for the end users to figure out. Which means an onslaught of support emails. I guess they are going to have to decide if they want to open the kimono so folks that are able to help themselves can do some baseline troubleshooting or be prepared to receive an email about every single issue. Which at this point is the stance they picked.
5 Likes
Yeah, now that you mention it, does seem the conditions at the faire would have been an extreme test of that.
The best way to diagnose it would be to hack into the the serial port and camera images like @scott.wiederhold has, but unfortunately (for us, not him) his machine is well behaved and doesn’t exhibit these problems.
Glowforge are no help because they never say what causes any of the problems we see day in day out, so everybody is left guessing. They just either say send the machine back or it seems to be working now and close the issue.
1 Like
Not true.
Mine has exhibited the calibration problem where it makes the Y move to the middle, and then repeatedly bangs up against the left side.
My unit sees nothing wrong. It happily sends the picture with the gantry showing in the middle, and showing the head all the way to the left. And it dutifully follows the commands that it receives telling it drive the head to the left, continuing to bang against the stop.
I have not grabbed a lid camera picture when it is doing this. But…
The common situation I have noticed whenever it does this is that I have a previously cut piece of material on the bed that has a square cut out of of it.
Maybe I can recreate it, and see what I can capture.
4 Likes