I’m pretty late to the calibration party, and having an issue.
Four tries in and the same issue every time. I get through the pattern step, covering the entire test board with symbols, it takes a picture, and then says it will start the measurement step. It hits the board with the red lasers and … then the whole process fails, saying the WiFi dropped. Fails are the same point every time.
Tried rebooting the Forge and retrying… same
Tried turning off the Forge, turning off the router, waiting, turning the router back on and then turning the Forge back on and retrying… same.
The wifi seems to be fine in all other cases. I’ve never had a failed print and my laptop shows a strong signal. The Calibration process is the only time it’s ever complained.
I’m 3 sheets of draft board in (one burned on both sides) and I don’t know what to do.
I definitely need some calibration: recent cuts are well over 1/4 inch off out by the edges.
Don’t know if this will help or not, but the main problem with failures on the Calibration process is that the material has to completely cover the gridded portion of the tray at the front. Make sure you are using a light colored material, and that the material is pushed far enough forward that you can’t see the tray. As a matter of fact, for this, you can butt it right up against the front door.
Good luck.
(Oh, be sure to clean the windows on the bottom of the head before you start too. I always forget that one.)
Hi Jules! Yea, I’m using standard Medium Draftboard, no marks, 3 of the tries with the label down, and one I peeled it off and made sure it was blemish free. In every case, it was definitely pushed up to cover the tray grid.
Also, before I started any of this I did the whole cleaning regimen, including the windows.
The error specifically says it’s a wifi fail (should have taken a screenshot…) but I can’t figure why. Never an issue except on this task.
Sounds like you’ll need to wait for support - but when you do go again, you don’t need a new piece of material if you have masking. Just remask the old one (I had to do 2 layers to get a clean board, but it worked great. I used that 1 board I think 5 times total
Oh, I know… It was one of those late nights getting later and I just hoped that each try would get it done so I could crash; so: weighed marking up more draft-board vs. trying to make my tired eyes focus on a remasking effort (I only have wide masking tape, not full sized 12" masking paper; so have to line up those edges carefully). Weary desperation.
Oh no! I am so sorry you are having trouble. I extracted the logs from your Glowforge and the team is looking into this now. I will update you when we have more information.
For what it’s worth, here’s a calibration test I just did. I seem to think one I tried a week or two back was a little worse, but I didn’t record it! Duh.
Thank you for your patience while we looked into this. I extracted the logs from your Glowforge to investigate the problem, and it seems like your unit is running into trouble during the calibration step in which the height of your material is measured. There are a few different reasons this error may be occurring, so would you mind checking a few things for me?
Turn off your Glowforge.
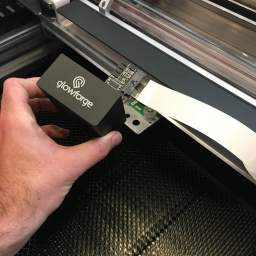
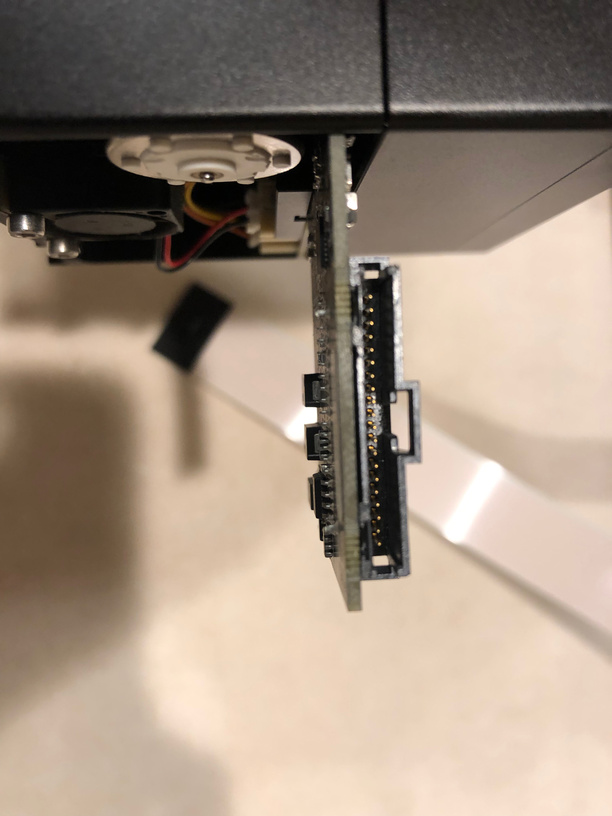
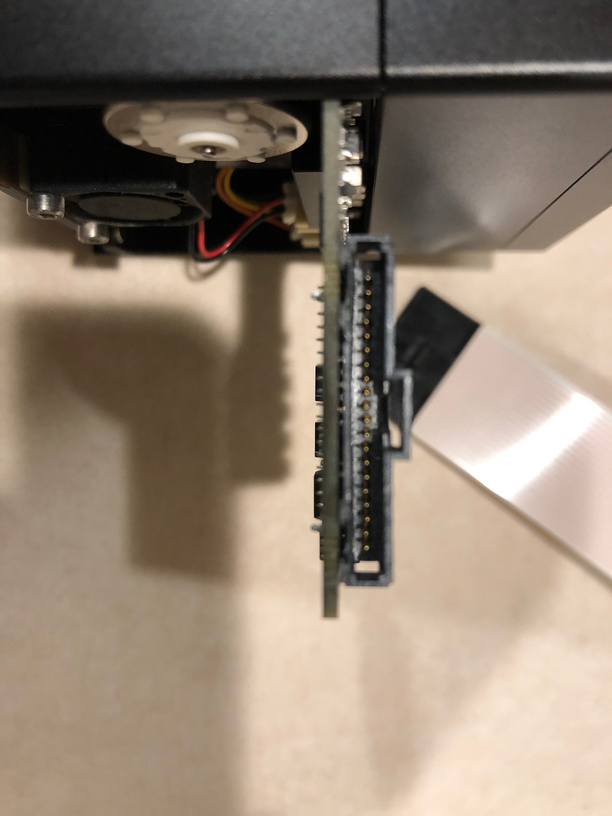
Holding only the finished black surfaces, grasp the printer head as shown. Pull gently up and back to disengage the magnets and remove the head.
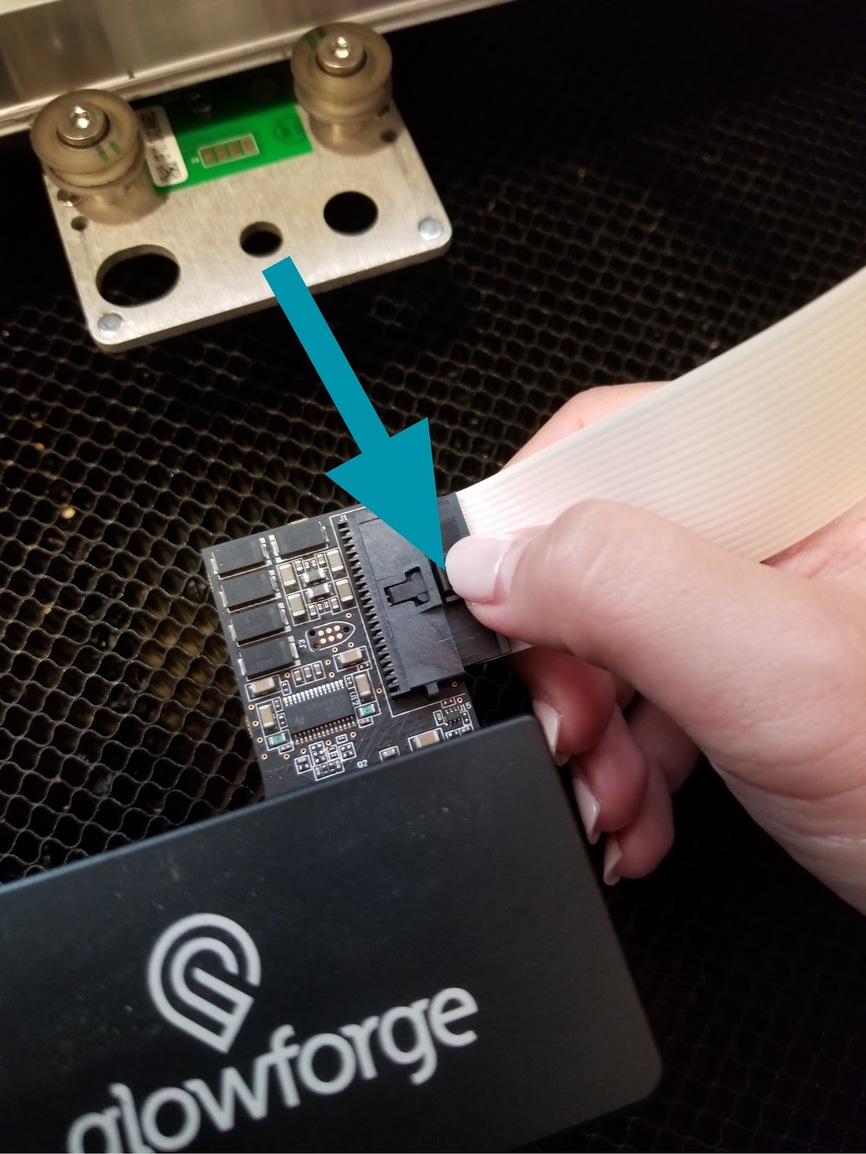
There is a small tab in the center of the wire ribbon. Push down fully on the tab to release it, and gently pull the wire ribbon plug from the printer head.
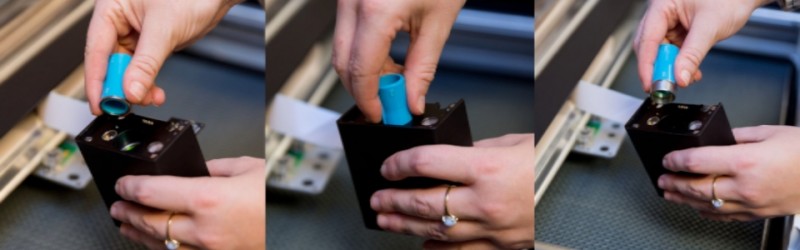
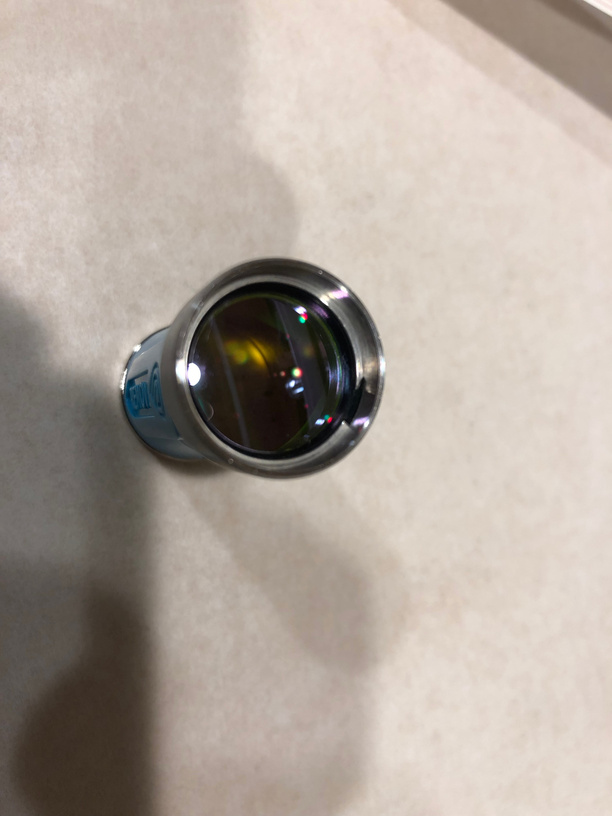
Gently insert the lens tool into bottom of the head with the “Remove” arrow pointing in. When you hear the magnet click, withdraw the tool and the lens.
Flip the lens tool until the “Install” arrow points up. Set the lens down on the lens tool. The open side goes away from the blue plastic, so it looks like a bowl on top of the tool. It will sit firmly on the tool and will not wiggle. Slide the lens tool up into the printer head until the magnet clicks, then remove the tool.
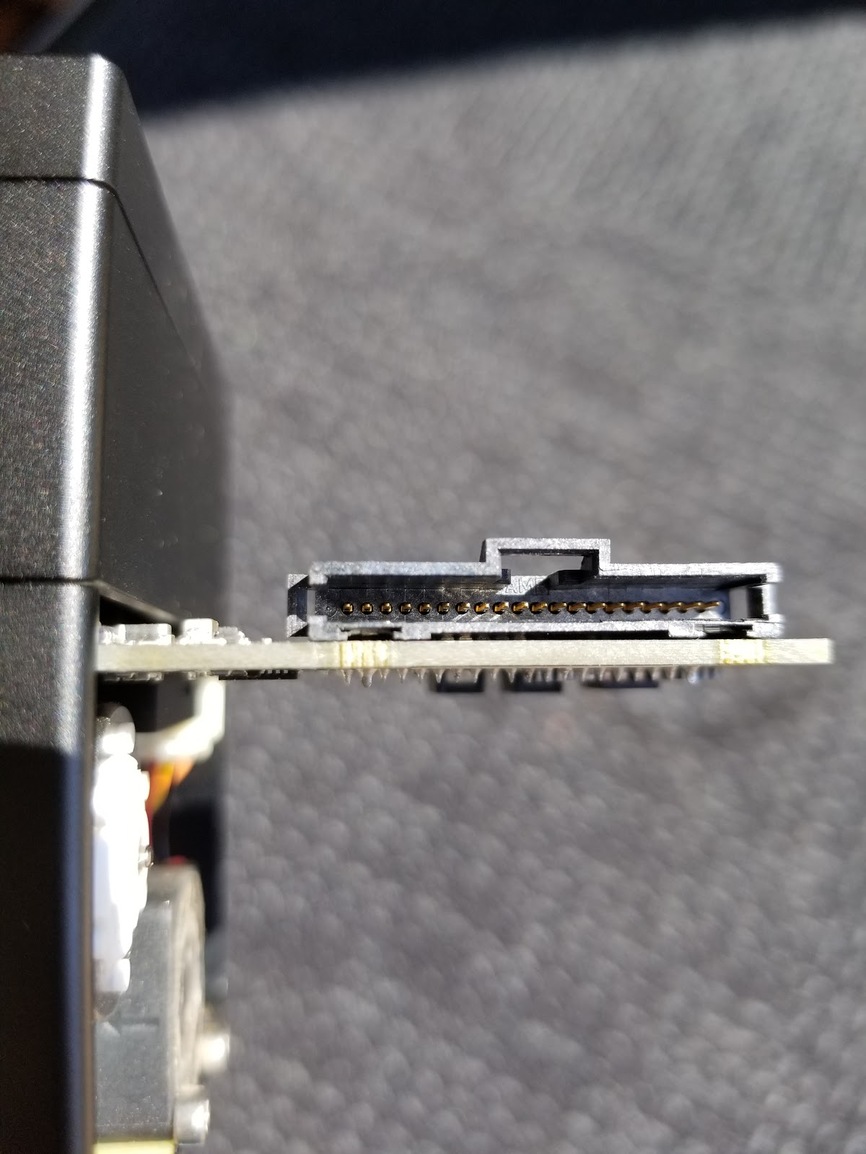
Pick up the printer head and wire ribbon. Make sure the tab on the wire ribbon is facing up. Slide the ribbon back into the head until it clicks.
As shown, lower the printer head over the metal plate so that it rests next to the two round posts. Then push it gently away from you – you’ll feel a “click” as magnets pull the printer head until it sits snugly atop the metal plate.
I know, right? It sort of looks like it could be normal and also sort of looks like it could be broken. If only I had multiple Forges to compare it too…
I asked on another thread but figured I might as well ask here too: does the masking you’re using completely hide the symbols from the earlier tests, or can you sort of see them through the tape/paper? The tape I use is showing them and I didn’t know if this would mess up future tests?
Thank you for sending the photos of your printer head and for following the outlined steps. Have you attempted to run the camera recalibrator again? If you haven’t done so already, please reconnect the printer head to your Glowforge and then run the camera recalibrator.
 ) but I can’t figure why. Never an issue except on this task.


