How do I fix this. It shows the object one place put prints it in another. I have to do some precision work soon and need this fixed ASAP.
GLOWFORGE…Please help.
How do I fix this. It shows the object one place put prints it in another. I have to do some precision work soon and need this fixed ASAP.
GLOWFORGE…Please help.
You’ll want to post an example (screenshot) of this, including the rulers so we can know how far off it is, and also what material you were using.
Thanks!
Also make sure the honeycomb is perfectly flat, as is the material to be cut.
Double check that the material height is correctly set in the GFUI
Precision requires jigs.
Of course “precision” is a relative term, but the camera is up to 1/4” accuracy. Jigs properly used are accurate to a kerf or less (0.01”).
Thanks for reaching out, and I’m sorry to hear you hit a snag. The software on your Glowforge is responsible for ensuring that the print lands on the material in the same place as the preview. When you’re done with a print, let a new image load. If the print appears on screen far from where it was supposed to go, you may have an alignment problem.
Most alignment problems come from the material being closer or farther from the camera than expected. While the software is still improving, you can take these steps for the most accurate alignment results:
Should you finish all of these steps, and find that you have an alignment error of more than 1/4", please reply so we can investigate.
Keep reading.
Thanks. I’m the worst at reading. Deleting my question now. ![]()
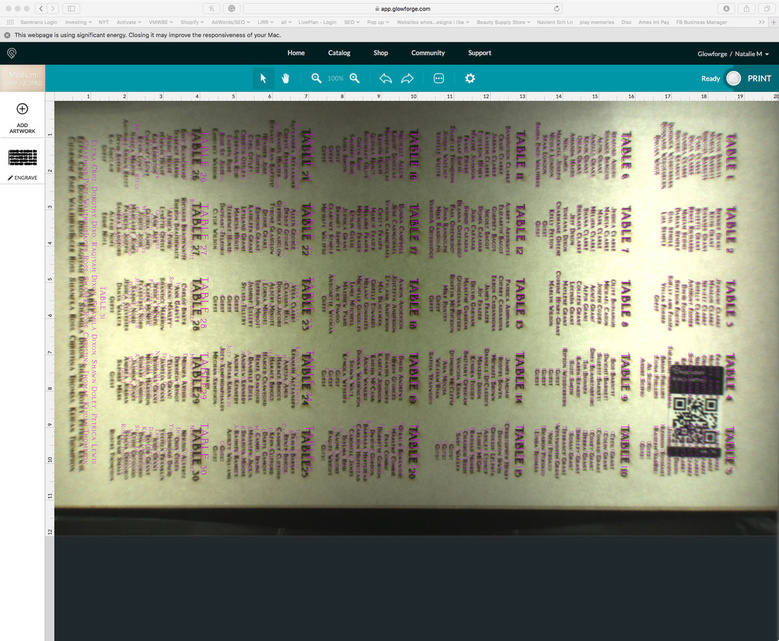
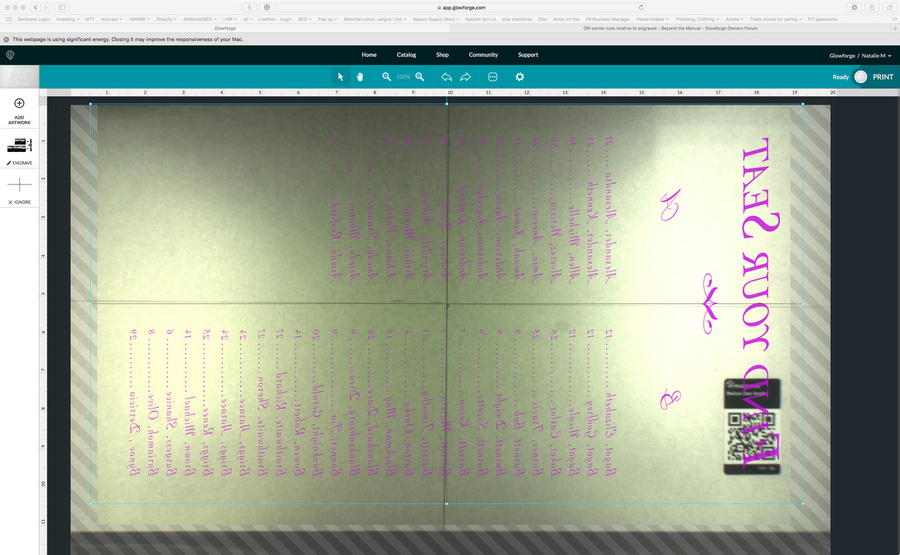
I have taken photos of what i speak from start to finish. I guess I have to research Kerf because this thing didnt come out at all centered on the board even though i tried my best to visually.
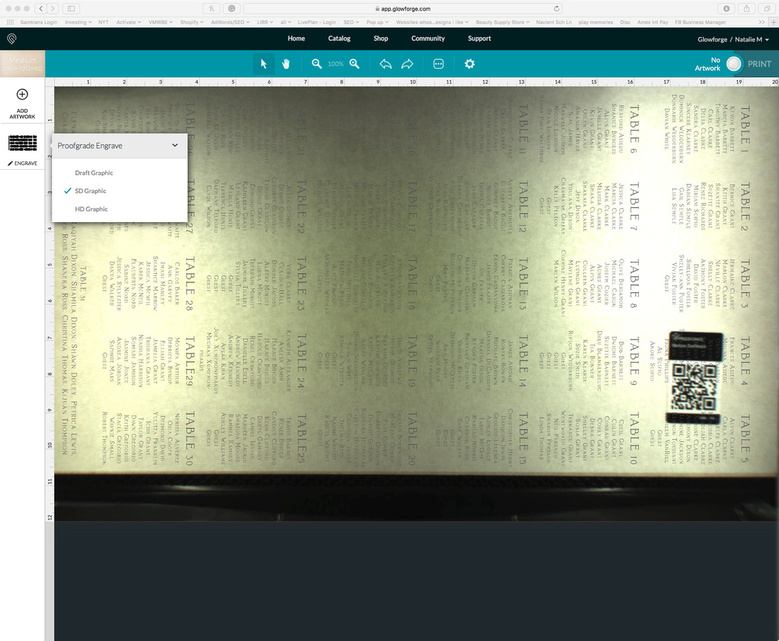
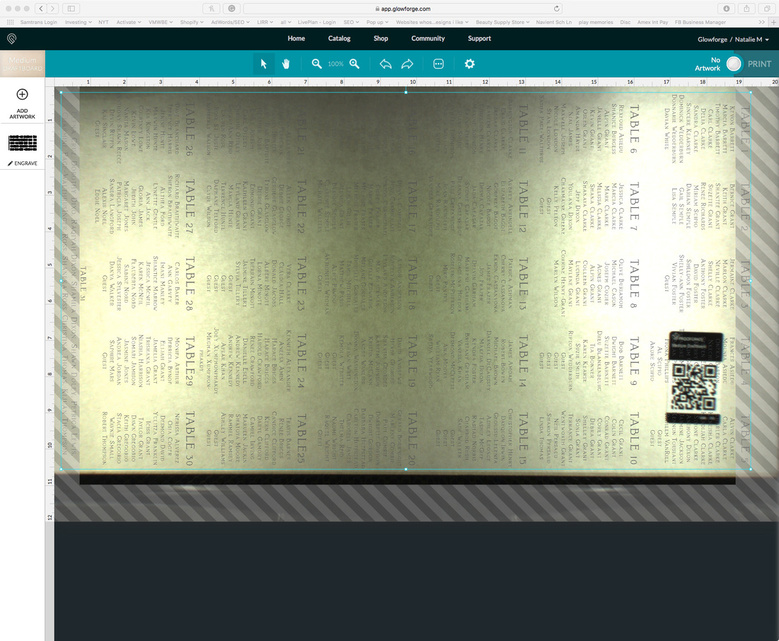
Also you’ll see in the photos on the second photo shows the whole board but when you go to the select tool you have much less print area as shown in photo 3.
Also my design was made on a 19.475 by 10.875 artboard which is the print area I read for the 12 by 20" sheets but yet when brought to the app its too big and must be shrunk down!!!
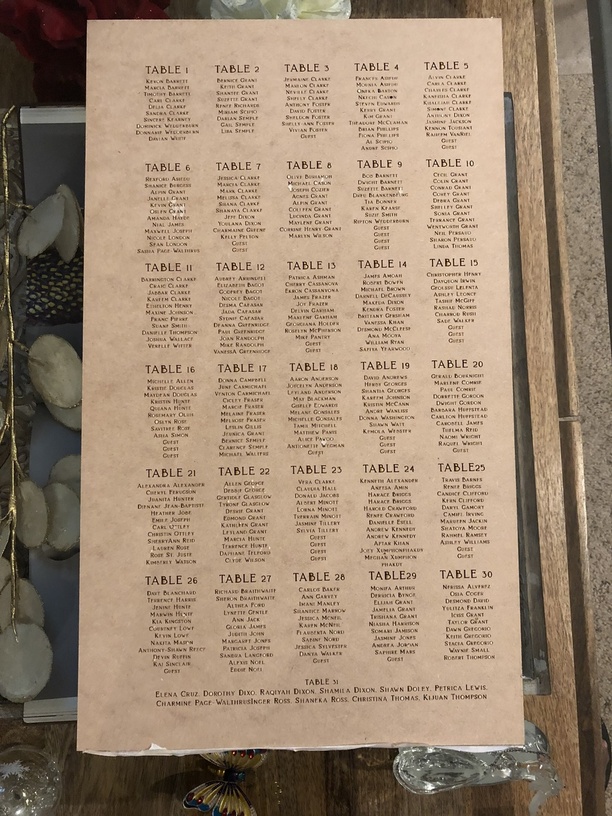
The last photo is of the finished product. as you can see it’s way off center even though the photo before I went to print showed otherwise. I had the board as far forward as it could fit on the honeycomb.
When the print was done, as shown in the first photo it no longer lined up even though the printed board was not moved.
This is all very strange.!
(upload://zJYNk3idKQ1gz74GsdXZTMVKLl5.jpg)![image|607x500]please see my response to the issue i’m having in the thread below. Iv’e posted pictures. At this moment I need my prints to be centered on the proof grade material!!
Hi @nakee, welcome to the forum. Looks like quite a party coming up. 
I’m going to try to explain a couple of things about the laser…
There are a couple of things we have to work around for now…one of them is what you call the “calibration”.
Because the lid camera sits so close to the very large bed, and has to capture the whole twenty inch image…there is a severe fish-eye effect caused by the camera. That means that placement alignment of the cuts is going to “look” out of kilter at the edges of the bed, and “look” a lot closer directly under the center lid camera when it takes it’s post-print picture. But if you look at the actual results on the board that got lasered, it looks fine. There’s no stretching or distortion.
For something like what you are doing there, as long as the entire image falls on the printable area, you should come out with a great result. If you are cutting small items out of a sheet that has already been cut up, you need to give yourself some extra room out at the edges to make sure that it falls on the material. (It really only impacts placement of cuts, and they are still working on the algorithm to improve that AFAIK.)
As far as the bed size changing on you and being smaller than the full 19.475" wide… that happens with engraves because the head needs room to slow down on the sides. The 19.475" setting is the cut setting, the engrave-able area is significantly smaller than that for the top speeds that engraves use. If you need to engrave all the way out to the edges full size, you have to slow down the speed and lower the power. (For that one we’re running up against the physics of the machine.)
As far as centering it in the Proofgrade sheet - you can’t. That’s because the Proofgrade sheet is larger than the currently printable area, and not evenly distributed…there’s a larger uncuttable area at the top and the left than on the right side and the front. What you can do, is create a cutting rectangle that surrounds your text, and after you have engraved the text, cut the rectangle out.
So if I were creating something like what you are showing, I would:
Create a rectangle that is about 10.5" by 19"
There is no good reason to try to push it to the limits and a little leeway will give you breathing space.
Make the text smaller inside that rectangle at the edges. (Add some white space around the text. In addition to looking more pleasing, it’s going to reduce the size of the engraving area, which will speed up processing, and might let you do it all in one shot.)
Align the text with the rectangle in an external design program - something like Illustrator or Inkscape. Make sure the text has been converted to paths before you start, and save the file as an SVG. It will already be aligned, and when you bring it into the Glowforge interface, if you have to reduce the size any further, everything will scale accordingly.
Engrave the text first then cut the shape out, and you will have centered text inside your shape. If you want to get a little fancy with it, you can also cut some shape other than a rectangle out, or round the corners slightly on the rectangle. (Might be cool.)
Anyway, hope that gives you some ideas.
just woke up from printing and back at it. I’ve decided to draw cross marks on the acrylic and the file layout to line them up to better center the print out
Do these need to be a specific size? Since your engraveable area is smaller than your cuttable area, I’d personally just set up a cut in my design program and then align the engrave to the cut and call it a day.
They don’t need to be a specific size so i adjust to the printable area and line it up with the cross marks i drew on the masking and the program…
The image is skewing with the camera when it should be printing the way the file is laid out. I match the cross marks on the center hoping it would print where the cross marks in the file are but it prints bent just like the image on the site…does not make sense.
I think you’re going to have difficulty getting perfectly straight jobs on full sheets of material because there is no relation from the gantry XY to the crumbtray XY. You are relying on the material being perfectly square (which I’ve never checked, I imagine it is) and then also relying on the crumbtray being perfectly square in the machine.
The reason I asked about the size required is that it’s easier to get perfection if you cut your own square with everything aligned inside of the file.
Thanks @Jules, that’s right.
Your Glowforge can currently print up to 11 x 19.5 in. Engravings take extra room to speed up and slow down, so the area may be a bit smaller. We’re working on software improvements that will increase the printable area.
If you find that you have an alignment error of more than 1/4", we’d like to have you try a few troubleshooting steps for us:
Turn off your Glowforge.
Check for small pieces of debris or dust.
Check the lower door to make sure it closes all the way. It may require some force to open, but open it, wipe any dust off the edges, and close it all the way.
Remove the tray and clean any dust or debris from the surface underneath. Pay careful attention to remove all debris from the four dimples where the tray rests.
Check the lid to make sure it closes all the way. Small particles of material, such as dust or debris, can prevent it from closing completely.
It’s been a little while since I’ve seen any replies on this thread so I’m going to close it. If you still need help with this please either start a new thread or email support@glowforge.com.