after calibrating twice. The print is way down from the top and close to the bottom. The image shows the front door of the glowforge and the target I upload shows off the board in the camera image and says no artwork. It is showing the board wrong and the camera is picking up the door instead of the whole wood . I don’t know what to do. I am using proof grade draftboard as directed and it just will not get the image of the wood right?
1 Like
Can you share a screenshot of what you are describing?
2 Likes
The proper amount showing will show the lower right corner and the printable area beyond. what does not show will be the wood beyond that point both above and on the left. This will happen after you have used the Set Focus when you should have an accurate connection between design and material. At that point also the design when highlighted should show the size and placement of the design. if any part of the design is beyond the cutting area (or the smaller engraving area) then that will not cut and you will often get the “no artwork” notice or if just a separate part of the design is completely in the cutting area it will say “ready” but only highlight , and only cut that smaller area.
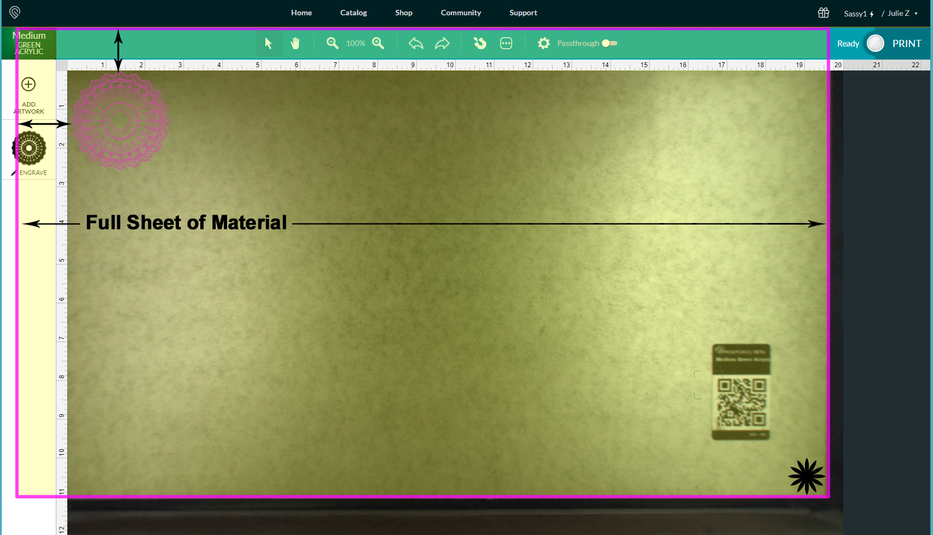
There is an overlay on the screen that keeps you from placing designs on the board that the head can’t reach…it should look like this diagram:
There is about an inch of material hidden underneath the thumbnail column on the left and at the top. If you want to optimize use of the material, work out from the lower right corner. (Black Star) Make sure the metal gridded area is completely covered with material.
2 Likes
Oh no, I’m so sorry you’ve hit a snag.
I’ve extracted your machine logs and can verify your Glowforge was successfully calibrated yesterday.
To better understand the trouble you’re experiencing, could you please send me a screenshot of what you see in the Glowforge app when this happens? Make sure to include the rulers in your screenshot and show as much of the bed as possible
To take a screenshot:
Mac: Press Shift-Command-4 and click and drag a box around your image. You’ll find the screenshot file saved on your desktop.
Windows: Click on the Start Menu and type “snipping tool”. Open the Snipping Tool > New then click and drag a box around your image. Click the Save icon and name and save your file.
Send us the screenshot, and we’ll be happy to take a look!
It’s been a little while since I’ve seen any replies on this thread so I’m going to close it. If you still need help with this please either start a new thread or email support@glowforge.com.