That was essentially what I did with the “Large Face”. I limited the gear to twelve teeth and that is why it was so big. I wanted the teeth to be the hour marks. Likewise, the inside teeth mark minutes.
If I increased the number of teeth on the outside edge of the face, that might help, but I did want them to be meaningful.
I was just thinking that instead of just the 3 sides you have in the face teeth (green), clip the corners of each one so you’ve got 5 sided teeth (gray gear). Then they’d look more like the real gears in the clock.
Oh. Just clip the off the sharp corners? That should be pretty easy…
I was also thinking about combining the round outer-side of the original face with the inner minute-marking teeth of the newest face.
I have also made some more changes to the frame, in an attempt to show off the gears more. Once the weather gets warmer, I plan to get some more sheets of acrylic and cut it down on my new table saw (but it is currently to cold in the garage). Then I will try a new clock all out of the type of acrylic, and hopefully avoid the thickness issues I ran into initially.
Yep. Then the hour “teeth” will look like the gear teeth. It’ll take longer to do the same for the inside ring teeth but they may be small enough that clipping the corners off wouldn’t make as big a difference as I think clipping the hour teeth will.
My original draftboard was 0.1230" thick (just a tad under 1/8").
The newer draftboard was 0.1275" thick (just a tad over 1/8").
It is amazing how such a little difference can cause so many issues for me. I will have to keep a much closer watch on my material thickness and dial in those pin-holes again.
The red acrylic I was using (the one that gave me the most trouble) was 0.1105" thick.
Very interesting measurements. This should help me to be much more precise in my future calculations.
At this point I have made several changes to the frame and I am just waiting for materials to test them out.
I have the tablesaw and I cannot wait to try it out with some sheet acrylic from Home Depot. I have my eye on some green-glass acrylic that @jamesdhatch told me about. But, it is too bitterly cold outside…
I think I need to make a few more adjustments to account for the thicker material, but I don’t think that should be to bad. I have also purchased some larger barrel-nuts (mentioned by @lostchild45 ) so I will probably try to work those into this version also.
Actually, now that I am thinking about it, maybe it is time to increase the size of the clock? A larger size might give me more wiggle room in my calculations? But it might require more weight overall too, and I am trying to reduce the weight needed…
I may need to get more brass rods to handle the increased width of material too… No, if I use the different diameter rods I should be fine (just another adjustment to make.)
Thanks for the suggestion! I think it will add stability to my frame and I think it should look better too!
It looks like the larger bolts will work fine with the top brace, but I think I am going to need to enlarge the lower braces to allow for the larger bolt-barrel-nut combinations.
I have obtained and cut down the green-glass acrylic from Home Depot! (Using my table saw for the first time!)
This acrylic has a plastic masking. Should I leave it on or replace with paper masking? I have read several different opinions on this matter here. But I was hoping, just maybe, @jamesdhatch has used it before and can enlighten me about how he (or anyone else) used it previously?
I figure it is new material, so I will experiment with it. I just peeled off the plastic masking and applied some paper masking. Not sure I will do that again… The paper masking clings pretty hard to the acrylic, almost to the point of out of control. It was rather difficult to get on properly.
I will see how it cuts, but doubt I will try that again.
I tried “Proofgrade Thick Green-Glass Acrylic” settings first, but it seems too hot. I got a bit of “chipping” on the back side.
I don’t mask the top. But I put down a layer of white copy paper on the bed and then lay the sheet on it. The copy paper prevents any flashback burning of the bottom. If it’s an intricate cut, I usually just vacuum up the bits of paper but I try to get the settings to where it just cuts through and mostly the copy paper comes off easily without having cut through all the bits of paper.
Flashback was my biggest concern. I will likely try the copy paper idea (when I use up the sheet I already masked).
Can I ask what settings you have used? I tried the settings, but I think they are too much.
I will say that I think this is going to make a BEAUTIFUL clock. The first pieces that I have cut to test diameters for the barrel nuts are working and look amazing.
looks like you have the settings pretty good. You might want to back off the power a bit. As I recall I played with power because I’ve had issues when just mucking about with speed. I had a set of little cut/engrave samples I made for the settings (otherwise I tend to get too many custom settings to find them - just like the issues with trying to find things on the dashboard). I’m not sure where they are - my wife disturbed my filing system by cleaning things up
I am getting really excited about this version of the clock!
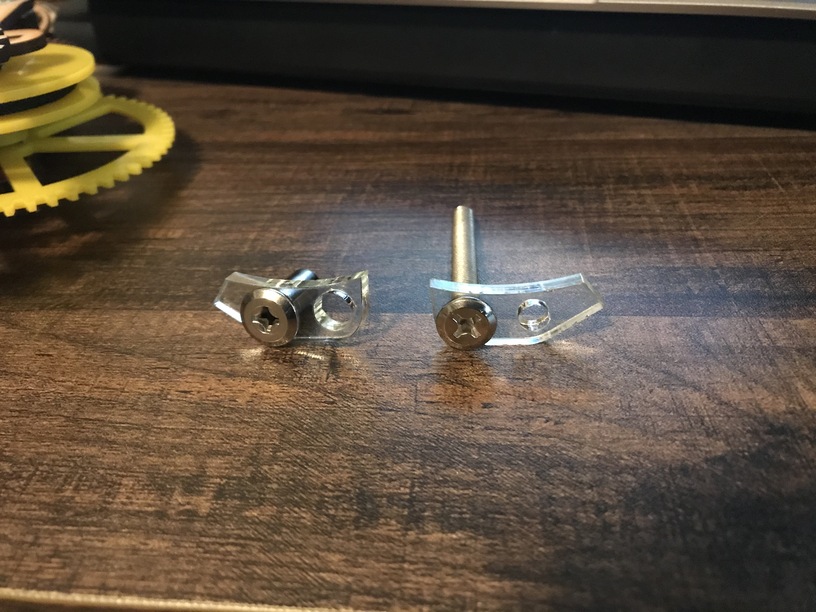
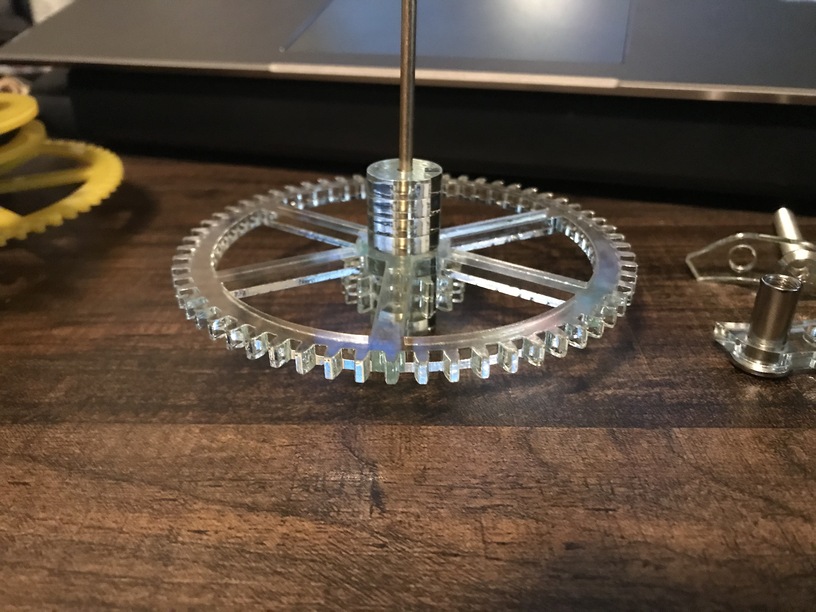
I cut my first axle with the new acrylic. Then I rummaged through my old scraps and found a piece of my original Draftboard (that was closer 1/8") and used that to cut a pin the proper length for the gear-assembly. It was very smooth assembling all the pieces.
One thing that you might find is that cutting gears cannot be increased in speed as the head can only go so fast with all the stop and turns. They fixed the burnout that leaving the power normal on those made, but now it is a bit underpowered on those zigs compared to full straightaway.