Which does raise the potential solution of breaking the cut lines so that you could spec a power/speed setting for the long cuts and a separate combination for the teeth. That might be a profound pita and only potentially worthwhile if you’re going to make a bunch of these.
They are already separated to ensure cut order, so this wouldn’t be very difficult.
This current batch has paper masking front and back. Do you think the copy paper would offer more protection? I could place the copy paper under it the next time I cut another gear assembly…
I couldn’t find the copy paper (printer was empty), so I grabbed some cardstock and put it under the acrylic. When I cut the next gear assembly we will see if it has the chipping issue as bad as the first one did.
The cardstock did not stop the “chipping”, but I do think I see what is causing it. The laser is reflecting off the metal base and flaring back on the acrylic. So I definitely think I have to much power.
I will probably cut some smaller pieces (like frame spacers) and see how low I can go and still cut through.
(For my notes, as much as anyone else…)
It appears that these settings are working the best for my Plus using this Home Depot Green Glass Acrylic (width 0.166", but I think it was listed closer to 0.177"):
Speed: 120
Power: 85
Compared to settings (at the time of this writing):
Speed: 115
Power: FULL
Note: This was with paper masking on front and back. So I might test it again with no masking and sitting on copy paper (when that time comes).
With these settings the chipping is not completely gone, but it is hardly noticeable compared to the original settings. The difference is pretty clear, so I will use these settings for now.
These new settings appear to have a reduced kerf too (I guess I should have expected that). So I might need to adjust some of my hardware holes just a bit. They are seeming really tight right now.
My refuses to cut anything now… it just goes through the motions. I guess I won’t be refining these kerf settings tonight (or this weekend, since it is late on Friday).
Found a mechanical clock option on Thingiverse called Leonardo, loaded by user CarloFonda. The files would likely need conversion from the DXF format, but there are options online for that. LINK
I think the challenge with mechanical clocks is that the wood for the gears can degrade over time and use, but for something you make yourself, there’s a lot of personal satisfaction.
I’d also say check out UGEARS a company out of Ukraine that sells laser cut build projects. You can find a number of geared models that are very inspirational.
Yeah, I was able to successfully create a wooden clock and was able to get it to run for several hours. I know there are many designs out there on the internet. I am trying to design one myself, for the satisfaction you mentioned!
I have moved on from wood and I am trying acrylic. Once it is done I plan to share it with the community, but it is not likely going to be a build for the faint of heart… (Some early designs have already been shared above.)
Right now I am using brass rods, a few bearings, several bolts, and cord attached to a weight, but everything else is cut on the . I am trying to refine the clock to make it more reliable. This has been a very fun journey for me with a lot of learning.
(But right now my is out of commission, not cutting anything…)
We should be able to load those into the GFUI now. I wonder if we could export them after loading them to convert them? That would be super easy.
While trying to work on my clock I have realized that constancy in your materials and cuts makes a HUGE difference.
Since my is out of commission for the moment, I have been looking at my past cuts and materials.
It is amazing how much I have learned since I started this process. And I am wondering if I might be able to go back and eventually make a only clock? I am not going to try just yet (well, I couldn’t even if I wanted too…) but I do think that something like that would not be impossible. It would not keep time very well and might not run for long, but it does not seem impossible to me anymore. So I might revisit that after I get this working.
The biggest thing I have noticed by examining my existing cuts is that there is a constant issue with circle cuts. I was thinking my gear-assemblies were off-balanced, so I started looking to see how I could improve them. That is when I discovered that the issue was not with the balance, but with the turning on the axle.
The axle hole that is cut by the laser is a circle. And I noticed that there was a very-very tiny edge inside the hold, where the cut starts and ends. This edge causes a “bump” when the assembly is turning, and I image it has to be adding friction as well.
I do not see how this could be corrected in the file, so I will likely have to sand down the edge to get rid of it (if I even deem that necessary).
I considered that, but it would have to be a new point configuration. I don’t know how I would do that in Inkscape, but I could definitely do that in the XML. I might try that (when my replacement arrives).
I will take some trial and error, because I don’t want to burn to much and create divett instead of a bump. That would cause the same issue, or possible a bigger issue.
Edit:
So I attempted this, but Inkscape does not really allow the accuracy that I feel is needed to do this.
I can code this in the SVG (a perfect circle with a slight overlap):
< path d=“m 40.216664,111.58715 a 1.27,1.27 0 0 1 0,2.544 a 1.27,1.27 0 1 1 0.1,-2.5365” />
But if I move or interact with that object at all, Inkscape does this to it:
Which appears to be a little more “square-ish” when Inkscape draws it. (I am not a fan of Inkscape’s rounding when it manipulates my points… but I try to ignore it…)
(Sorry, I am that guy that writes his SVG’s in Notepad…)
This is what is left from a time when the laser would start blasting before it started moving and still blasting when it stopped. Needless to say, it caused quite a divot. With some very fancy programming, they lowered the power when the laser was not able to run at speed by a close approximation, but not perfect, most of the time overcompensating a bit so the cut is less than at top speed. This is the same issue as when it cuts deeper on a straightaway, vs cutting teeth.
If you have a line tangent coming and leaving the starting point, it will be at speed as it passes that point, and Inkscape would accept that.
I will try to test it when I get my replacement. But I don’t like how Inkscape draws the “new circle”; I am afraid it would be even worse and less uniform.
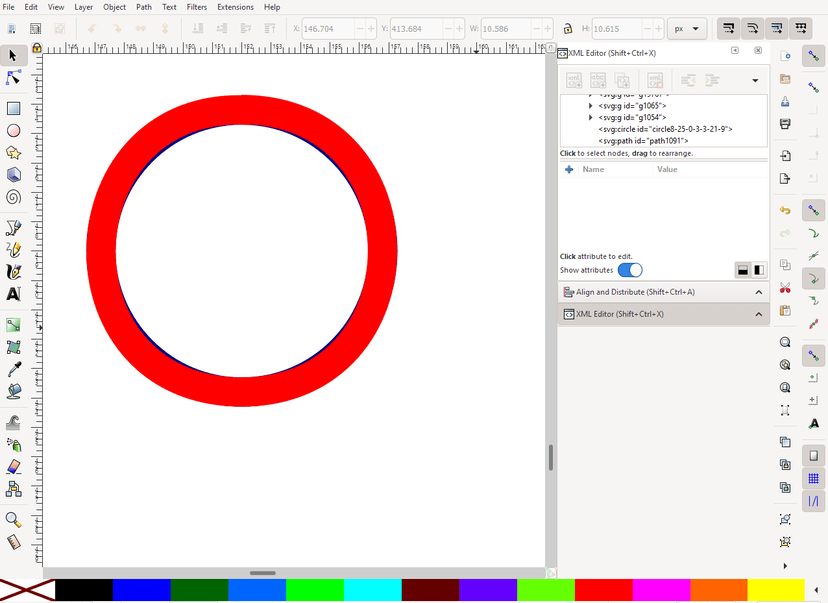
It might be nothing, but if that tiny little edge is noticeable, then I think this could be an issue too:
The original circle is in the back (Navy) and the overlapped circle that Inkscape manipulated is in the front (Red). You can see the “corner edges” are pulled out a bit, making it slight less round consistently.
I still plan to test this when I can, but based on what I am seeing, I don’t have high hopes.
Thanks, but I already have an overlapping circle, just no to test it with.
And it looks like your’s is overlapping on the outsides of the circle. Mine was just going over the existing path (so you cannot perceive it visually).
I have been playing with my original Draftboard clock. It is still running for a few minutes and stopping. I still think the issue is the frame (the reason for making the second clock), but I also think I see an issue with minute-axle (inadvertently fixed in the new clock with bearings).
Even though my is down, I think I might be able to fix the old clock with pieces I already have cut! I have some tiny spacers meant to hold the axle inside the bearing. I think these same spacers might be useful in the old design to hold the axle more consistently in the frame.

 settings (at the time of this writing):
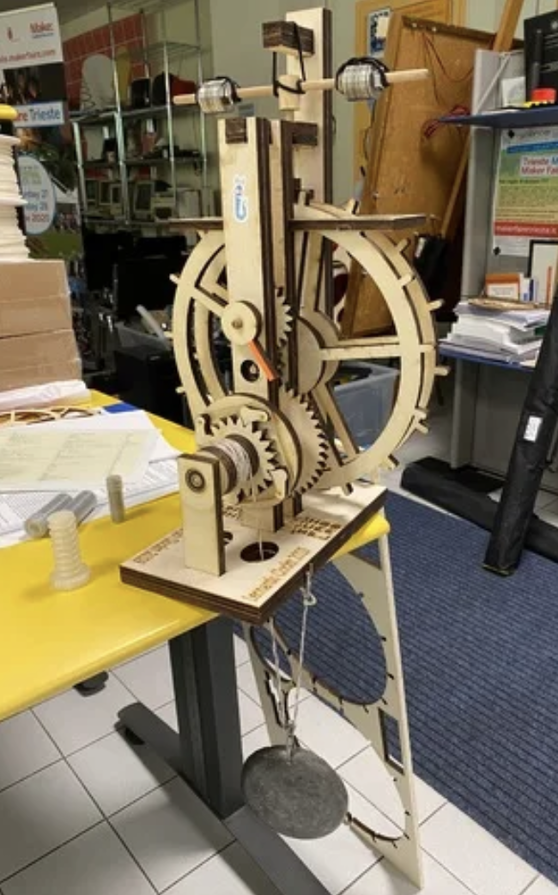
 says they are sending me a refurbished machine. I think it took two weeks last time.