My scrap tests with the WD-40 are looking good so far, so I think I might go ahead and try applying some inside the gravity-ratchet.
The ratchet has released several times in tests. It appears that only one of the internal pawls is moving. I am hoping that applying the WD-40 will help them fall with gravity and make the ratchet work more effectively (and not let the pawls slip out of the ratchet teeth.)
Only further testing will tell…
2 Likes
Well the WD-40 was a complete fail.
Like the lubricated ball-bearings, too much viscosity of the oils prevents the pawls from sliding in the drum.
I wiped out as much of the lubricants as I could and tried sanding the sides of the pawls. I think they need more room between the other pieces of acrylic to fall with gravity more consistently.
I have put the clock back together and I am trying it again. Before only one pawl seemed to be working, but I am hoping to get at least three of them working (ideally all four).
4 Likes
Yeah, the WD-40 was a COMPLETE failure. All four pawls are stuck now.
I may try making the pawls out of a thinner acrylic, just to make sure they have room to move between the sides of the drum.
WD40 isn’t really a good lubricant. Try a real oil like sewing machine oil or one of the teflon based lubricants. You need a light oil and not heavily applied.
I buy watch oil in 1g tubes that last for hundreds or thousands of watches. They’re applied at friction points on the end of a needle - droppers are like floods. Most watch & clock fails are from excess oil that eventually gums up and slows or stops the mechanism.
6 Likes
Yeah… I am just trying things I have at home. Is there a common household item I could try? I don’t think I have sewing machine oil or any teflon based lubricants…
I might look to see if I have any oil for my electric shaver?
Or 3-in-1 oil is pretty common.
Dip a toothpick into the oil and apply the drop that clings to it to the touchpoint on the pawls as well as the axles.
3 Likes
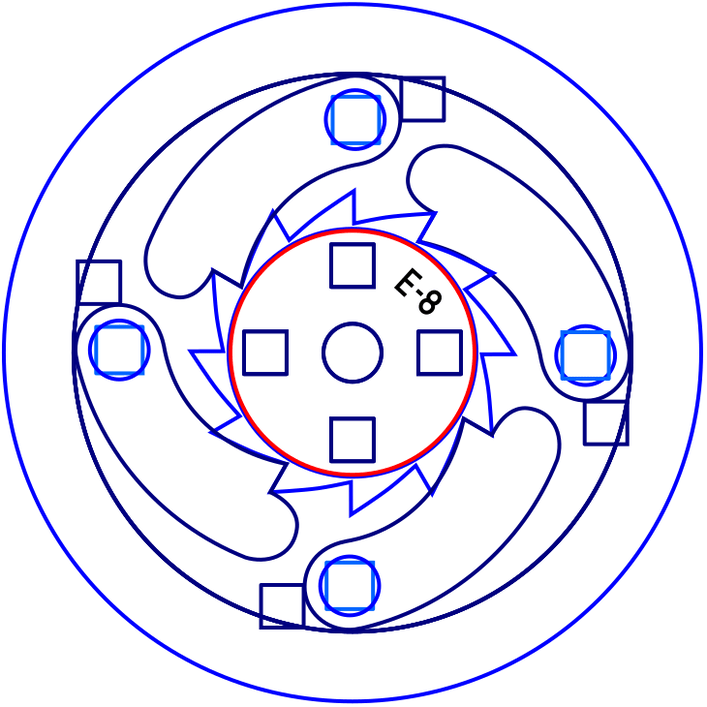
I tried to use some thinner scrap acrylic I had laying around to create some new pawls for the ratchet.
Initial tests were the best yet. Now to test it with a 2lb weight on it…
I have high hopes for this one! (I want to move on… I am tired of messing with the ratchet.)
6 Likes
The ratchet slipped again dropping the weight.
I see the pawls falling now. They even have a satisfying “click” as I turn the drum backwards. But, I see them not engaging the ratchet teeth as the drum turns under pressure. I see the pawl just resting on top of the tooth, not slipping in to engage.
My hope was, if this happened, that the pawl that was engaged with the ratchet-tooth that it would hold under the weight as the drum turned. But it appears that the pawl disengages as it reaches the button of the drum and gravity pulls it out.
I will watch it a little longer to make sure this is what is happening, but I think I might be able to fix it from falling out by adjusting the angle the pawl and the tooth meet at. If the tooth holds the pawl until the torque is release, that should solve my issue (I think).
The pawl currently meets the ratchet-tooth at a 90 degree angle. If that angle were less, the tooth should hold the pawl even as it goes around the drum and is pulled down by gravity.
1 Like
The adjusted angle doesn’t seem like it is was enough to address the issues with the ratchet…
Knowing what I do now, I have a new design that I hope will lock into place better. I will have to play with the kerf and see if I can get it to work. It will use sharper angles but more rounded corners.
It seems troublesome to keep the ratchet in such a small area, but if I don’t have to move it I don’t want to…
1 Like
I am seriously tired of working on this ratchet… This is starting to feel more like work than a hobby I enjoy…
I hope this latest iteration works better, because I really want to get back to working on the clock instead of the winding mechanism.
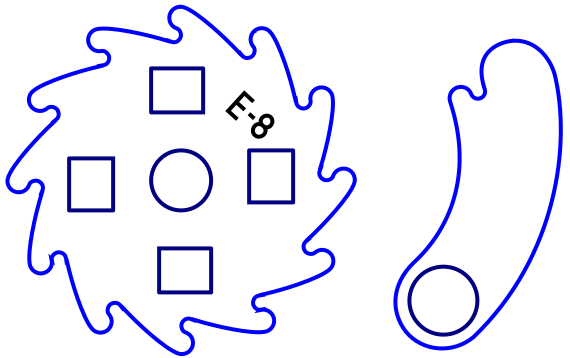
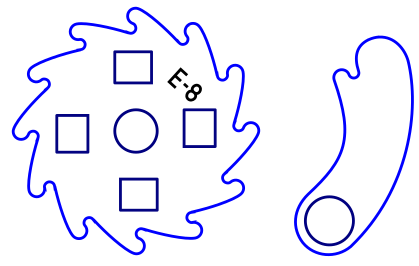
I have rounded the edges and designed the pawls to lock into the teeth on the ratchet. (Sorry for the messy design, I didn’t feel like cleaning it up…)
Next, to account for the kerf, I converted the “Stroke to path” in Inkscape and removed the inner path it created. Then I reversed the ratchet so the kerfs would like up better. And this was the final result.
I should be able to get this installed tonight so I can continuing testing the ratchet, and hopefully move on.
3 Likes
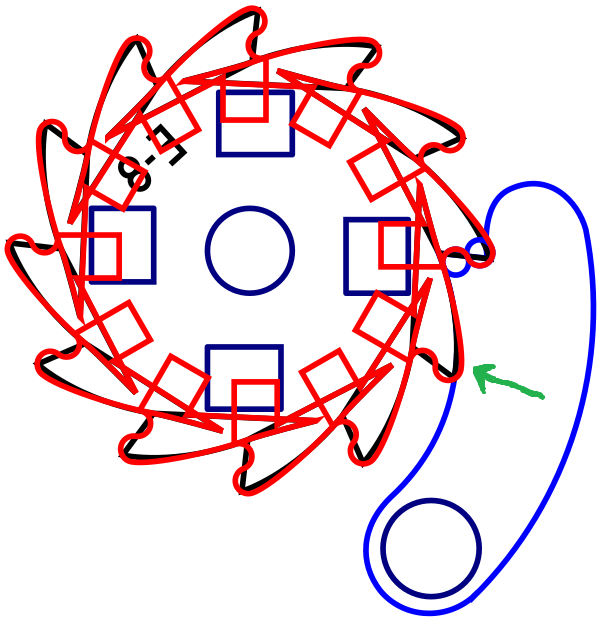
Another problem… and I should have seen this one…
That right there! The pawl is setting the ratchet so it cannot lock into it. I am adjusting and trying again…
3 Likes
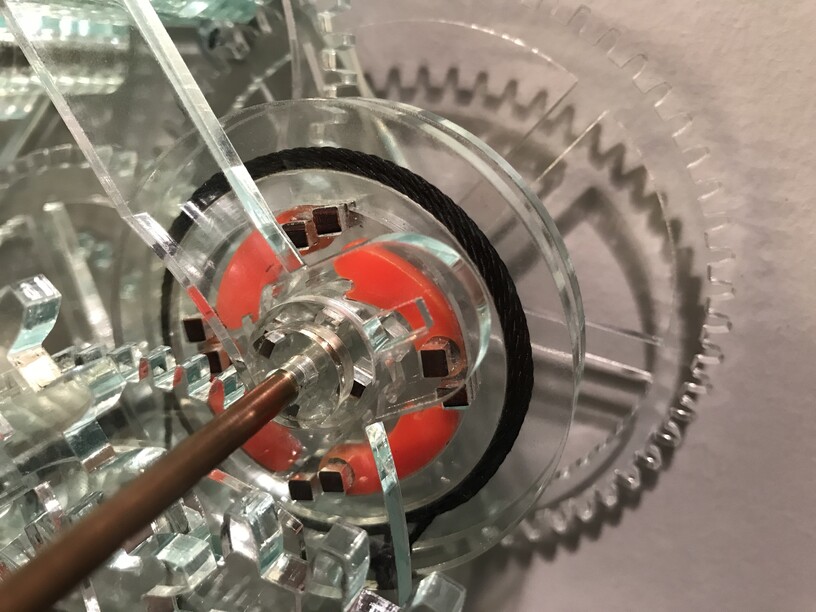
The ratchet held all night and I see it is physically locked in place now. So time to focus on the frame again.
I need to clean up all those little things that I added in the beginning that aren’t needed anymore, and I need to adjust some of the axle holes to make sure everything is aligning like I meant it to.
The frame is a large cut that wastes a lot of material if I get it wrong; so I will be doing a lot of analysis and measuring again before I cut what I hope is the final frame.
(For my notes) List of known changes needed to the frame:
- Minute axle-hole needs to move up and slightly to the left to prevent the gears getting to close
- Hour gear-down axle-hole needs to back down and to the left (where it originally was)
- Brace-holes in the lower-right of the frame can be removed (new braces are working fine)
- Drum axle-hole can be closed up (with the ratchet it no longer needs to slide out of place to wind)
-
(Maybe) Adjust the bottom braces so the clock can sit level on a flat surface
3 Likes
Yay!
You’re condensing years of clock mechanism research & development into a few months with lasers and modern materials. Gotta feel good about that.
2 Likes
Sometimes I feel like I am compressing the frustration too, but I am sure they were much more frustrated than I am (they had to do things by hand).
The ratchet is SO satisfying now. It was such a pain to get right, but it is really nice now that it is complete. This was the final result:
I still think most of the issues remaining revolve around the minute-axle. I am hoping that adjusting the axle-hole will be enough, but I am not sure. Still observing the clock to see if I can find any other points where things are not quite acting like I would expect them to.
2 Likes
I made changes to the frame and cut a new one. But something is still robbing the gear-chain of torque. It will run fine for a few minutes, then it will slow down and eventually stop (just like the wooden version).
I am thinking about oiling the brass rods, but I doubt that is really the problem.
I will have to keep watching it and hope the issue comes to me…
The clock was running better yesterday. I started it in the morning and it seemed to run all day. I had to restart it again this morning, so I still think the issue is the minute-axle, but it seems to be “breaking-in”.
I have an idea to try that will rely more on the bearings for that axle, but I will need to run a few test first.
It seems my dream of creating a design that anyone could print and put together to make a mechanical clock was pretty naive. This has been a great learning experience and lots of fun at several parts, but I think I am going to need a different project for a while.
3 Likes
It turns out the issue was that the frame shifted with the weight again. The hour-axle appears to be first affected when that happens. But with this new design it is easy to adjust, I just need to find a way to make it less likely to need adjusting…
I was starting to work on a new axle design, but I will probably hold off on that.
I think I just need to finish it up and start some time testing.
14 Likes
So freaking cool. I seriously wish I had more time to make one of these. We’re currently replacing 1500+ sqft of wood flooring so it’ll be a while…
But man that’s awesome!
3 Likes
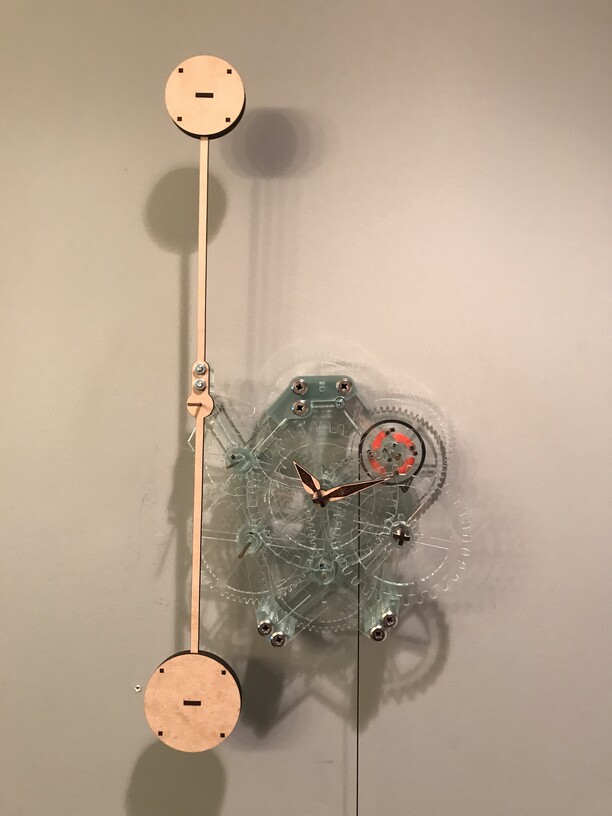
I trimmed the brass rods last night and threw the old clock face on. (I still need to cut new braces for the face, it does not really fit on the new clock.)
The clock has been running really well. I need to start time testing again to get the pendulum set properly.
15 Likes