After having seen @jamesdhatch’s excellent cantilevered sewing box, I figured I’d try one of my own! (Mostly just to learn Fusion 360 joints a bit better, for my own sake.) What started as a mockup turned into a surprisingly-functional first try.
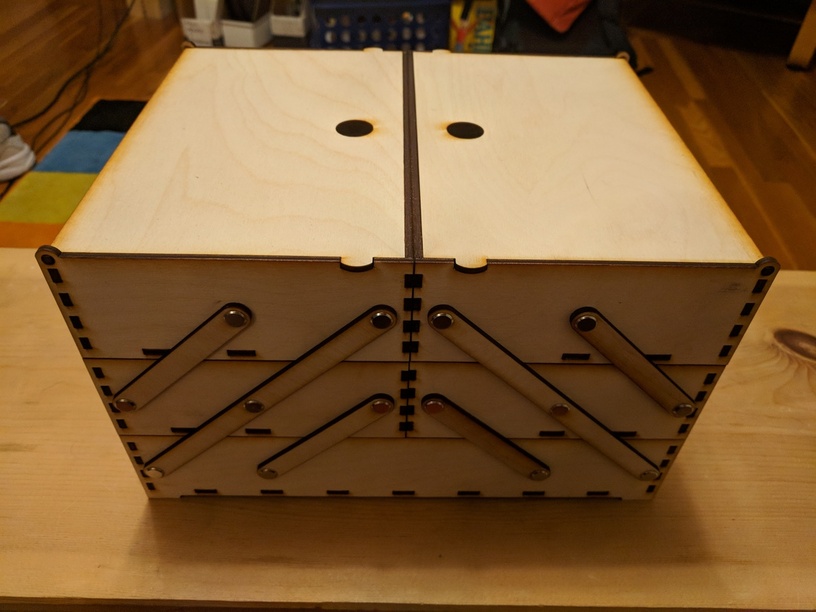
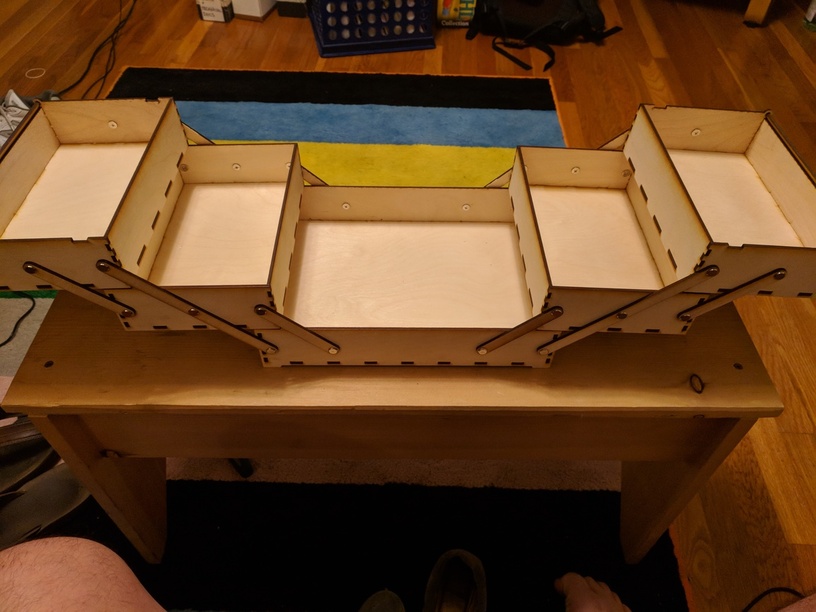
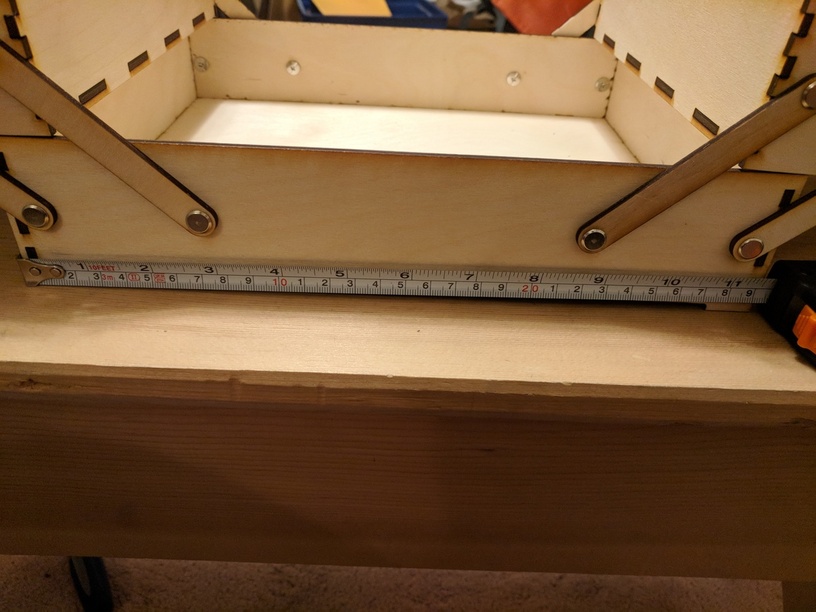
Made from 8 pieces of 12x12 Baltic Birch (this was meant to just be a mockup, after all), some white glue, and 28 little 6mm Chicago screws (“sex screws”). It’s quite big: The footprint wound up as right about 9x12, with the bottom tray fitting an 8.5x11" sheet of letter paper as a perfect little liner. Stability is pretty good: the thing is unlikely to tip, and the locked-in drawer bottoms feel better to me than finger-joint bottoms. No handle at the moment—I wanted to experiment a little before committing to a handle design, anyway.
Can clean up and post the SVG if anyone’s interested, likely in both Proofgrade and 12x12" formats. (Edit: SVGs posted to the free laser designs forum and the project’s own homepage!) Not too different from James’s box, though, so if you’re looking for something smaller his is clearly time-tested and well-loved!
Outstanding job! It’s pretty incredible for a first-run. I have been wanting to make one of these and would love to take up your generous offer to share it.
Well, it’s pretty clear there’s interest! I’m happy folks like what I’ve designed.
So that folks don’t feel like they need to keep bumping the thread to express interest, I’ll make it a point to put something up by this weekend so folks have a Memorial Day project. I’ll post it to the Free Laser Designs section and bump this thread once it’s up.
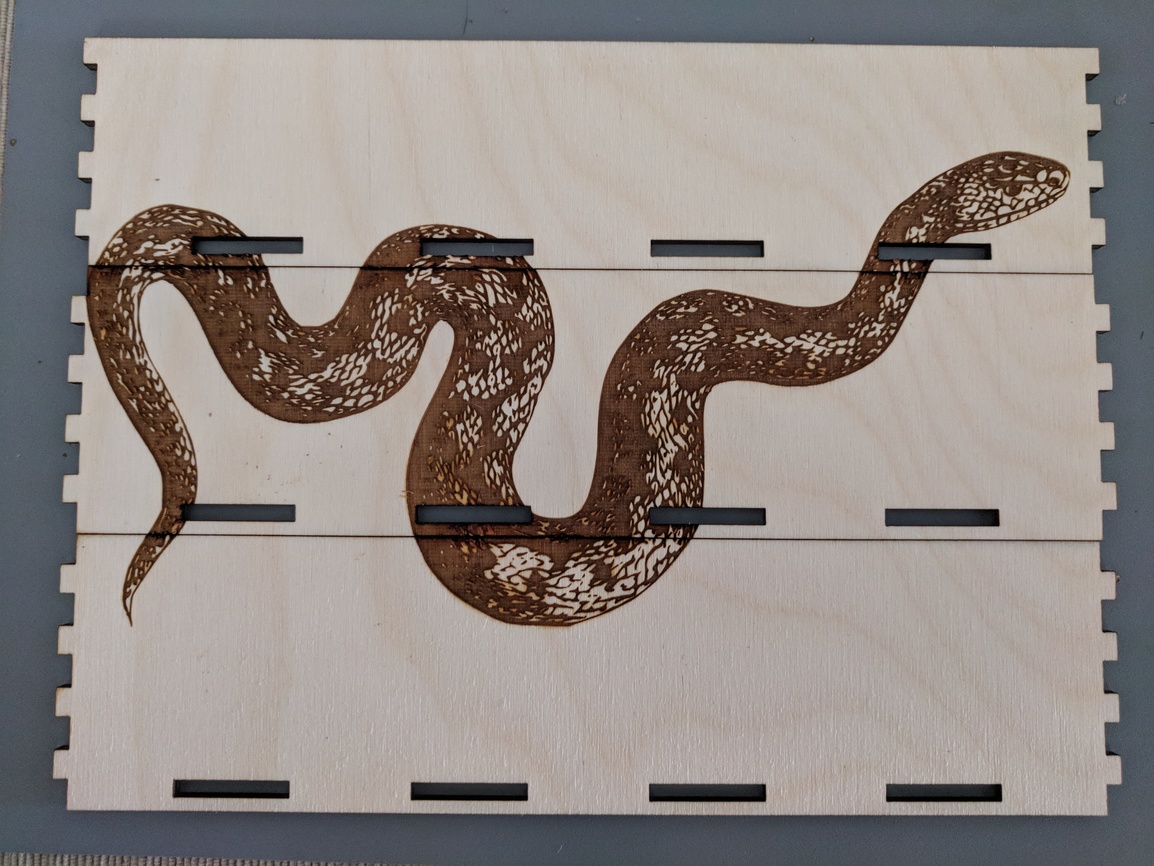
Regardless of whether you use Proofgrade or other materials, you’ll need 28 rivets or nuts/bolts to keep the thing together. If you’re stocking up, I think these are the rivets I used, and you’ll probably want some wood glue, clamps, and Loctite handy. I’ll also lay out the files so you can put art across all available surfaces–after all, I’m sure that’s what we all got the Glowforge for, right?
I don’t think I’ll have time to do as many pre-publication revisions/explorations as I’d done for my dice box, so expect a “beta”-style V1 design at first with room for improvement. I’m mostly happy with the design, but if you want a carry-friendly handle, you may need to improvise, and I’m still not 100% sure on whether that hinge design is sufficiently strong. Plenty of hacking and exploration left to do, and I’d love to incorporate feedback as the design evolves.
I have one question about your lid join/hinge (sorry, English is not my native language).
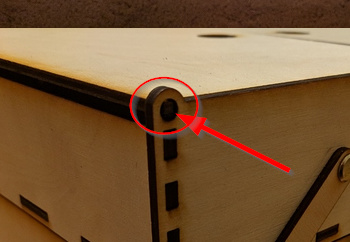
I understand how you created the side panel with the round hole. But how did you make the end of the lid round as well to fit so nicely in the side panel?
I’m afraid that’s simply a square peg in a round hole, just like me. I’ve made it work as best I can!
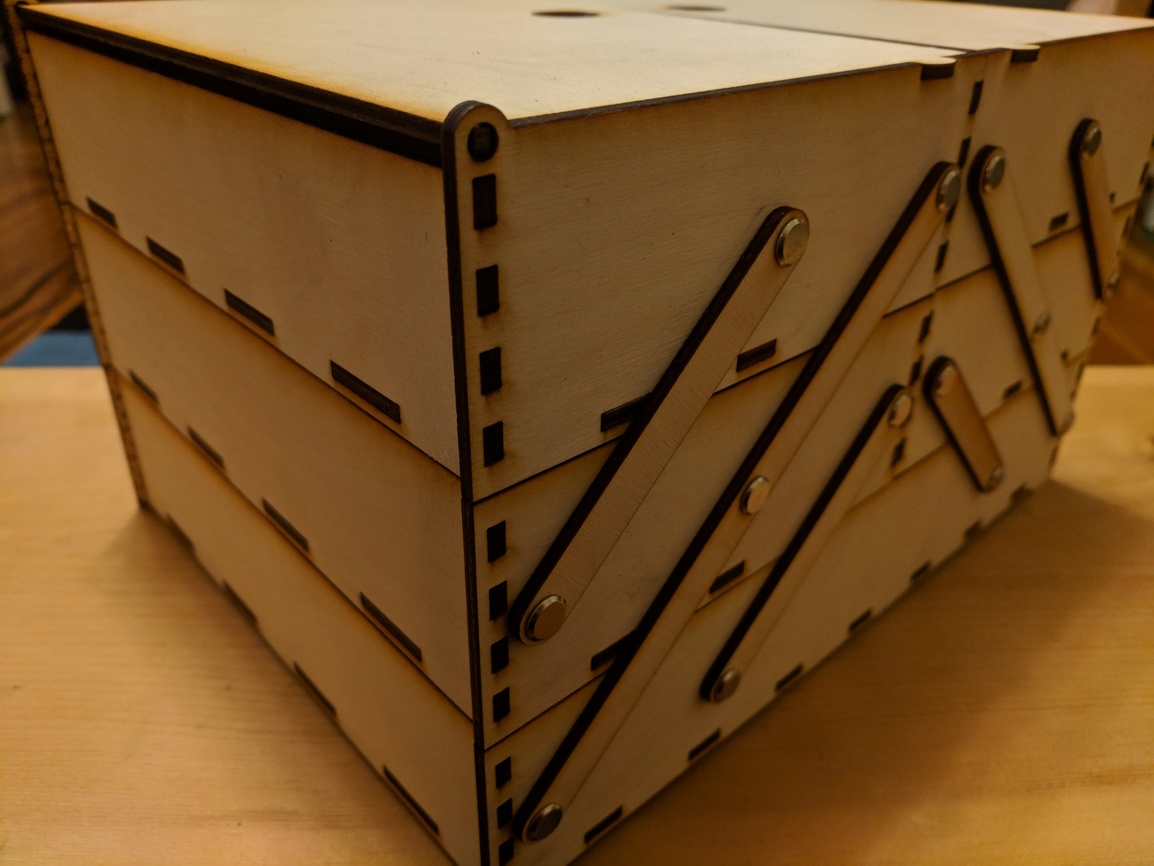
Specifically, the circle is exactly the same diameter as the diagonal of the square axis, which works well enough because the lid does not have a lot of weight to support and because the laser removes enough material to let the hinge turn without too much friction. I’ve also kept the closed lid flush the box’s top edges, which is why the hinge extends above the top walls of the box. The cut-outs on the edge of the box to help keep the lid closed and well-supported (and give one’s fingers something to grasp on the lids beyond the holes I’ve cut).
However, when the box is open, there is nothing to hold the lid open or aligned; the lid hangs at an angle that puts pressure on the hinge and the side of the box. I’m hoping to change that part of the design a little bit to help with that problem, possibly by moving the hinge further inward to reduce the angle and leverage. (I was sure that wouldn’t be the biggest problem with my first draft of the design, but everything else has worked better than expected!)
If you move it outward instead the lids could drop down flat against the ends instead of staying open horizontally. That would eliminate the hinge stress.
That was the plan, particularly if I also extend the slight overlay. Currently the front walls extend 1/8" beyond the sides, so there’s something to hold the walls in without requiring glue. If I were to extend that to 1/4", there’d be room to let the side wall hang flat, which also lets me use identical pieces for the box side walls and consequently drop the unique part count. It also allows the side wall to act as a support for the closed lid, so the lid can support more weight stacked on top.
Downside is that if I keep the base 11x8.5" for ease of lining, a 1/4" overlay + 1/8" material on both sides makes the full width of the front wall 11.75", which is nearly enough to exceed my 12" material. Add that to GF’s camera alignment issues and BB’s tendency to splinter its rough edges, and it makes me a bit nervous. Then again, the box is already close to “too big” so dropping an inch off the finished size may not be that big of a step to take.
Alternative design is to move the hinge inward, so the lids sit flat atop the side walls while open, parallel to the ground. This adds a little extra lightweight shelf space (spools of thread, pincushions, etc) but requires even more horizontal clearance than the box already does. Decisions, decisions!
12x12" SVGs are posted! Sorry for the delay, but I spent some extra time optimizing the layout for easy customization, writing the assembly instructions, and testing the cuts at home.
 ).
).


 I’m happy folks like what I’ve designed.
 Proofgrade or other materials, you’ll need 28 rivets or nuts/bolts to keep the thing together. If you’re stocking up,