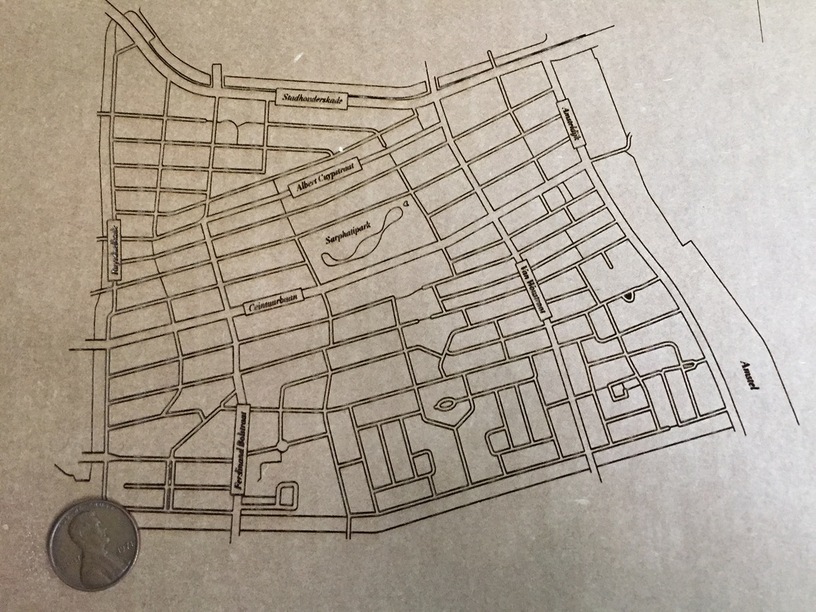
Hello all, I was having some trouble importing and printing yesterday but figured it out with some help from people here. Wanted to share the text print. This is using a piece from an Amazon delivery box. Took about two hours as you can see it’s pretty complex. I’ve got a penny there for scale. You’ll note that it did a great job on the type which is quite small and detailed.
Just an FYI - we are keeping all of the settings information for non-Proofgrade material in the Beyond the Manual category at @dan 's request, and if you want to leave the project here you could edit it to remove the settings information, or one of the Regulars will be happy to move the whole post for you into BTM.
What @davidgal2 said. But scores are vectors so it’s a straight pathway for the laser without skipping all the white space. Instead of sending the head back & forth and inching up line by line, the laser follows the path of the line scoring it (using lower power/higher speed than a cut) to similarly mark the material. You can’t do fills that way but lines work well. Thick lines can be gotten by defocusing or by repeating the design with a slight offset specified in your design file. It’s usually (but not always) wicked faster than an engrave.
Thanks to you and @davidgal2, I will probably be using this a lot. I plan to make some things out of paper and cardboard, and I imagine most of those type of designs, so long at they are made up of lines, would be best suited for scoring, it sounds like.
If you’re going to score corrugated, you need to make sure that the thing you are etching does not have a lot of closely spaced sharp curves and corners along with the straight lines (that map should be fine). That’s the big diff with a score: the head slows down around curves, and you can get cuts deeper than you want and/or heat buildup.
I’m fine moving this topic wherever. I ended up with the settings I had because I saw a few other mentions of similar settings for cardboard so went ahead and use that. I’ll have to try the faster settings and see how that works out. This was only my third print with the new GF so still lots to try.
And yes, my old neighborhood in Amsterdam! I really miss living there.
I’m sorry for any confusion - this is not correct. You may post any projects you would like in either the Made on a Glowforge section or here. Should you wish to post manual settings for any material, they may only be posted here.
I don’t read this section (I saw this because it was flagged) so please start a topic in another category if you’d like to discuss to make sure I see it.
Okay, now I’m confused. @Tom_A said you need 2 postings for non-PG projects where you share settings. The first is in Made on a Glowforge but without the settings. The second would be in Beyond the Manual with settings.
You said essentially the same thing except included PG projects with non-default settings needing to go into Beyond the Manual.
Let me see if this is correct:
If it’s made on a Glowforge and it doesn’t mention settings it can go in the Made on a Glowforge category. Materials don’t matter if settings aren’t mentioned.
If it’s made on a Glowforge and it’s PG materials and any settings mentioned are default PG settings (there are 5 right - 1 cut, 2 score and 2 engrave defaults correct?) then it can go in Made on a Glowforge.
If it mentions using non-default settings for PG material it has to go in Beyond the Manual.
Since there are no default settings for non-PG materials, any mention of settings for those projects must go in Beyond the Manual.
If you mention non-default settings that mention must be removed to post in Made on a Glowforge or moved to Beyond the Manual regardless of material.
For example I melted Trogdor onto a stone from the stone’s own material. I posted it in made on a glowforge and I did not mention any settings so that was ok.
I posted yesterday in “Made on a Glowforge” an engraving for a calf skin banjo head. I did not list the settings, which were miscalculated after 2 Pale Ales. Also didn’t discuss whether goat, calf or cat make a better head.
Not to split hairs but my #5 isn’t redundant, it can be inferred but was not explicit so I made it explicit.
BTW, I don’t think @Dan said we can’t discuss materials is his post above. He said we couldn’t discuss non-default settings. That’s different.
At the end of the day, we could distill the rules to a single one - don’t discuss non-default settings in Made on a Glowforge. The rest are there just to satisfy the people who want clarity in what’s allowed as well as what’s disallowed