I was reading some of the other other discussions on absolute zeros, positioning jigs, etc. and decided to give it a try. I just received an Amazon package and figured I might as well dial in settings for cutting it as well (0.1" focus, 200/60; speed may be able to be increased even more).
First, I checked the bed stability, and it wasn’t terrible. Front to back and side to side, it doesn’t move detectably, so I figured it was good enough to give it a go.
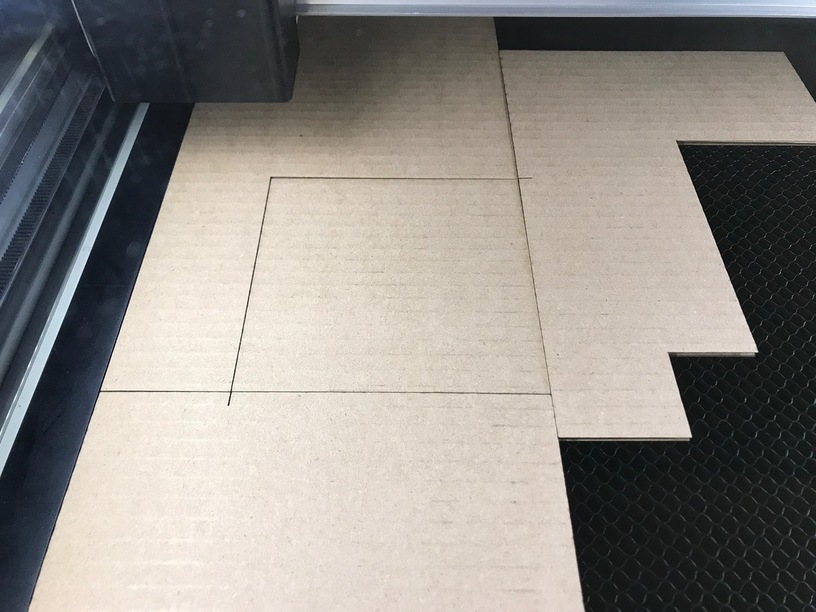
I cut a 9x12 rectangle with the laser, to get squared edges (9" was as wide as I could go with my stock). I pushed this back against the back wall and along the left rail.
Then I set up a 12x20 page to snap the GFUI placement to the origin and made two cuts 1" from the upper left edge, using some off cuts to prevent lasering directly into the bed.
I did two of these, removing and resetting everything in between. They line up very well, and all the dimensions measure what I would expect, as well as you can measure circles in cardboard. Perhaps I shouldn’t have used circles to test. Or cardboard.
I did try a printed paper test alignment, scoring crosses over some printed crosses, and it was close but not perfect. It is very difficult to align paper to corrugated cardboard.
Anyway, this method of jig creation does show some promise for being able to indicate objects repeatably across resets.
Cool! For the corner I am suddenly thinking draftboard or cheap baltic birch with embedded magnets. You could index the cardboard for each job to that, maybe.
Very encouraging. I was planning jigs for a few of the things I would be making. I have plenty of cardboard for some of them, so was thinking to specifically use those.
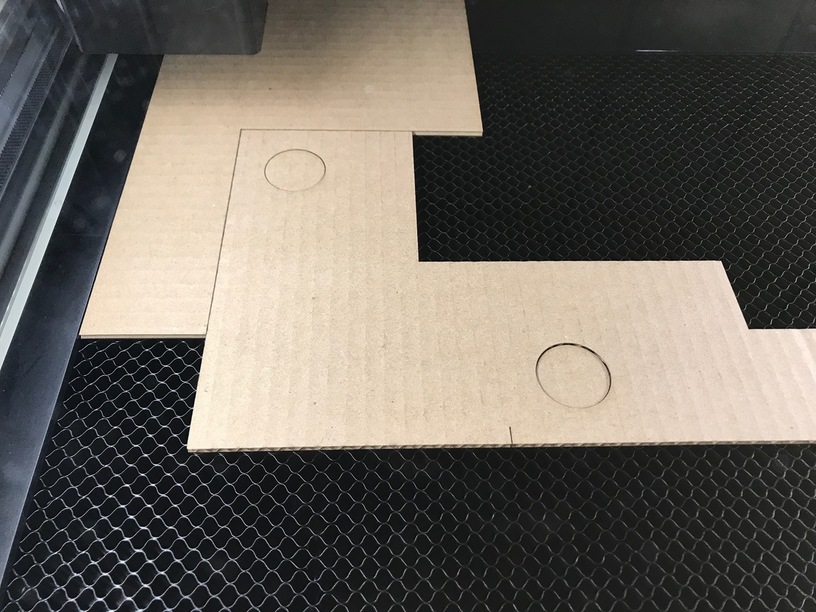
I wanted to run some engraving tests, and I happened to have a circular design and some scrap plywood circles from some previous escutcheon trials. They were pretty small, though, and I wanted the design as centered as possible. Then I remembered this jig I had made and that was still lying around. It had been a while now, though, and the bed had been removed and replaced several times since then, so I thought this would be a good opportunity to test how well it would work.
Check out the two small burn marks on the cardboard to the top left and top right:
Those were from a few pixels in the corners of my file that had survived through my workflow and got turned into scores. They landed almost exactly where they should have. I may have to try some draftboard jigs next.
The key to this jig is that it butts up against the back wall and left rail, and has been cut at a 1" offset to the absolute corner by the Glowforge. This lets me design in software in absolute coordinates, and can work for any job, not just as a specialized jig for repeatable cutting. Those should work even better, but I wanted to see how repeatable this system was, at least until they get the improved positioning running.
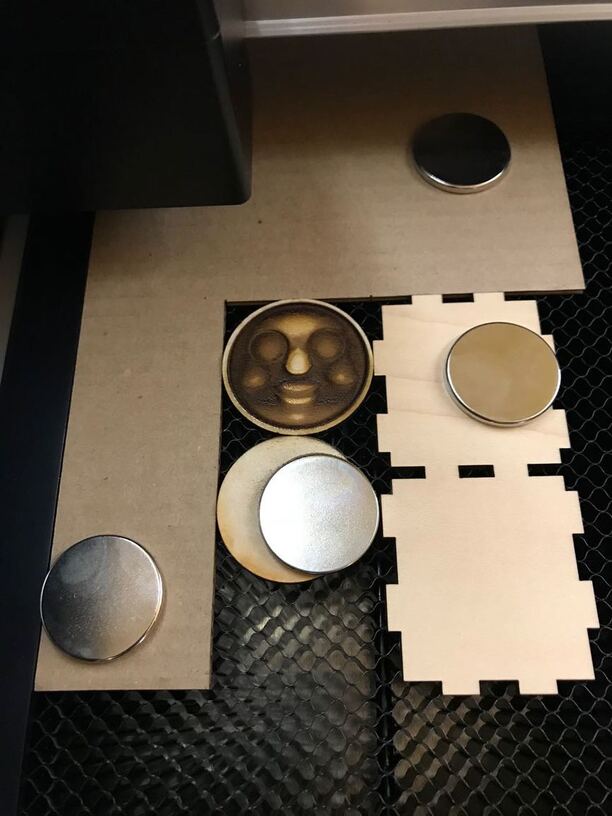
It works well enough to center two circles to within half a millimeter of error. That’s not great in CNC terms, but it’s pretty good for a scrap of cardboard.
I did the same kind of jig in birch ply for the machine at the beginning of time, when the bed range was a lot smaller. It worked really well - definitely within half a mm.
It’s not good anymore though, since the usable bed size changed, but it definitely beats trying to eyeball things.
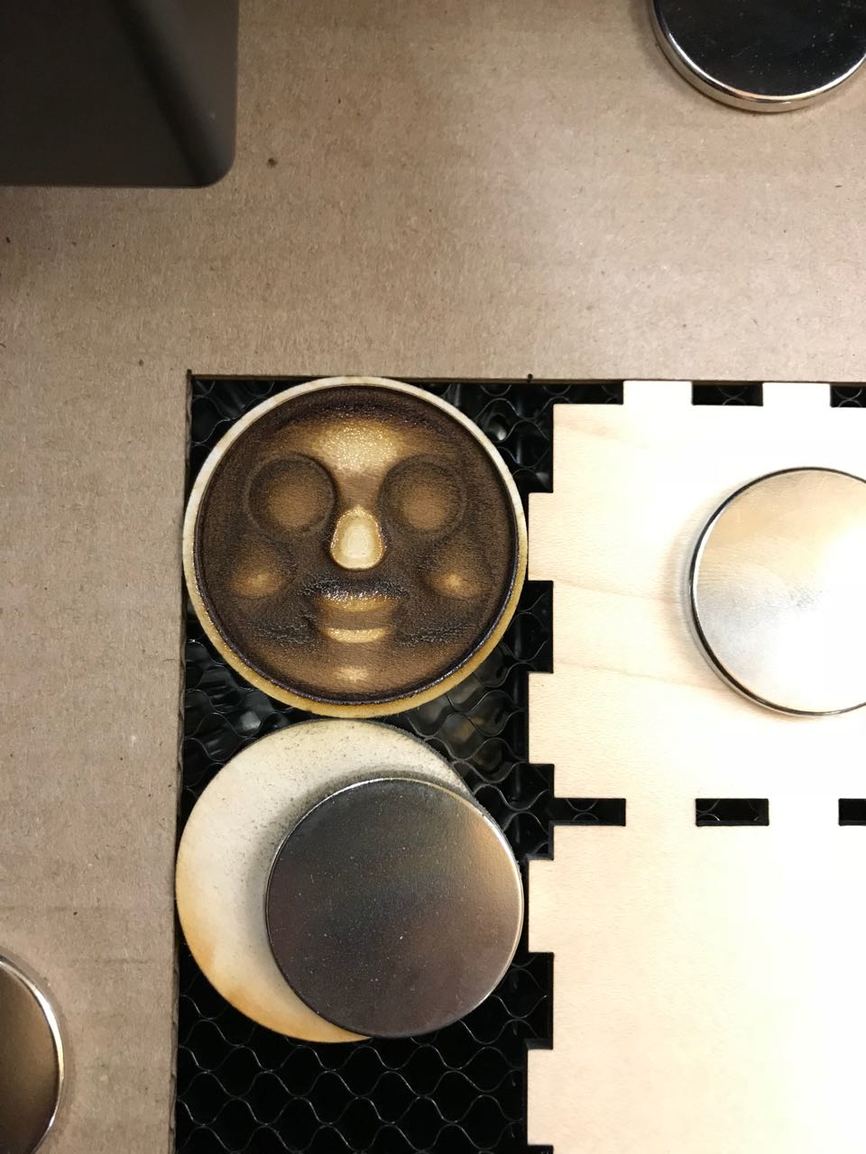
Sigh. It’s Thomas the Tank Engine. I figured out how to use Blender to get a heightmap image from an STL, which is the reverse of what almost everyone else on the internet seems to want to do.
You should be able to shoot a couple new cut lines on that jig since the area got larger. No need to do an entire new one. Just keep making the cutout bigger every time they increase the usable size.