Thank you for for all your help in the past. I now have an issue that I don’t seem able to fix on my own or with looking up existing stuff here.
My air assist fan never got cleaned because I was unaware it existed after nearly two years. My material started getting scorched so I looked on here and found I needed to take the laserhead plate off the laser arm and clean the air assist fan.
I did and everything seemed great! No more flair ups.
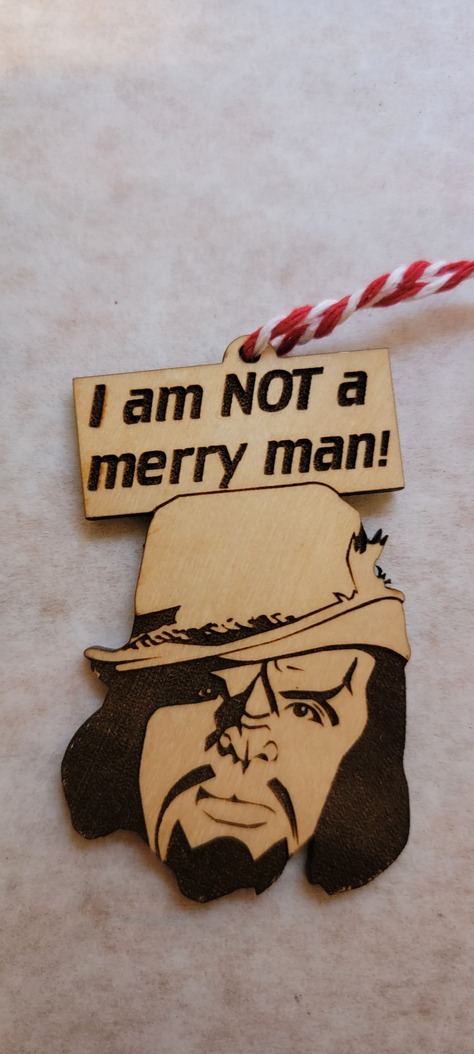
This is the first one from a year ago. The lines look straight, like on the top of the hat, under merry man.
So I cleaned the lens, the bottom of the laser head, the side mirror on the left, and tried to air can spray any bits I could see. It still did it. So I took the laser head base off the arm again, tried to re tighten the wheel on the right, and it seemed the same.
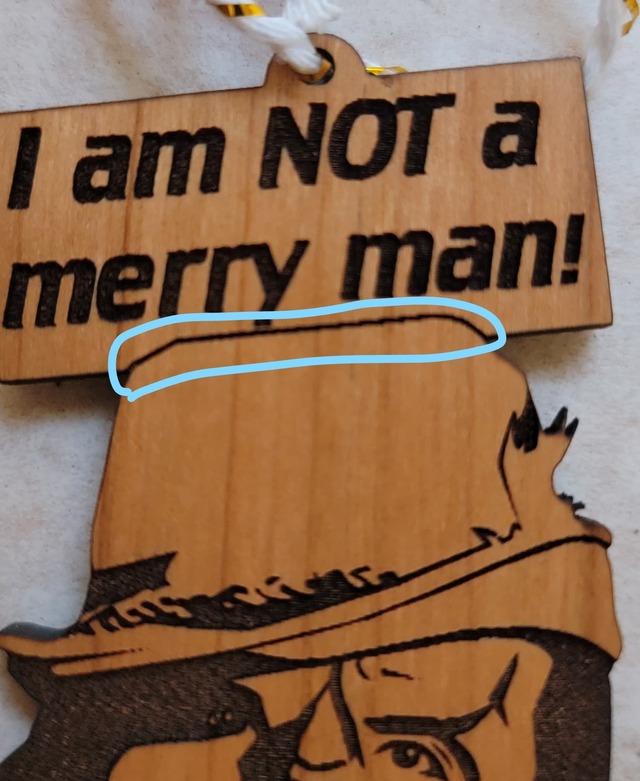
So I repeated the process of taking the plate off the laser arm and now it seems worse with a slight ghosting effect?!
I checked online and everyone says to check the belt to make sure is tight enough, but I feel like the more I tighten the worse it gets. Could it be too tight?
Where can I check for debris issues?
This machine has served me well for a good while now and now I’m really stressed out haha.
If someone could help me I would really appreciate it. This is the worst time for this to happen haha.
So I untightened the right side wheel, re tightened it and did it less this time. Now its not blurry anymore, and it looks a lot better. It’s still not perfect like it used to be.
I’m guessing that the tention needs to be just right for this to be perfect?
I believe it needs to be pretty close to “spot on” and that the faster the engrave speed, the more important this will be to reduce variations in the engraved image. Also, make sure there are not cracks in your carriage plate wheels and that the belt is in the correct space of the pulley tensioner.
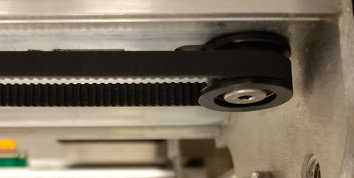
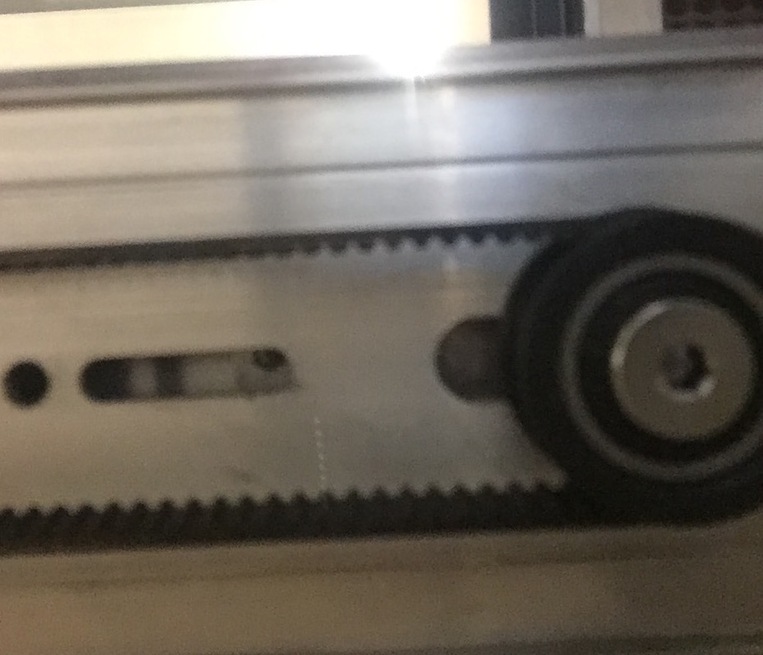
I have seen instances where the belt was not in between the two ridges of the wheel. In this picture, the belt is in the correct position, not riding on one of the edges.
So it does definitley feel like the tension needs to be very specifically set. I tried it again, and it got better, then tried it again, and it got worse. How can we tell whats perfect tension?
Support will have the definitive answer on that. I have never removed the belt by removing the bolt, so I have no direct experience. I think one really good way would be to look at the support photos close up, and try to move your wheel such that it duplicates the placement. Here is what mine looks like having never been removed or loosened. Using a mirror in the bed as you try to do this may be helpful.
My name is Mercedes and I’m part of the Technical team here at Glowforge.
I’m so glad the people here on the forums were able to get you back up and running so quickly!
I’m going to go ahead and close this forum post now. If you have any other questions or need help with anything else feel free to send a message our way by either creating an email ticket or a new forum post!