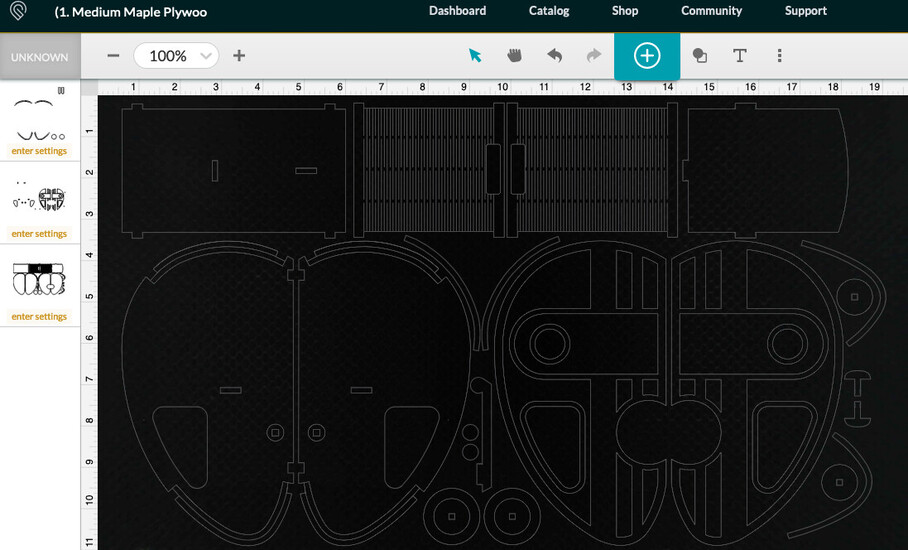
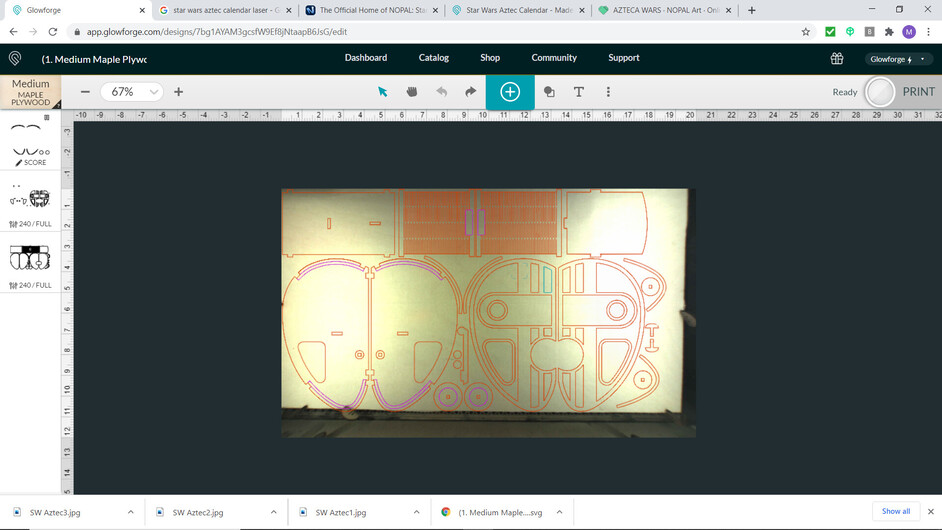
Hi. I downloaded the desktop trailer design from the catalog. As you can see in my screenshot it is too big for what shows as my printable area. I am not sure how to handle because if I make it smaller the slots will be wrong size I think but not sure. I also am more concerned with my my printable area is too small. The design shows as approx 10.7" tall and I thought the printable areas was 11 something inches.
If you are using PG materials, or other ‘heavy’ stuff (acrylic, wood, fullsize leather sheet, etc), then you should not need to hold the material down. If it’s already warped/curved, I would recommend a different piece for this project.
Once you start using only partially-used-up sheets (large scrap), then there will be enough interior and exterior locations to place pins for hold down.
Sometimes a warped piece is your only choice. In that case, I’d put the worst corner anywhere but lower right, and use magnets and pins. Once, I cut the design in stages so I could make room for better holding capacity near the worst area.
And you are correct, the Basic and Plus do have a limit in the height. I’ve had to rethink some of my designs and make the planned cutting area 10.5" high.
Oops, I didn’t realize you had a Pro. I was assuming folks who have one would be using the pass through device for stuff longer than a regular board. Use the Search function here in the forum, there’s probably a discussion of design size limits for the Pro, and how to use the pass through to do work 11" tall. (Y’know, short for a Pro, but tooooo tall for a Basic or Plus.
It’s also possible that after opening the file, you inadvertently resized it a little—not hard to do. If you want to be sure to have the accurately sized version, you could go to the three vertical dots menu item, choose Design Details, then choose Reset Design.
I see that the community has provided some good advice on the next best steps. I’ll keep this thread open a little longer, and see if any of those steps helped. Let us know how it goes!
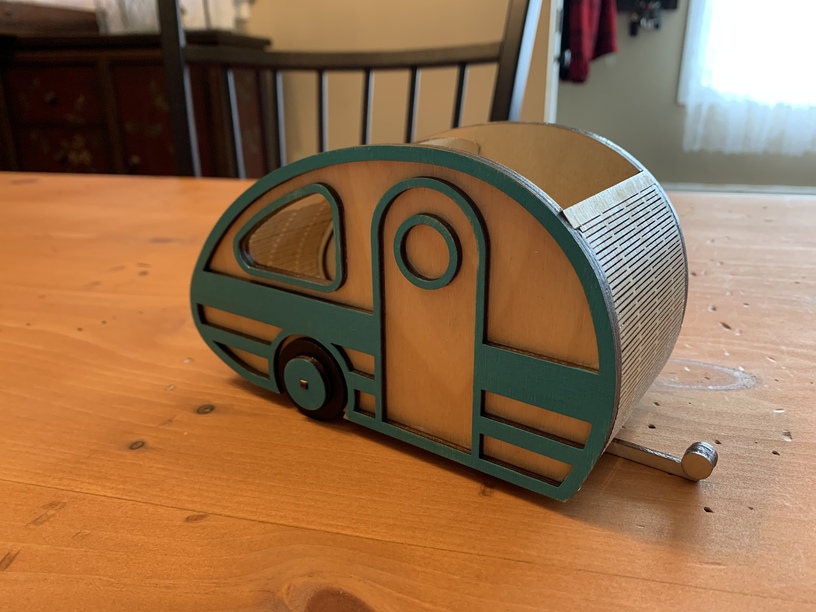
I have a pro model and was able to fit the design perfectly on the bed without issue. I printed it on Proofgrade maple plywood as suggested. I tried hold down pins (as I had an older board I’d allowed to warp a bit), but realized they wouldn’t work with the design.
Admittedly, I did make one mistake during a first run. I manually moved the laser head to tape the board to the bed and forgot to reset (turn off/on the machine) before printing. Um, yeah, don’t do that.
I hope the suggestions folks offered help and everything works out for you! I just adore the little camper design.
Hey there @mrtoad, I’m so glad to see you were able to run the print, that is great news! The design turned out great, and I love the touches of color!
Since the issue you were having is resolved now, I’m going to go ahead and close this thread. Please don’t hesitate to reach out again should you need assistance.
 Um, yeah, don’t do that.