Cathedral Wine Box

Continuing the discussion from "Sacred" Wine Box:

I have been wanting to do this project and @rgrannan’s file was very helpful to get some ideas on what to do. I’m not done with it, especially as I haven’t added engraving on the acrylic windows yet since I had to get a commissioned piece out the door and to St. Louis before a Wednesday birthday. The engraving really finishes the design and I wish I would have had time to do it.

I like the detachable top and I like the layers and lines. I’ve been thinking for the past year about how I would layer things. With the Draftboard, that allowed me to do an inner lining for added depth and assist in the fit of the top. The liner glues onto the inside of the Proofgrade outer layer.

I used the Inkscape Laser Tools tabbed box maker to start from scratch. It went well, except for a first print hiccup when I didn’t realize my gantry was still skewed from and earlier nudge while under power. So that goof meant I didn’t have enough cherry to do the whole piece as I wanted. Maple looks fine though.

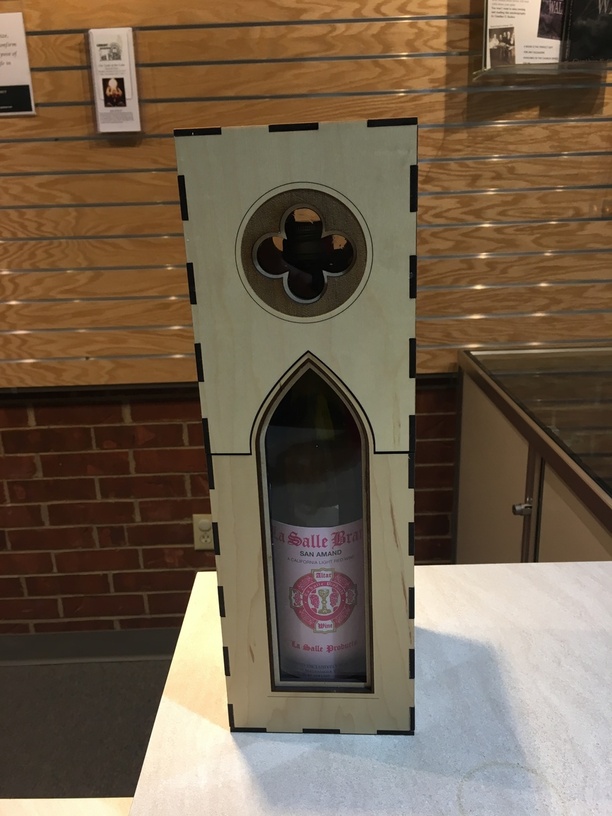
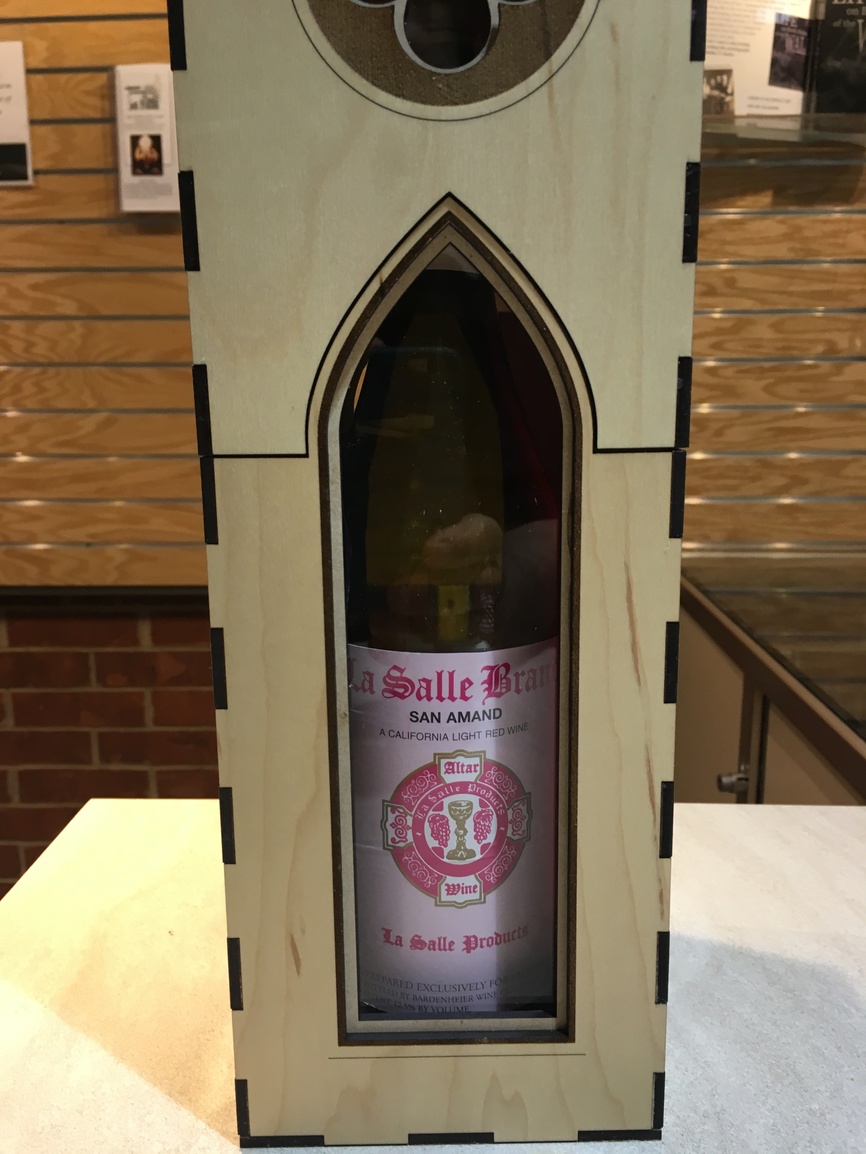
I’m calling it the Cathedral Wine Box because it’s big to fit a larger, thicker red wine bottle if necessary. I will make a smaller version that uses the existing material sizes more efficiently.


The red was acrylic from Inventibles before Glowforge started stocking it. as is the blue.

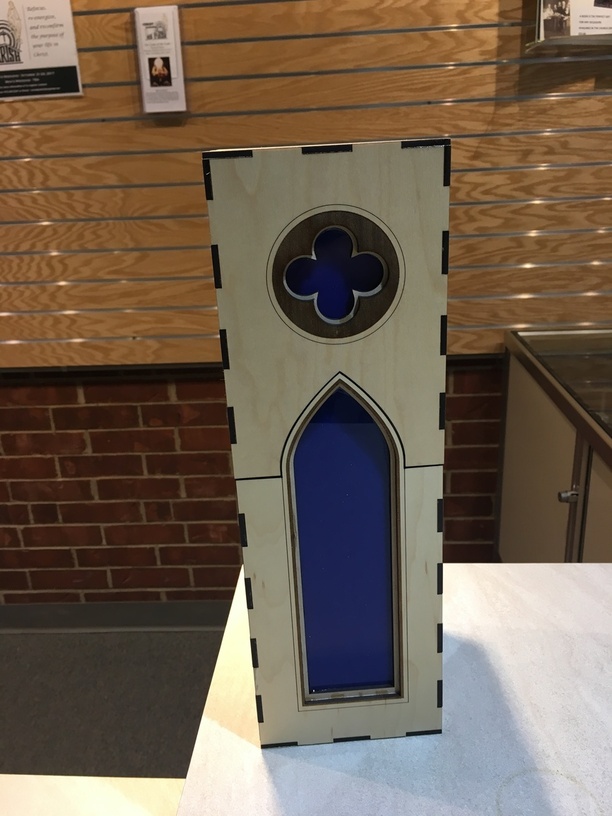
For some reason I missed two score lines on either side of the opening on this clear acrylic window side. Didn’t notice it until I took the pictures this morning before I sent it on its way. Rats.

WBRoseWindow

I really like the score function now. Nice to have such power control.

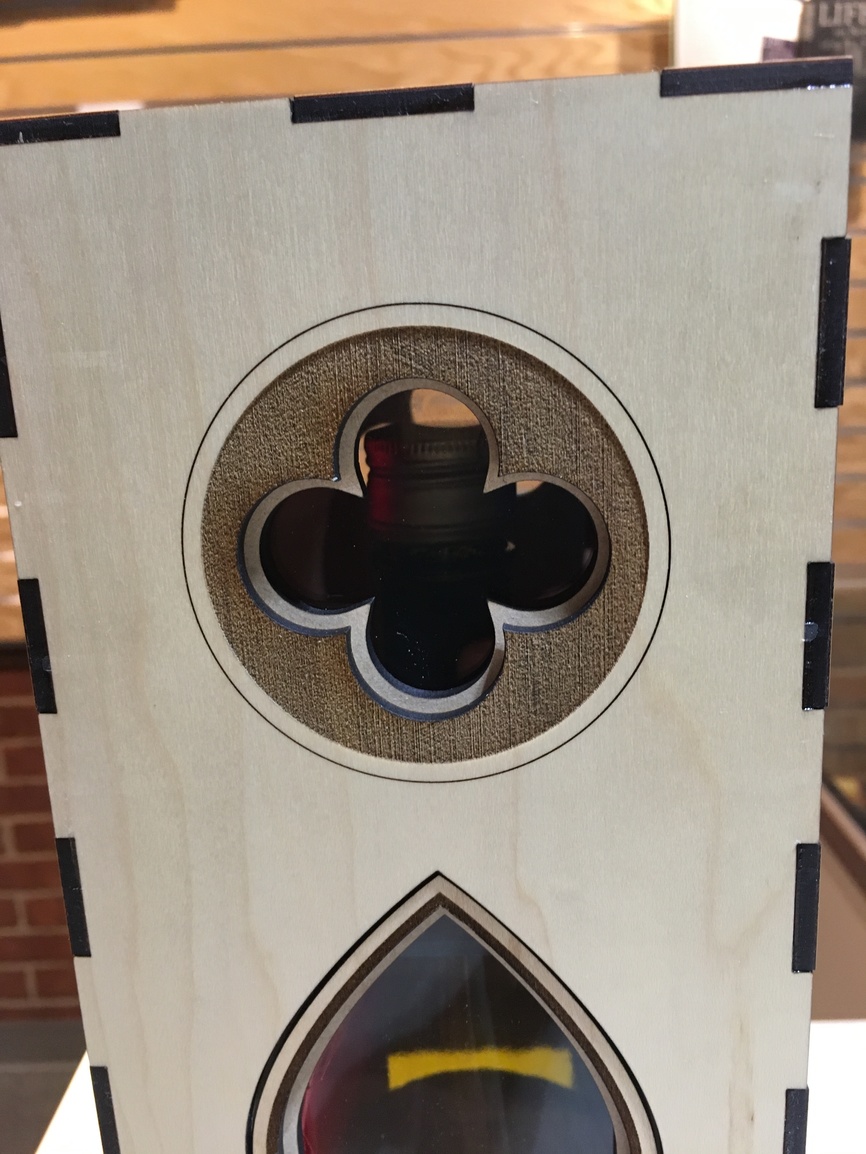
The engraving took a long time but it did allow me to get a bit more contrast without adding a fourth layer of material.

WBFrontLower

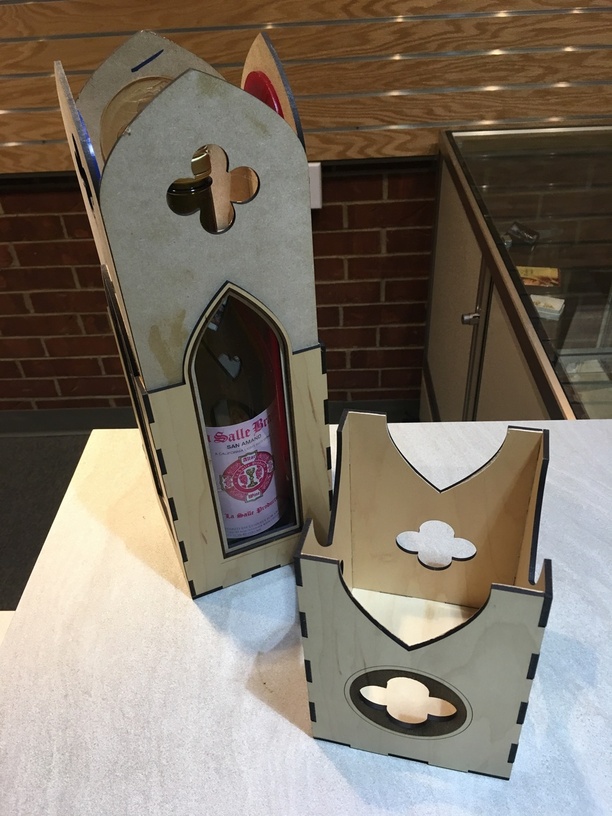
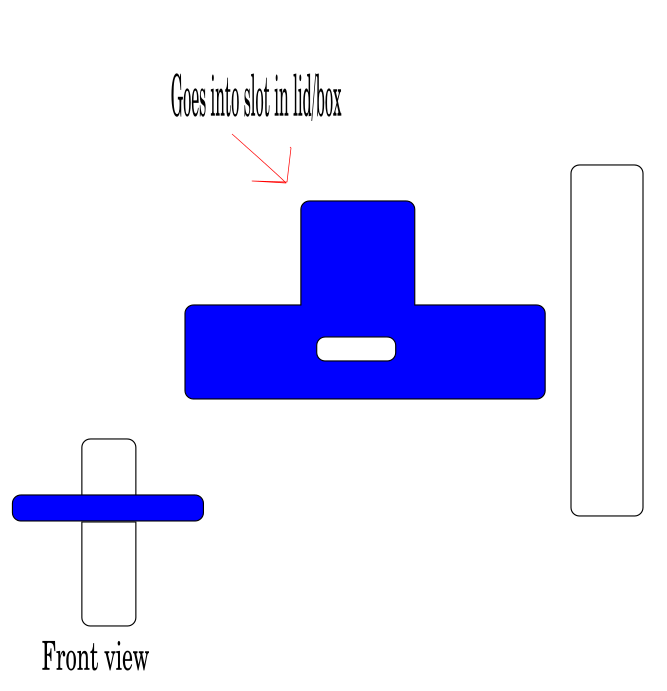
Here’s how the top fits on it. Its got for inner sides that have cuts to add one more layer and then to put the acrylic on to.

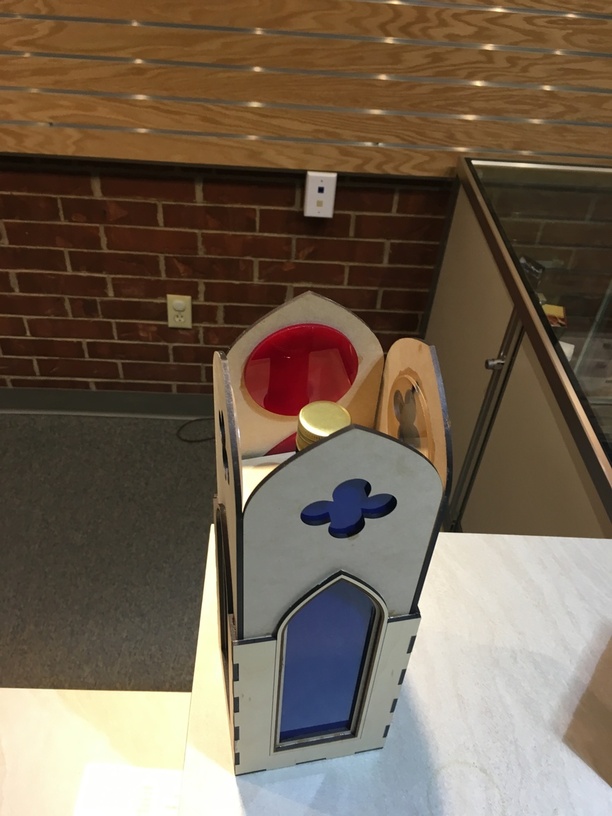
You can see how the acrylic is glued on.

First time using Draftboard. It really is good stuff. I’ll be using lots of it.

The bottom has two layers with larger circles on it to keep the bottle from shifting and there is another square with a smaller circle to act as a collar for the top of the bottle to keep it from tilting.

I put it all in one file with a bunch of different colors and made copies of the pieces I needed to. It’s pretty complicated since it has scores, engraves and cuts for several different pieces and materials.

So I broke it down into three files, one for each material: [fixed the orphan objects! Thank @cynd11!]
WineBoxCathedral

Dark blue cut. Aqua blue cut. Purple score. Yellow engrave. Print this twice, but the second time leave off the top and bottom squares.

Draftboardinsertboxwine

This is all cut. Do this one twice also but for the second one delete the squares with the larger holes and cut the square with the smaller hole.

AcrylicWineBox

Do all clear acrylic or mix and match colors, whatever you want. These are the acrylic pieces that are glued onto the draftboard for the final inner layer.

So it’s nice to be able to post something new after a long time.

84 Likes

I really like that design.

5 Likes

Crazy good! I like the clear window so you can see the bottle inside.

4 Likes

Wow, another one out of the park.

7 Likes

They turned out beautifully! (Still love that design.) :grinning:

Did you remake the design, or use the original one? I like the liner inserts idea.

3 Likes

I remade it from scratch. Somewhere along the line there is an extra operation in the outer shell file. It has to be very small. I’ve tried to find it. Checked outline mode. Even let it print but I can’t find the hidden object. It’s an engrave, so something filled. I give up. Let someone else sleuth it out.

1 Like

Try hovering over the thumbnail for each operation and let it light up. Sometimes there’s a little stray mark that sets up as a different operation if it’s a slightly different color, or sometimes they show up outside of the artboard.

Probably just a little mark somewhere. @davidgal2 saw one on one of his a while back, IIRC.

Looks great! :grinning:

3 Likes

Too small to see, at least on my laptop screen no pink shows up at all nor teal in the setup screen.

1 Like

I don’t see it either…must be really tiny. :slightly_smiling_face:

What a fabulous box! Really special occasion. I’m sure the recipient will love it.

The extra bits are near the left hand loop of your cloverleaf design on the lower of the two pieces. There are actually two, if you zoom way in (hide the yellow fill to make it easier to see). Dark blue fill color if that makes it easier to find.

8 Likes

Nice project! Great gift idea, and wonderful of you to share it with us in free designs! The layers work so well in that.
So the upper bottle brace floats on the bottle neck?

I know you are enjoying the power control that was missing from the other 'forge. Considering that limitation on the first unit, you sure managed a bunch of neat stuff!
(On a side note, I lust after that slat wall with the aluminum channel trim.)

3 Likes

Yay @cynd11…good eye! Good catch! ( I just found out that if I don’t use the ‘@’ symbol with your name…it spells cyanide)

6 Likes

^^Great laugh!

5 Likes

Eeeeeek!

5 Likes

Is it sacrilegious to use this for house warming gifts of wine? :rofl:

1 Like

Thank you so much. I was going nuts trying to find it.

Yes. It’s a snug fit inside the liner but doesn’t wedge it apart. I do have to come up with a solution to keep the top from slipping off if you grab it just by the top. It’s tight but the bottom will slide out with a full bottle of wine in it.

Our sacramental wine is a bit sweet for me, but the folks don’t like drier wine. I have been known to go get a bottle from the sacristy if I need wine in an emergency, :smile:

8 Likes

!st thing that comes to mind is the ‘snap fit’ design where a prong on the top or bottom would snap into a slot on the other half, and you depress the tab to unlock it. One of those on each side should do it. :sunglasses:
Should be able to retro fit that into opposite corners of the box to clear the bottle.

4 Likes

I love it! I think it’s a great idea to use engraving to essentially create an additional layer without having to use up more material. The lid sliding problem is one that I didn’t really get to thinking through. Your design at least gives you more time before they seperate.

2 Likes

You beat me to it! I’ve been really wanting to make some of these as well!
Looks great, you did a nice job on these!

2 Likes

What if you just had an insertable tab that went though lid and base (think peg?) you could make it a cross on either side of the window? This is with 2 pieces the tab on the blue piece goes ito the wine box and the white piece just goes through that slot in the blue piece. You’d have a “floating cross” just off the surface of the box. (although this quick 2 min sketch/idea would need to make the white piece stop from dropping throgh the slot - maybe mild taper.

7 Likes