As klutzy as I can be…it’s a real possibility. 
(You ought to see the perfect set of stripes Demon just left on my arm when I didn’t set her down quickly enough to suit her…she shows real artistic promise.)
1 Like
Inspired but ill equipped, I did my cleaning with a light, a straw, Windex, and q-tips. I did manage to complete the task without losing anything into the bowels of the machine, and just fired up a test run. Seems so much quieter!
3 Likes
Mine got a whole lot louder. About 2 minutes into an engrave I realized that the exhaust hose was still off.
16 Likes
Hah, classic!
3 Likes
HEY! That belongs in the restricted #FanPorn section!
10 Likes
This is something I will def. NOT attempt 
3 Likes
Well, I have to say that your procedure is spot on @jules!
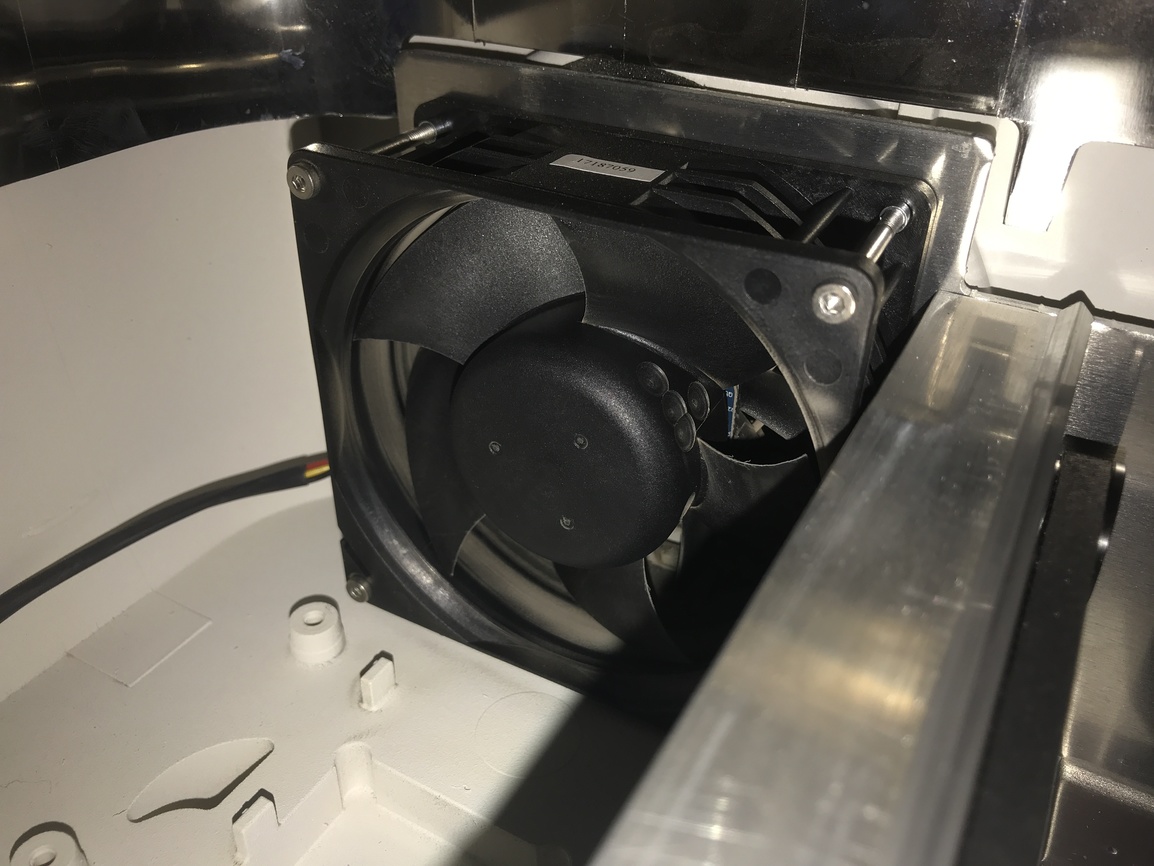
Yesterday for the first time in over 1 1/2 years of lasering I got the dreaded orange button and labored fan whine noise. Eek! I never cleaned the fan on the PRU (feeling sorry for whoever had to clean that one up) nor on this machine, so your writeup was extremely timely. I fortunately have (well, okay, my husband has) a video inspection camera with its own LCD screen and light (it’s this one but I don’t think they make it any more) and boy did that make the job easier–I just can’t get my eyeballs down in there on my Pro. I didn’t have the long cotton swabs so I used bits of cosmetic sponge held in place with long locking tweezers. They are softer so I had to scrub harder–gonna get me some swabs for next time. It took about 1 1/2 hours and I was dripping sweat all over the machine since the humidity is so high right now, but I got the job done. Let it dry overnight and just tested: sweet! It’s back to its quietly humming self.
Thanks so much!
8 Likes
Awesome! 

Yeah, mine was so much better after her bath too!
1 Like
I’m genuinely jealous of how clean and lovely that is.
3 Likes
You really need to fix that!
11 Likes
So if you are wrong about being right, and right about being wrong then does that make you always right?
1 Like
No, because I was wrong about not being right. Wrong is wrong! 
5 Likes
Thanks for taking the time to share all of these important details!
3 Likes
@Jules Can’t thank you enough for this! I previously went through a warranty replacement on my first Pro for the same noise and vibration, and was gearing up to have to do it again on my newer machine. While awkward, yes, this worked out great. I do envy the easy access those without the Pro have! Let’s hope future models have better access to clean or replace the Pro fans.
4 Likes
I want to point our a key element of cleaning the fan that in my opinion made all the difference.
I was getting more and more smoke coming out through the machine and after tearing my ventilation system apart and rebuilding it I was frustrated to still see smoke pouring out the machine when I ran any cut.
After eliminating the ventilation as the issue, I cleaned the fan (thankfully on the basic unit so fairly easy) with some iso alcohol and a cloth and it was clean and spinning correctly but still after testing with a low power cut and the exhaust hose off I found the volume of air being pushed out by the machine was not what it should be.
I ran a shop vac inside and out of the fan and while the fan spun cleanly I noticed when looking into the exhaust port that some of the holes in the honey comb grid between the fan and the hose were blocked and running the vac over them was not making a difference.
I poked at the holes with a pen and when I did the compacted dust that was packed inside each broke apart and was able to be sucked up by the vac. I spent about 5 mins doing this to all the holes and after reconnecting everything and running an engrave - I found the exhaust system to work great again and I could cut again with no smell or smoke or fumes. The air quality monitor I use sitting on top of the glowforge did not even register a difference when it was turned on.
Its working so well again that I cancelled the 200CFm inline booster fan that I had just ordered in the hopes of solving my issue.
So moral of the story is make sure those honeycomb holes in the grid between the fan and the exhaust outlet are cleaned regularly
Hope that helps someone
12 Likes
It does…that’s an important one to keep up with too.
2 Likes
I put one in when my exhaust fan stopped working at all in spite of being able to spin freely and more to the point when the Glowforge is not cutting anything it pulls fresh air through the machine keeping it from heating up from just being on. it also exercises the exhaust fan when the Gllwgorge is not running and I think helps when it does go on.
2 Likes
On the Basic this is really easy - no heatsink in the way.
Mine was abslutely full of crud and was making a horrible grinding noise on startup. SO glad I found this.
I scratched mine mostly clean with a bamboo stick and it has made a huge difference to noise and to air flow.
Will be doing a proper clean with wet Q-tip next.
1 Like
So after seeing this thread referenced on another thread, and after having just spent an hour cleaning my GF, I’ll add this to the monthly chore (ordered the camera - that will come in handy for a LOT of other things!).
But it makes me think about a few things.
-
Design - This seems like poor design to me if it’s a part that may affect how the unit runs / performs. Certainly GF doesn’t want people shipping back their units for a busted fan from build up. Why not just make the exhaust ring on the back removable to get at the fan easier? Granted the Basic users can get to theirs, the Pro users (myself included) should have a way to get at the fan to get it clean or easily replaced. I get the case has the duct molded in, but this seems like a poor design.
-
Design again - WTF is up with all of the wires / connections / stuff that other build up is affecting?!?! That should at the very least be shielded from debris hitting it with a simple piece of plastic. Granted not everything would be protected, at least it’d save it from SOME debris buildup.
-
Cleaning technique - thanks Jules for outlining this. You’d think on some level GF would want to cover this, but yes it’s pretty dicey getting in there and doing this so not something the average user would do. I’m the kind of guy who rips apart appliances, washers / dryers, to fix / clean stuff so I’m not afraid, but you’d think they’d want to make this easier?
Kind of a rant, I just don’t want Zippy breaking down. And now something ELSE to do other than cutting / engraving. ![]()
EDIT - didn’t see this thread:
Should have put my comments there!
6 Likes