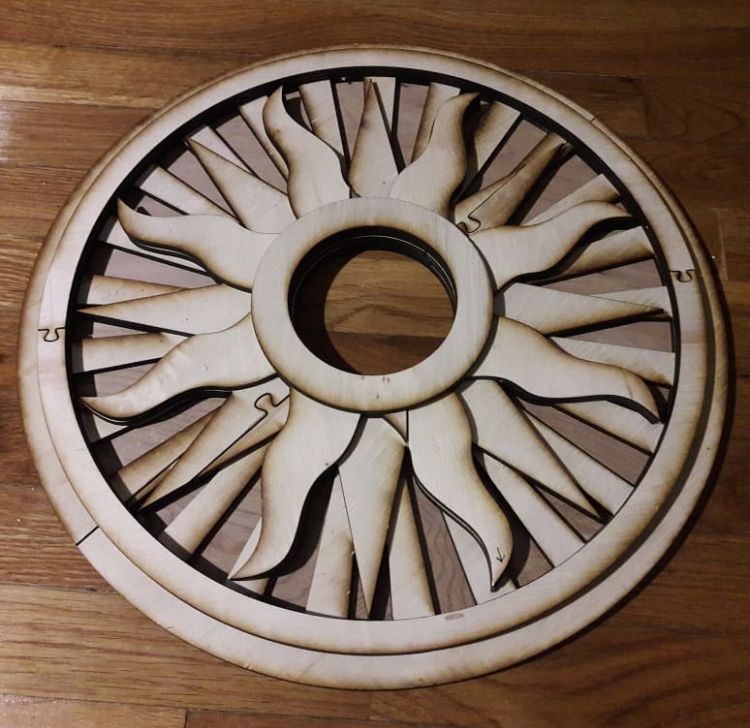
The medallion is made from 1/4 inch plywood and designed in Illustrator in layers. Each layer was cut in half with a puzzle piece tab to make it easier to fit them together before gluing. I chose not to use the passthrough because I knew I would paint it and I was lazy.
The pieces were laminated together with wood glue and clamped and clamped and clamped some more. There are six layers (I think) to give it the depth we wanted.
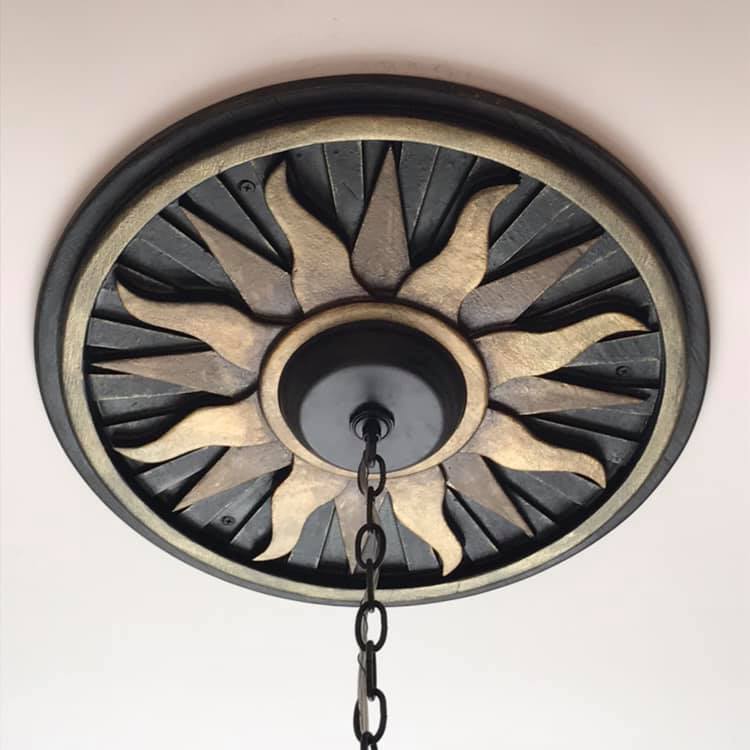
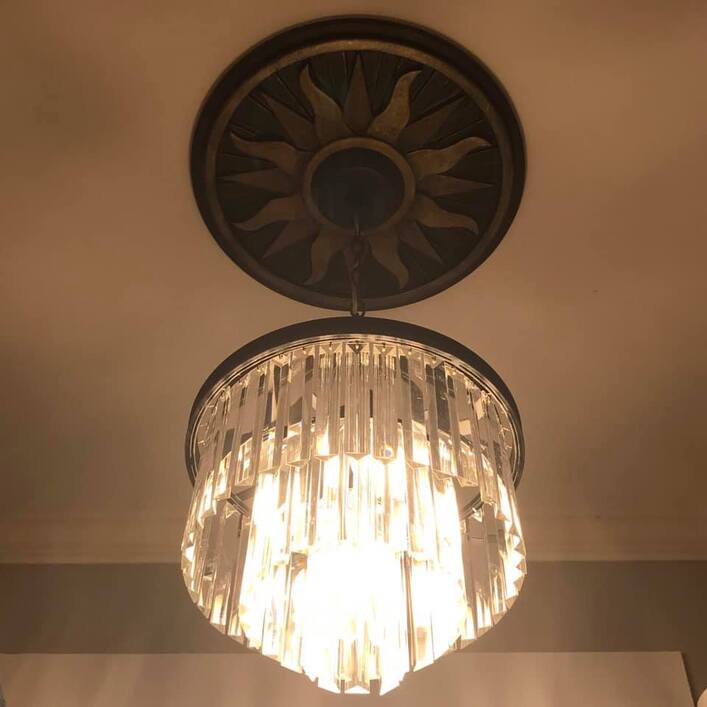
After the glue dried, it was scraped and sanded lightly to clear off any squeezeout. Then the whole thing was coated with a layer of XTC-3D resin to help encapsulate it and cover some of the wood grain. Also, this helps it not to warp when I take hot showers. It has held up well for the last 6-ish months. It was then painted a rich deep almost black brown, and the gold was dry brushed over the top.
Not counting @polarbrainfreeze’s skyline medallion, this is the biggest escutcheon I can recall. Very nice look. Building up layer by layer with parts is good to get this depth. Nice color.
One heck of a first post! How many coats of XTC 3D did it take, and did the wood soak it up? I have some leftover from my 3d printing days but never thought to use it on wood! But that looks amazing!
Thank you! I think there were only one or two coats. However, if I were going to do it again, I would use a sanding sealer first and give each layer a nice light sanding to knock down any grain that wants to lift. I think the unsealed wood was not the best idea because that allowed the grain of the wood to lift a little more than was expected and was a little against what we were going for.