So i have a confession to make…I’m a lazy crafter and a perfectionist which is a terrible combination! Anyway I am looking for a suggestion to mark a wood cutting board to make sure my designs are centered. There has to be some kind of chalk pencil or something that is easily removed after the design has been cut. If things aren’t perfectly centered it drives me crazy! Suggestions appreciated!
10 Likes
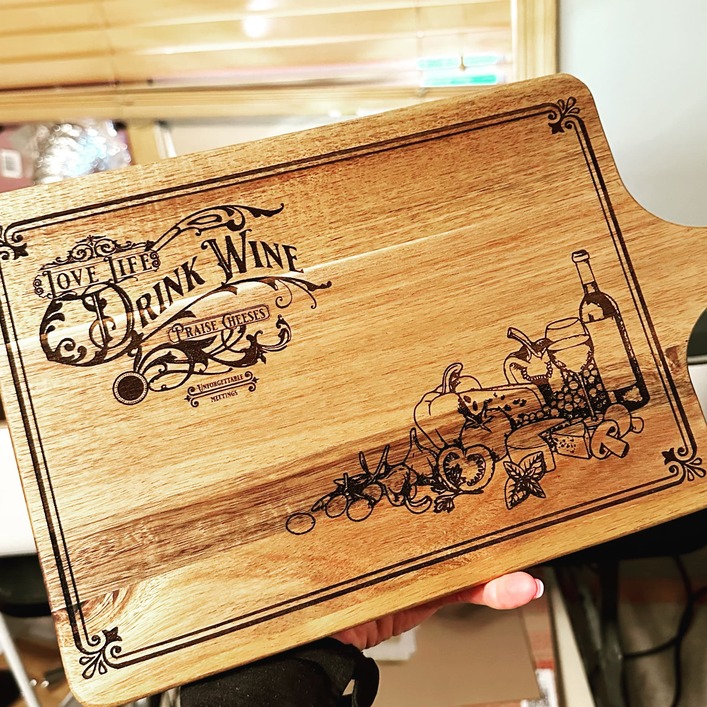
That is a very nice piece.
The first thing is to make sure that the camera is calibrated. Then you have to have the top of the board at the correct height and use Set Focus at the lower right corner and the image there after set focus has been achieved. I will often use set focus multiple times until it quits jumping if the placing is critical.
6 Likes
One thing some people do is mask the blank, set power to a very low number that only marks on the masking, then do a test print (maybe an outline of the design? set to score) to make sure it’s aligned as desired.
Edited to add (because I guess I didn’t finish my thought, oops lol):
If it’s not aligned right,
then I would adjust and retest
(or if needed, redo the masking, though I’d imagine you could get away with a couple of tests before having to redo the masking)
Once you get it right, don’t move it! Then just proceed with the print.
8 Likes
I do what @trually describes…only get one shot at it!
5 Likes
I put a small square of blue tape in the center of the board, do a quick pencil X by running a ruler along the diagonals and then use that to center my artwork in the GFUI after I’ve done the Set Focus (also using the blue tape as the target of the Set Focus).
3 Likes
My first choice is always to do a cheap throwaway jig out of cardboard (in addition to set focus of course). It’s the quickest solution for a lazy person like myself that still wants accuracy. If you haven’t done this before, there are lots of forum posts on jigs. In this case, I would use a vector program (or really it could be done in Glowforge Premium using rectangles and the outline function) to create a shape that your cutting board will fit snugly into. Center your design within this shape. Place large sheet of cardboard on bottom of bed, score or cut outline while ignoring your design, then place cutting board into cutout (or within scored line), ignore cutout, set focus on cutting board but do not move your design even if it seems off, then engrave.

6 Likes
This topic was automatically closed 30 days after the last reply. New replies are no longer allowed.