Found some beautiful chalkboard sheets on sale at Home Depot. Anyone have any suggestions are where to start settings wise for cuts and engraves? Thanks!!!
4 Likes
Ohhh, it’s lovely stuff, and I have lovely settings which are currently out of my reach because I can’t yet navigate the stairs with my newly sliced and diced ankle.
Ahhh, my awesome husband is going to go retrieve my handy chalkboard chip for me; I’ll have them in a moment. In the meantime I’m going to move this to Beyond The Manual to comply with the forum rules about discussing non-PG settings.
Stay tuned! 
8 Likes
Okay, got them!
If it’s the same stuff I have, it measures 0.19". It cuts beautifully, and your cut edges will be pitch black just like the chalkboard, which is extremely useful. I’ve primarily used it for jewelry stands and holders.
I use 125 speed and full power (basic) for cuts. I haven’t done any scoring, now that I think of it, so I don’t have settings for that, sorry!
I’ve only engraved it once or twice; that was 1000/full at 195lpi. I didn’t find it as satisfying for engraving. The engraved portion comes out dark brown, not a great contrast for the black, so if you do any engraving, I’d use masking so you can paint the engraves after cutting.
10 Likes
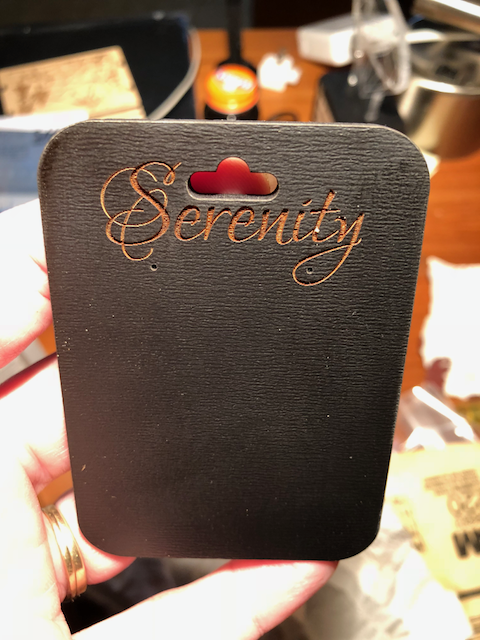
Here’s a photo of how it looks engraved. (I happened to have my earring card file loaded in the GFUI, so that’s what got cut for my initial test of the material.) 
20 Likes
You have made my day!!! Thank you!!! Your poor ankle!!! I had foot surgery a while back and the healing process was less than ideal lol. I hope you are doing okay!
1 Like
Yep, I was warned that it would be kind of arduous. But it’s meant to fix a lifelong issue, so it should ultimately be worth the trouble.
I was trying to find photos of other stuff I’ve done with the chalkboard. here it is with the “Springtime in Kyoto” pattern from the catalog (I use it to hold earrings).
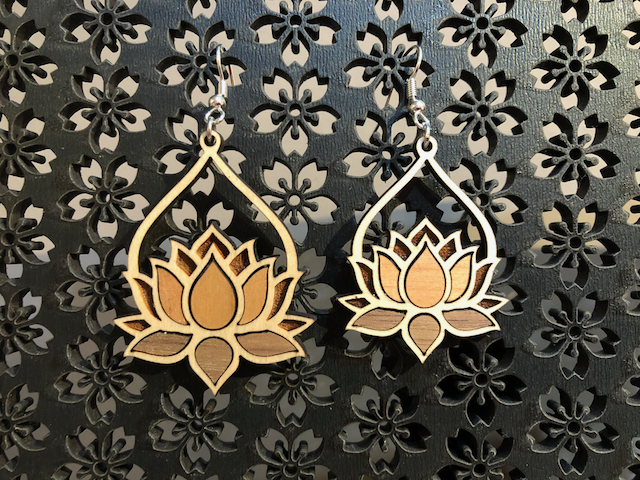
EDIT: Yes, I know they’re different sizes…I was working up a smaller one for shorter-necked customers!
This is a box I made with it for displaying bracelets. I actually meant it for the copper bracelets I make, but it works for the leather ones, too.
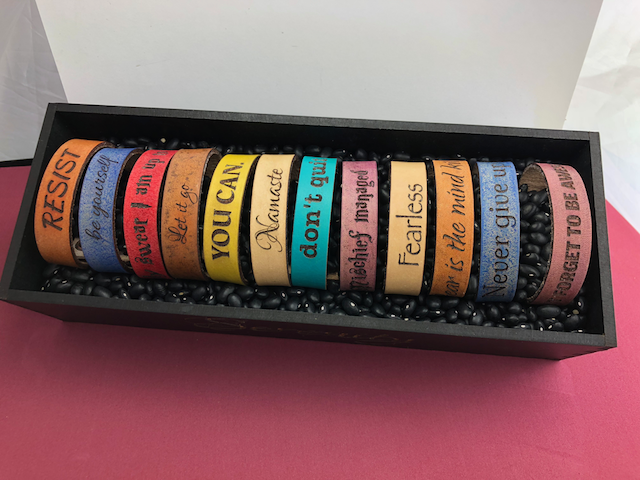
21 Likes
Like your use of the beans as a display aid.
John 
7 Likes
I’ve made a couple of things at 150/full on a pro. The nice dark edge is pretty, but surface cleanup with water makes a stink. I actually wiped the last piece down with febreeze!
4 Likes
Your work is LOVELY
1 Like
I will remember that one!!
2 Likes
Hi there! Where do you buy the leather for bracelets? Thank you for the chalkboard info, I’m getting ready to work with some today.
I used the PG leather from Glowforge. You can use any veg tanned leather, though. There are people on Etsy and eBay who sell scraps.
Are you only doing one cut at that speed then?
Yes, just one pass.
Is this the chalkboard with dry erase board on the other side?
Nope, just chalkboard.
They now have mdf that has whiteboard (dry erase) on one side and chalkboard on the other. It cuts really nice too.
3 Likes
that is a really clever display option!
2 Likes
what settings are you using to cut the 1/4 white board/chalk board?
145/full/1 Pass
2 Likes