With all the recent updates, have the proofgrade cut settings changed? I’ve never had a problem before with cutting through materials, but it seems like recently things have not been going through. Tried cleaning the lens but doesn’t really seem to make a difference. Engrave seems ok and the depth seems consistent so I’m thinking it’s not attenuation? Same issue in draftboard and acrylic.
When you say you tried cleaning the lense, did you clean all of the optics or just the lense.
Here is a good place to start. Making sure everything is flat and settled also.
2 Likes
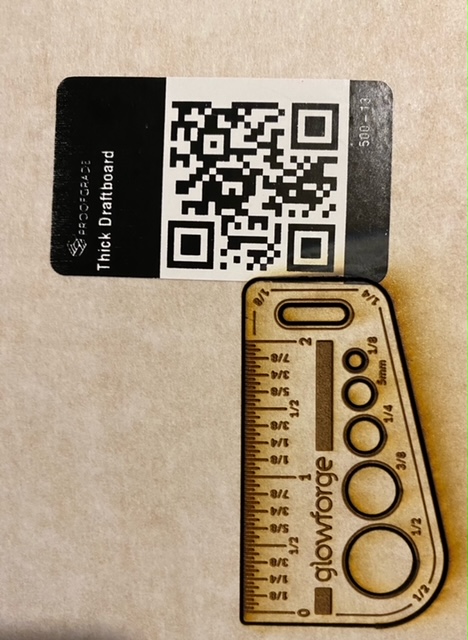
Welcome to the community. A staff member will be along who can look at your logs from the back end - but in the meantime you should print a copy of the Gift of Good Measure (GOGM) (it’s in your dashboard) on the spare piece of proofgrade they sent with your laser, then post the time you did it and photos of the front and back here.
Overall the PG settings haven’t changed - but they did make a back-end change recently that could have messed with personal settings…
1 Like
Appreciate it @deirdrebeth - not new to the community, but don’t post that often.
When I say cleaned the lens I meant all the optics, just like the post from @Thumper369 referenced. I also cleaned and reseated the crumb tray.
I’ve also printed the Gift of Good Measure before and had it work alright as far as I recall (though most recently in thinner material). The issue seems to be worse in the thicker material. I noticed on a recent simple shape cutout that the star shape actually had a taper to it through the thickness… if the issue isn’t the laser makes me wonder if the problem isn’t potentially something to do with the tracking and more “recent” speed up related (I’m using a Pro).
Printed another GGM just now (About 11:15p ET):
Here’s the front:
Here’s the back:
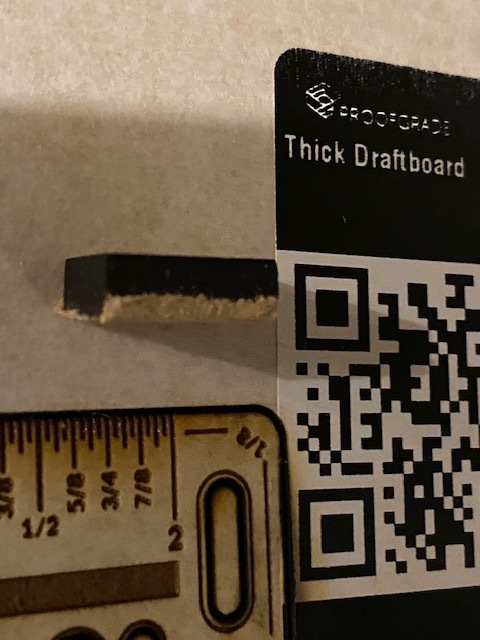
I also cut a small square out to just off the edge and got a rather odd result. On the initial burn through it almost went through the material, but as it passed around it appears to have only gone 2/3 of the way though with the default proofgrade settings. It sort of looks like the one edge has a taper to me; however it’s very difficult to tell if it’s an optical illustion.
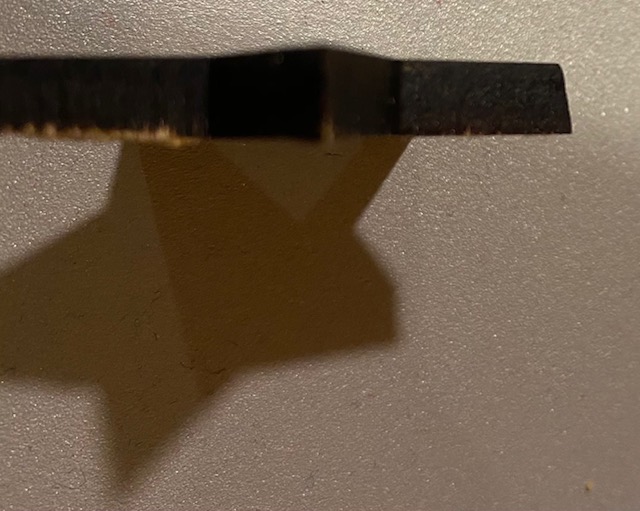
This is the star shape I mentioned - I had to run it through twice to get it to cut, when it did you can see at the tip of the star the taper I mentioned (also done this eve). I had to run it through twice to get it to cut completely through.
1 Like
Oh how odd - new email maybe?

Your cut looks really thick - another person is having that same issue right now. That’s usually either your lens being put in upside down (bowl should go up) or a focus issue (which shouldn’t happen when you’re using  )
)
Unless someone else has an idea you’re going to need to wait on a staff member who can look at your background logs.
2 Likes
A slight taper can appear on thicker materials due to how the beam is shaped, converges to a point and then diverges.
I find it odd that it seems like their focus is changing a bit. I believe the start point for the perimeter cut is about 2/3rd of the way down the left side (when it’s printed normally). That’s something you’d normally expect to see with warped materials. I’d expect a little difference in the cut because that’s a pierce point, but it seems to follow around the bottom and back up.


3 Likes
I checked the lens position when I cleaned and reinstalled it. Arrow is pointed up (into the head). There’s also only a lip on the one side of the tool.
That is interesting (if the other persons issue is the first photo). It might also explain the weird result in the square block in my picture. For that I ran it off the edge of the draftboard to see how far it was cutting through. When it went back on it never seemed to recover focus. So wonder if there is something weird there going on - like maybe the focus will go higher but not lower.
Anyway - appreciate the insights. Interested in what the guys say after looking at the logs.
Hello!
Thanks for clarifying all of the troubleshooting steps you’ve already completed.
I’ve taken a look at your logs and I would like to check over just a few more things. Could you please do the following for me?
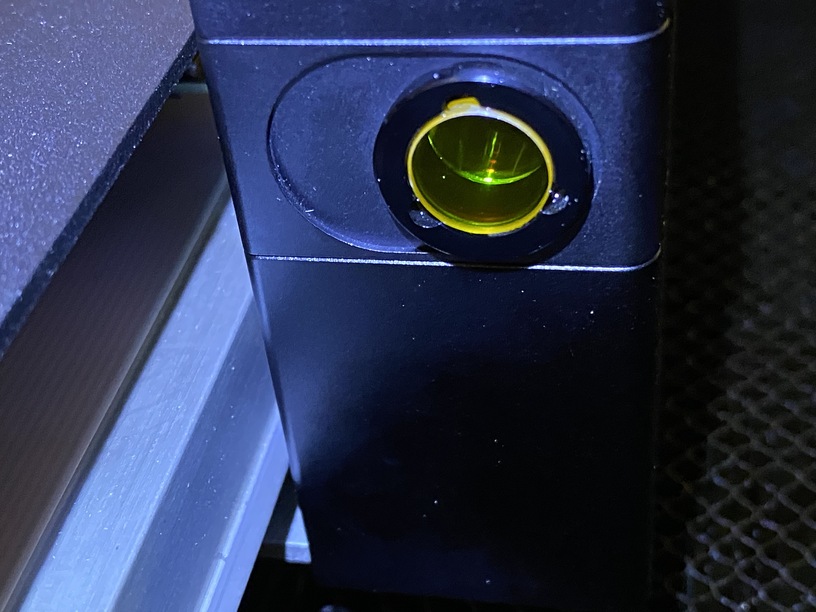
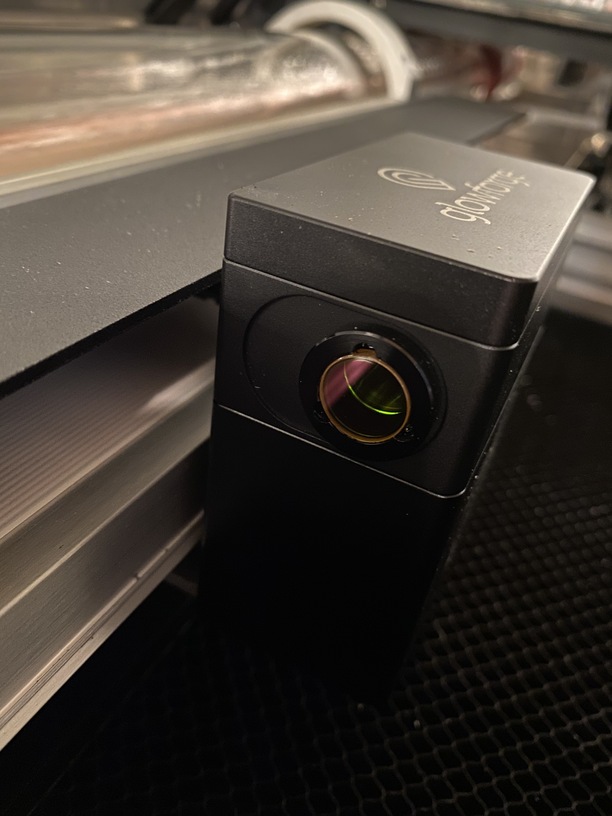
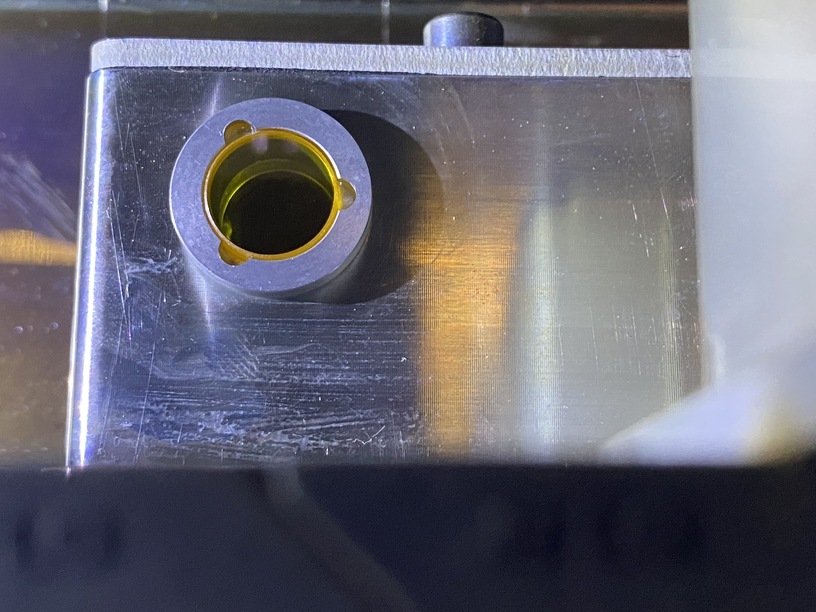
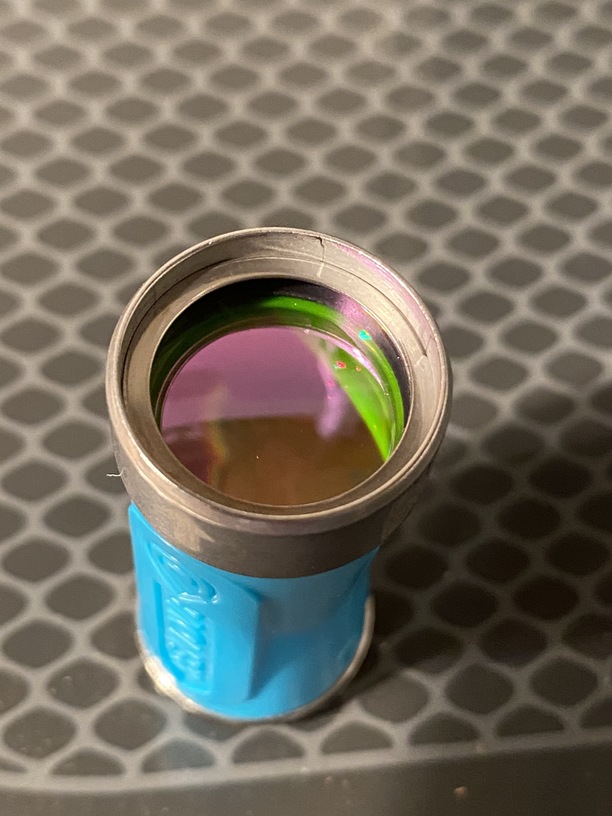
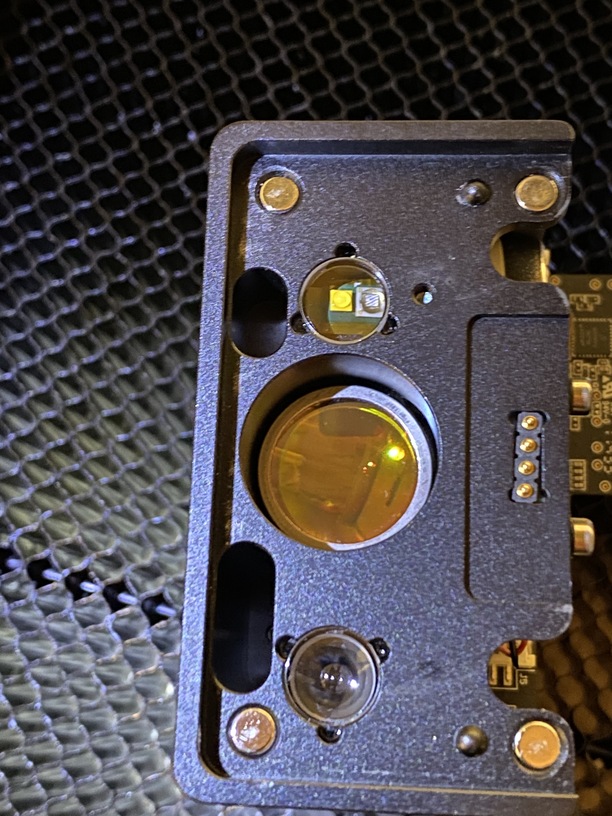
Please send photos of all your cleaned optical components, with special attention to any damage you might find:
- Both windows
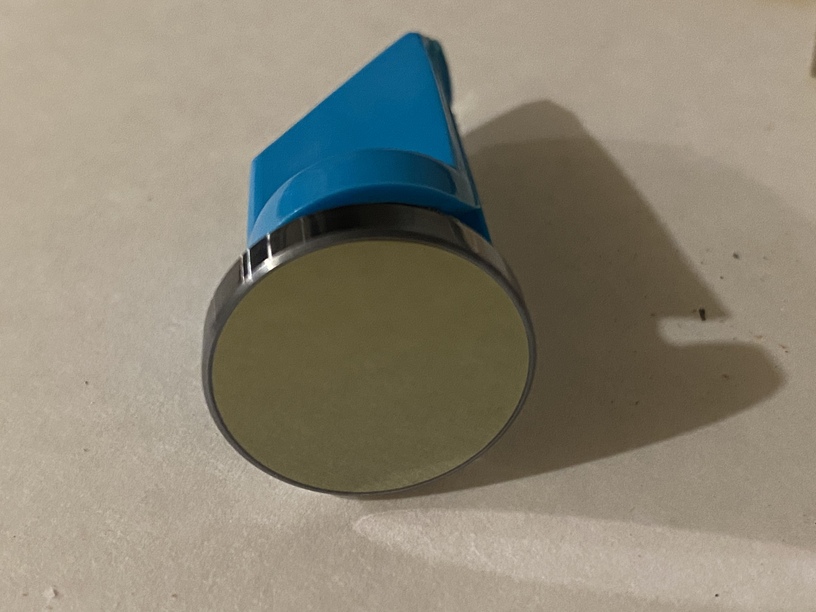
- The printer head window, on the left hand side of the printer head

- The laser window on the inside left of the Glowforge

- The printer head window, on the left hand side of the printer head
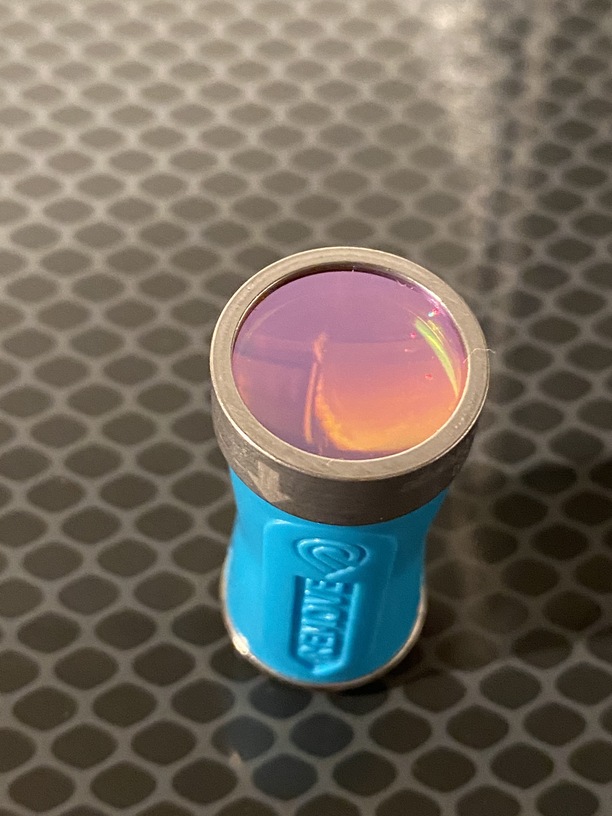
- The printer head lens
- Both sides of the lens, top and bottom

- Both sides of the lens, top and bottom
- The mirror inside the printer head

- The bottom of the printer head

Once we have those pictures, we’ll follow up with next steps.
Here are the requested pictures. I can find no obvious signs of scratches or other damage. Have only ever used recommended Zeiss wipes.

1 Like
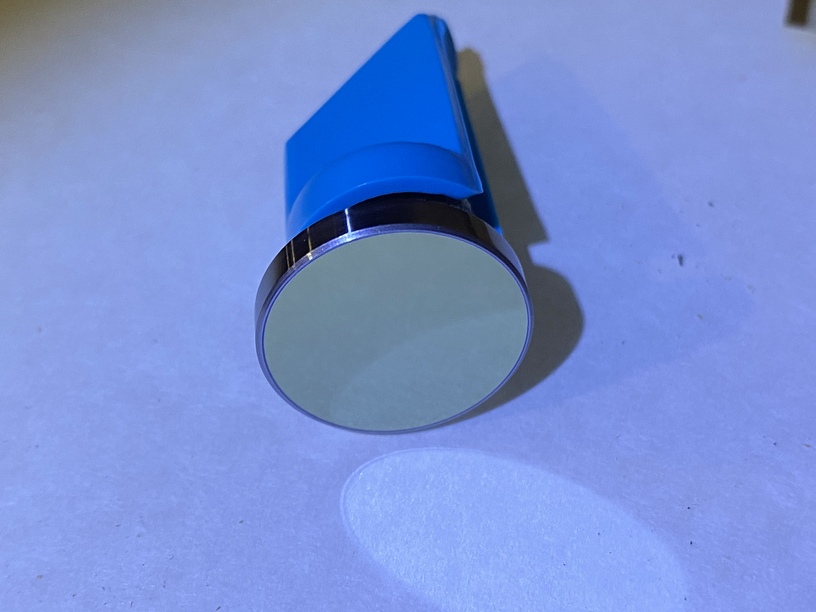
Noticed that the head mirror and it’s reflection looks fuzzy. Almost like a fingerprint.
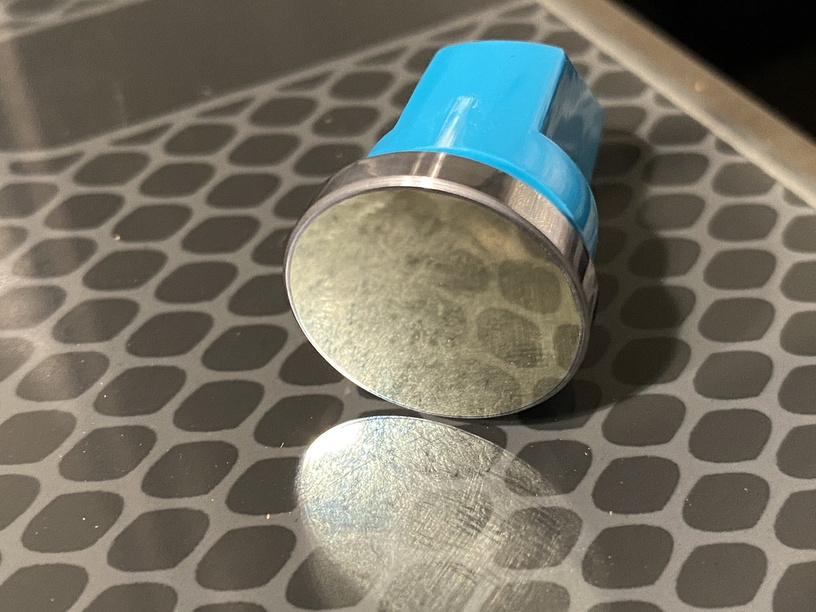
A clean or new mirror would be, pardon the pun, a mirror like surface. Could just be the picture. Maybe the light is causing prints on the glass top to be reflected back on the mirror. Either way, don’t think it’s bad enough to cause your issue, but if there are greasy fingerprints or other deposits the laser will eventually burn that into the mirror surface.
2 Likes
It’s just the picture. What you’re seeing is actually on the glass of the glowforge. I can take another picture, but the mirror looks pretty flawless moving it around.
1 Like
Told the wife this morning that she should not have posted the picture of her dog sitting in the window looking out at the bright fall colors. Great picture but the window looked like it hadn’t been cleaned in 2 years. It hadn’t.
2 Likes
2 Likes
@Melanie.P any other insights given this information?
Unfortunately, it looks like your unit is experiencing an issue that we can’t resolve remotely. I want you to have a reliable unit, so I’m recommending we replace this one. I’ll be in touch via email to sort out the details. I’m so sorry about the bad news.
For the community, working with the company on options and will report back on the fix so others that might be experiencing a similar issue at least see this thread in resolution and not left hanging.
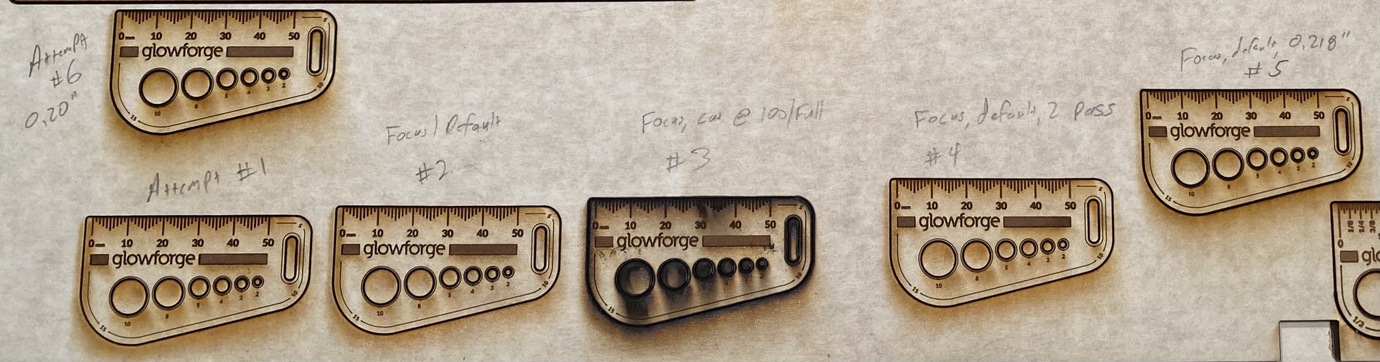
For the community - after some back and forth ended up replacing the print head. It has made a positive impact in that instead of going only half way through it generally goes almost through. Ran a number of tests after realigning the new print head and in some places it cuts through but not consistently. What’s odd is that slowing it down and running a 2x pass doesn’t seem to really make a difference in thick draftboard. Some photos of various runs, from using default “thick draftboard” settings, setting focus on the board in the UI, slowing it down from default proofgrade settings, running 2 passes, and manually setting focus slightly above/below. It’s all quite odd - like the last bit just never gets into focus enough to burn through.
At least it’s better than it was.
1 Like
This topic was automatically closed 30 days after the last reply. New replies are no longer allowed.