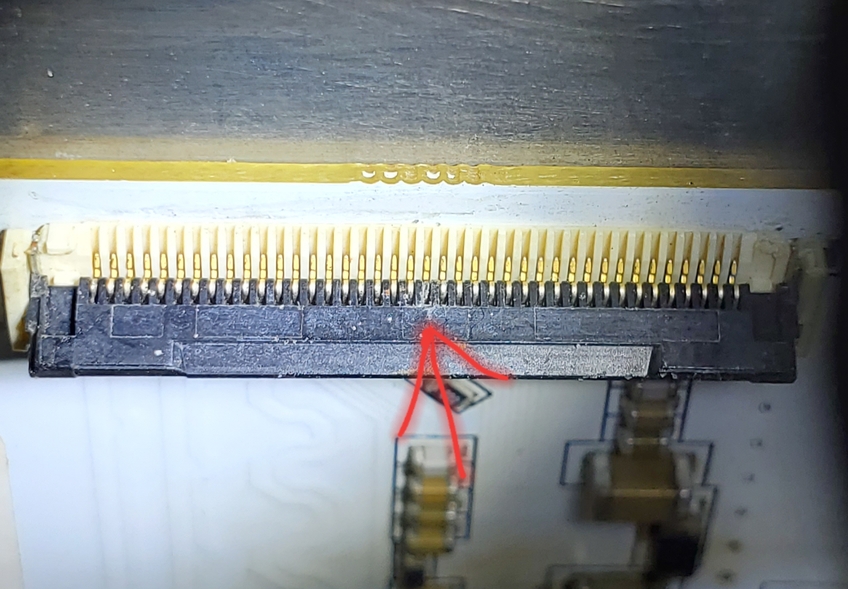
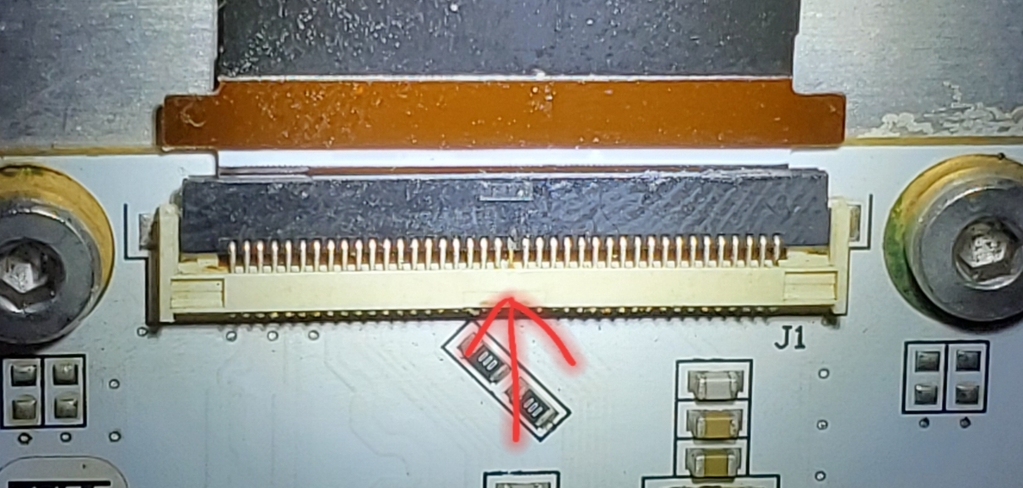
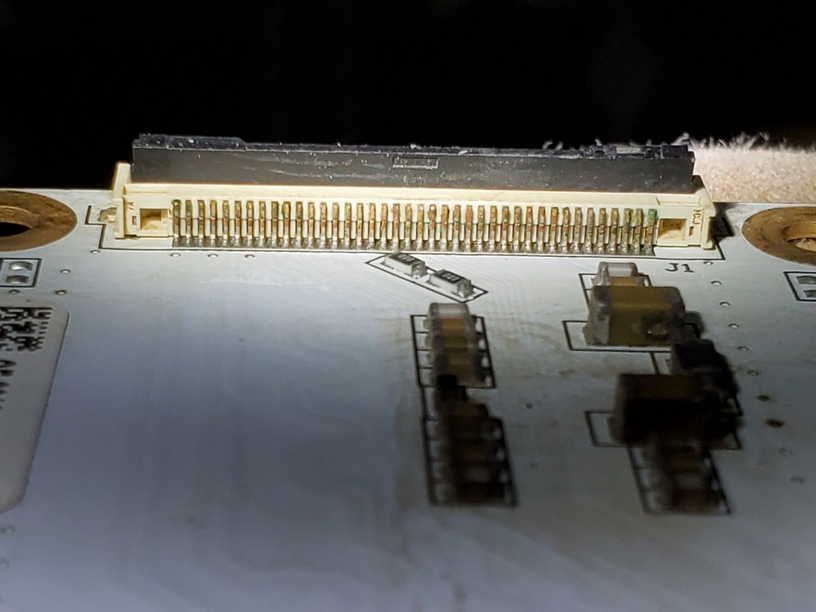
Dang, was really excited to get my black cable today, only to find out that that wasn’t the problem. Looks like one of the pins on the connection board may be fried or corroded.
I’m sure I’ll have to send my machine in, what a bummer.
Edit: Hey, support, if I could somehow just get this board sent to me, I’m capable of fixing it myself. It would save a roundtrip expense on the forge which is ideal. If it can be expedited that would be even better, I can keep an eye out for an invoice, thanks!
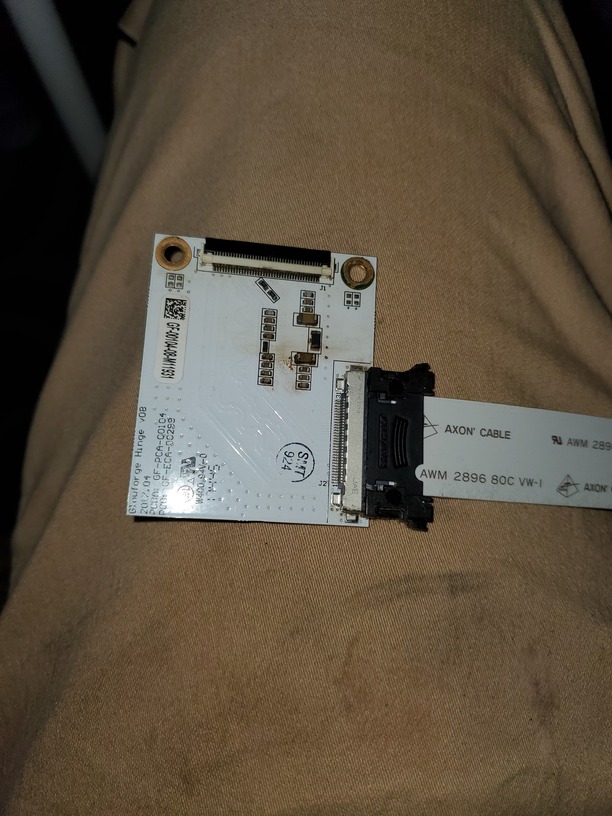
I wish it were an easy to replace part, but the tie in cable goes behind the frame and power supply. I’d need to remove the glass on the right side and I’m assuming some of the circuitry.
Yeah… My first thought was “I’m out of warranty. I’d try and replace it.” Then I looked at it and I’m like “No frickin’ way would I try to replace that. Even if I got everything off well, there’s no way it’d go back perfectly.”
Yeah I would go for it, but I’d probably break something way more important. @rbtdanforth last year my power supply went out and it took like 4 weeks to get that fixed, seriously hoping it’s faster than that. It would be really cool if I could just get a refurbished machine and they just keep mine, but that’s probably not the case.
They just put little protective glasses on them, load Neuter.svg into the GFUI and… IT’S MAGIC TIME! With the new speed improvements it takes like 2 seconds. And it cauterizes as it goes! No stitches!
That is a real bummer, would be nice if that board was a user swap able part for sure. Not sure how it is connected lower in the frame tho. would be nice it if it was just those 2 allen heads holding it in place and a cable below.
Get some good magnification and inspect that pin. If it is topical corrosion I would try cleaning it - gently but with enough force to remove the corrosion.
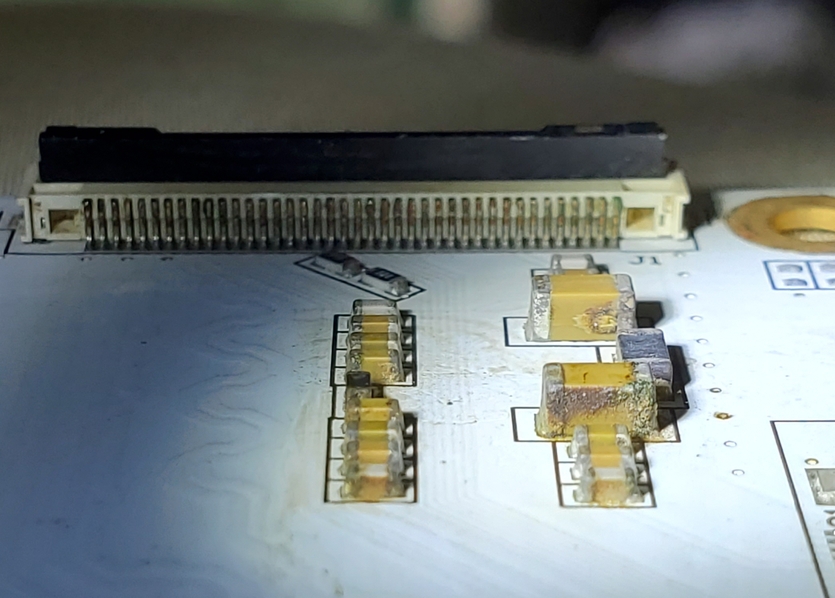
Begs the question where did the electrolyte come from…?
That pin sure looks like it’s damaged. But you need to buzz it out with a meter to be sure.
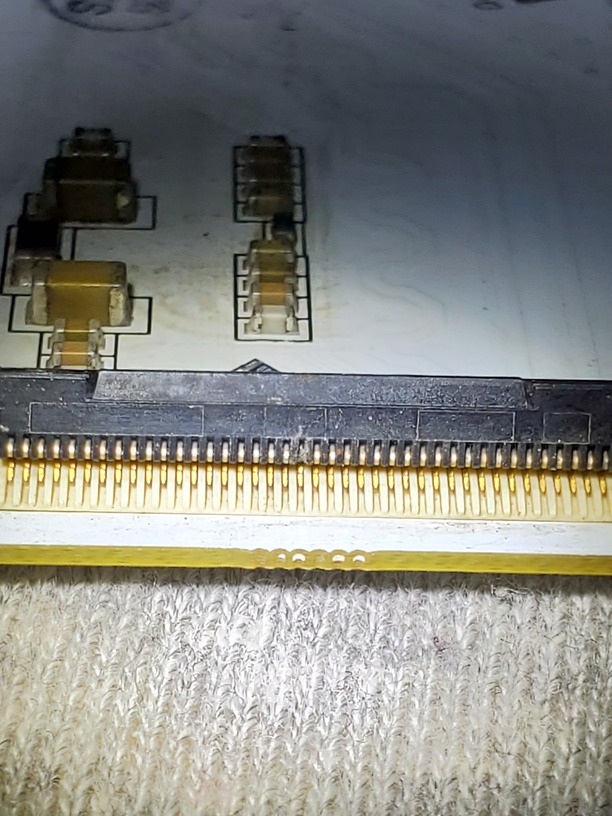
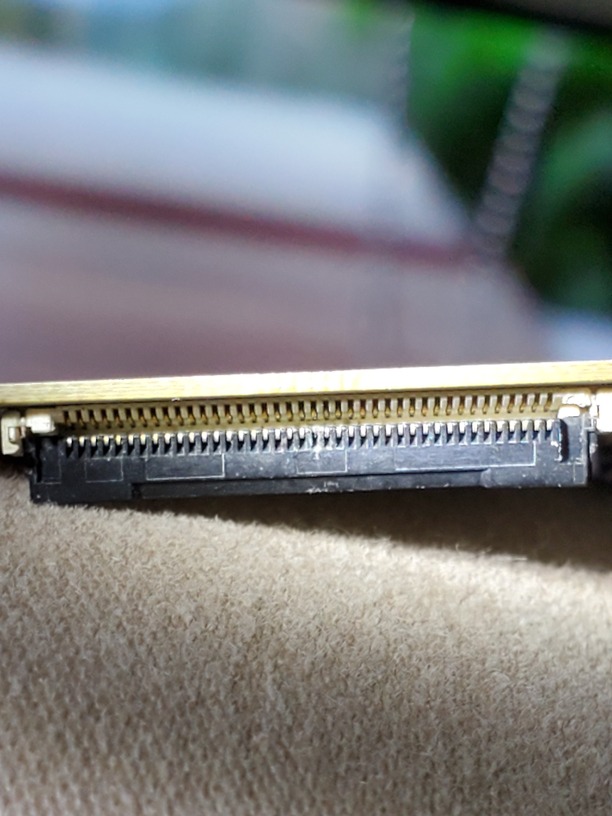
The connector itself is soldered to the white PCB. It looks like a through-hole mounting, not surface mount. Removing and replacing it is definitely doable with the correct skill set and tools, but would be impossible for someone who doesn’t have the tools or the experience to do it.
It’s hard to see exactly how it’s damaged from the images. It could just be surface corrosion (which is probably actually galvanic corrosion. Something you lazed had the right combination of chemicals to attack that pin because current was flowing through it. The pins are gold plated, not solid gold, so if there’s even a tiny spot that was not completely plated, corrosion will get in at that point).
Assuming it’s just surface corrosion, you might be able to “freshen” it up with some gentle scraping with the tip of an Xacto knife. And if it’s truly eaten-through from corrosion, you might be able to hit it with a little solder to bridge the gap and restore connectivity.
If you’re not under warranty anymore, and you have the skills to try to fix it, I can’t imagine it’d be worse for you than just sending the printer in, even if you fail. All that GF is going to do is replace that entire PCBA, they’re extremely unlikely to make the effort to repair it…
I don’t think this is an electrical over-stress failure. I doubt that the ribbon cable can carry as much current as one of these pins. The ribbon should have shown signs of heating.
One time I got a little generous with some glass cleaner on the underside of the lid on my pre-release. Didn’t really think about it until I got a little light show the next time I turned it on. Immediately turned it back off and then blew some air around the LEDs strips and connectors to dry. This was before there were well-documented cleaning instructions.
Since then I never spray directly into the machine, but instead moisten the rag or paper toil lightly. The way the ribbon slots are, any moisture can drip right down the ribbon into these connectors.
Wonder if humid environments contribute to this, especially if exposed to salty air like tropical islands are bad on electronics.
I hope the fix is easy or at least without hiccups.
This may have been the case. The underside of the pins actually had a lot of corrosion on them, which gives me the idea that something hit that board and dripped down. I haven’t sprayed directly into the machine in a long time, but I can see how exposure and time may add to burning the pins out. I tried cleaning a little more vigorously, but still no dice, so we’ll see what support says.
@Tom_A Hey, popped the top on my machine, it actually isn’t too bad, the OpenGlow forum has that nice little tutorial on how to do it, so I figured there wasn’t much to lose in doing it. Once you get that piece out of the way, it’s 7 screws and some 3m tape between you and pulling the cable with the board. Super simple.