So what is happening with this? Because this seems like a major problem to me.
Aren’t they guaranteed to cut right each and every time?
If that is the case then are you able to get a refund from Glowforge for the wasted sheets?
3 Likes
I have to admit, I don’t know. I know there is ‘some’ guarantee on the Proofgrade, but I haven’t really ventured to look. ![]() I think I’ll get on that…
I think I’ll get on that…
I have Illustrator, too, but I’m a complete newb with the vector based programs. If Illustrator lets you record actions like Photoshop does (a program I know my way around), that would have saved about half the effort. Inkscape just happened to be the first one I was able to get a functional workflow out of.
Plus, quite frankly, Illustrator frightens me a little.
1 Like
Illustrator frightens most sane people. (But it’s a bit easier to use to kerf adjust than Inkscape - it has a decent Offset function.)
Doesn’t matter, you got it done in Inkscape, so that’s cool.
2 Likes
It does.
3 Likes
Sold.
This is the first of what will be many projects like this.
Looks like I’ll be schooling myself on some Illustrator Kung Fu.
3 Likes
Like every Adobe product, one of the toughest things (I think, for most people), is that the program can 1) do so many things, and 2) do all of those things in different ways - IOW, there are multiple ways to accomplish one thing, typically.
If you have any questions, I’m sure someone here can help you out. The collective knowledge here is strong.
2 Likes
Dude, you could brush me up on the Actions. It’s been years since I messed with them. (I’ve forgotten everything I once knew.) 
I could probably help you, but honestly, I use them for almost nothing. If you think of something interesting, let me know. 
1 Like
Umm… DXF kerf corrections… ![]()
Plan to play with it one day. (Not anytime soon though, got too much else going on at the moment. Maybe next year if no-one beats me to it.)
Some Assembly Acquired!
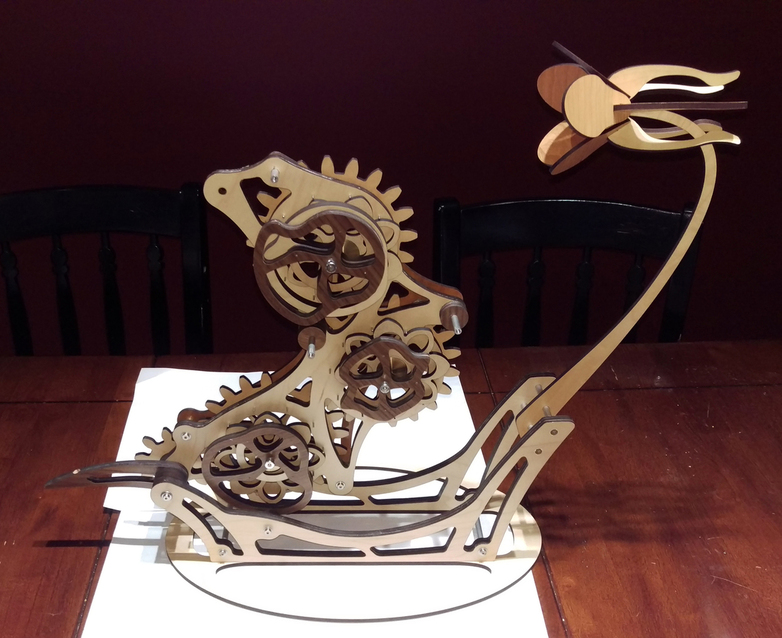
I’ve made some progress. Here is the big picture of all the sub-assemblies:
(picture quality is sub-par, sorry… next time I’ll break out the DSLR)
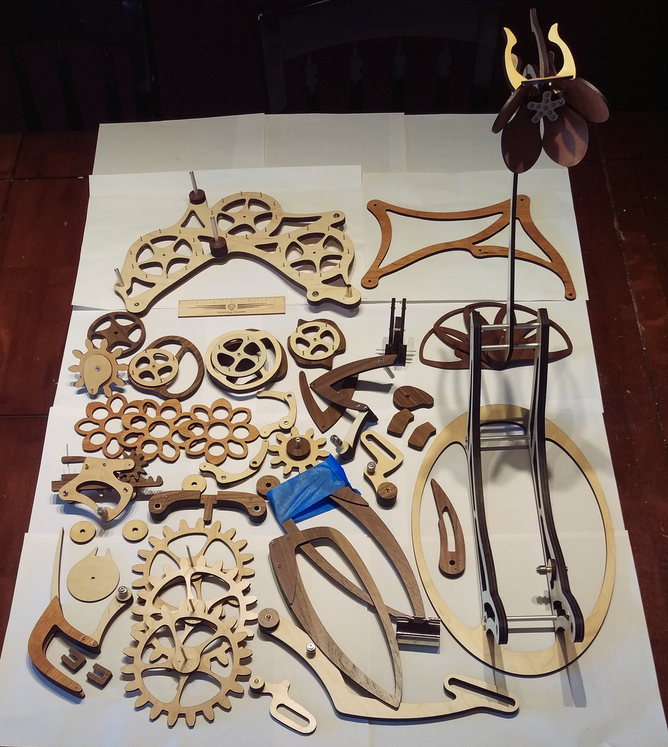
The piece with the blue tape and binder clip is a wing I dropped and had to glue. The Mr. Mister song immediately got stuck in my head for the rest of the day - hope that doesn’t happen to you. ![]()
A few - slightly blurry - close ups:
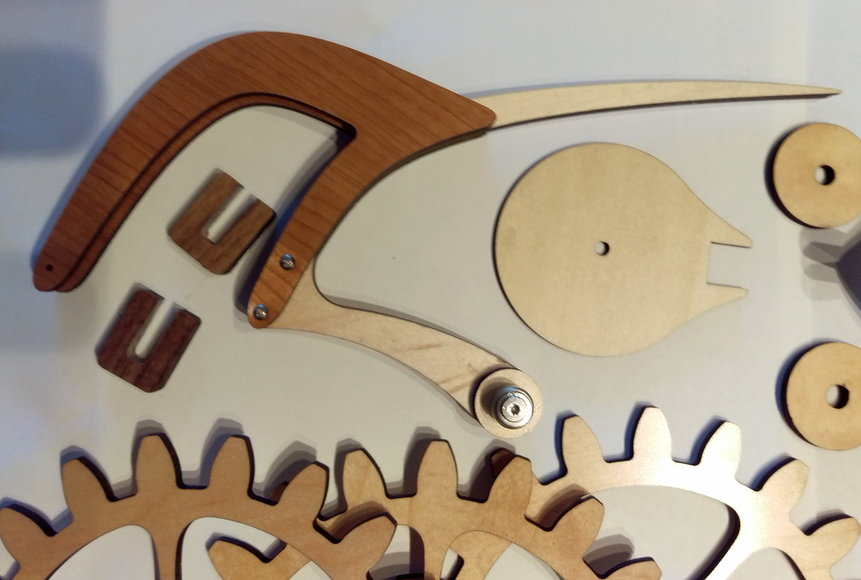
The head and beak:
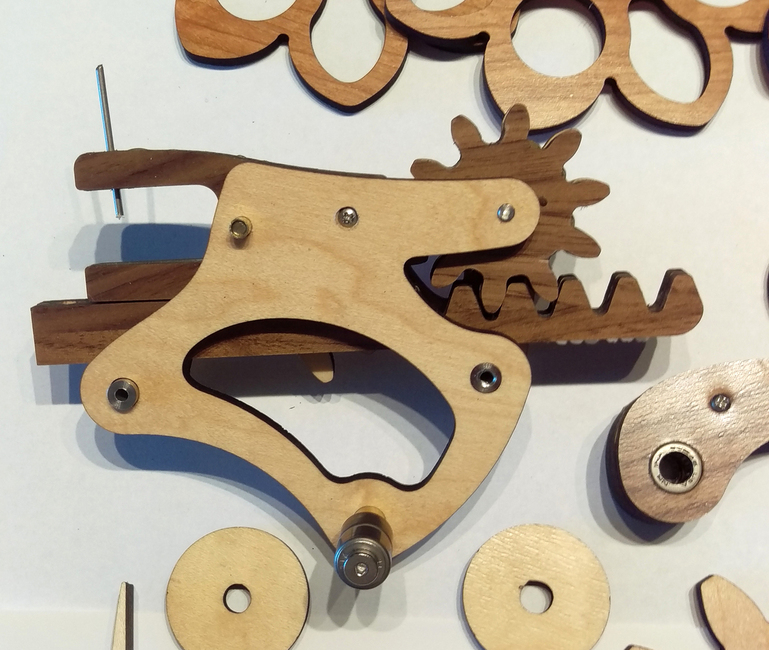
The tail feather spreading assembly:
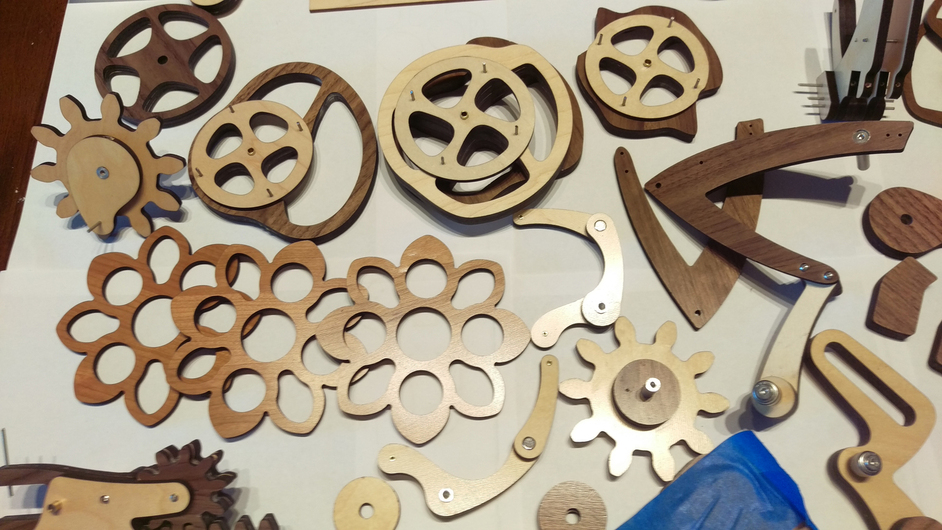
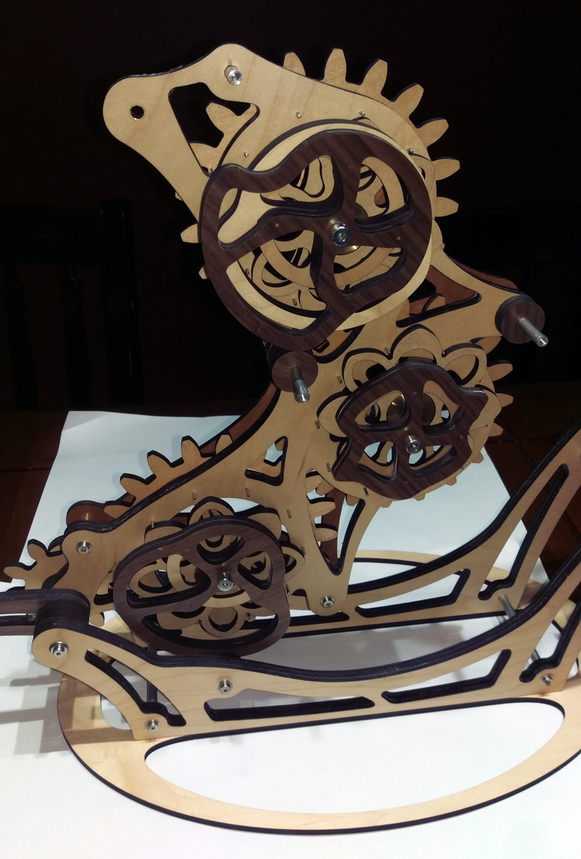
Some of the cams and gears:
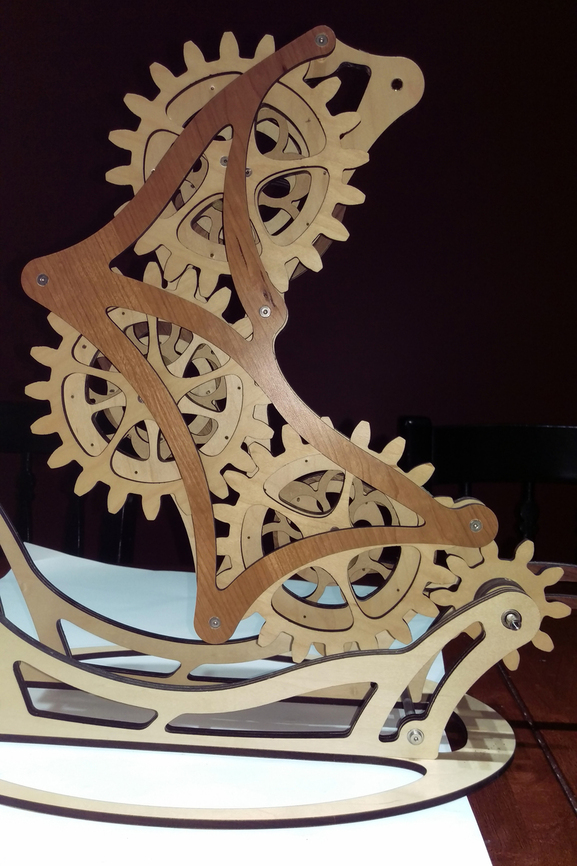
The gear train frame:
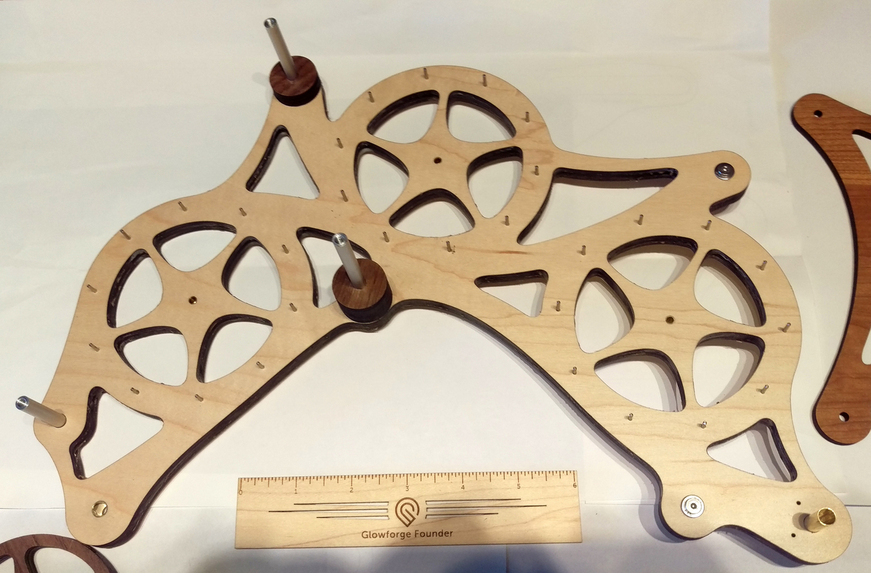
This gear train frame was made by stacking and gluing 3 pieces of medium maple Proofgrade. I thoroughly sanded the finish off the sides to be glued and used normal wood glue (Tightbond). It is amazingly rigid. Much stronger and durable than I thought it would be. You can twist it with a great amount of force and it barely flexes, and there are no ominous cracking sounds when you do.
(Pro-Tip: Buy all the 1" document binding clips you can find at Staples. They make great clamps. See the broken wing in the first picture)
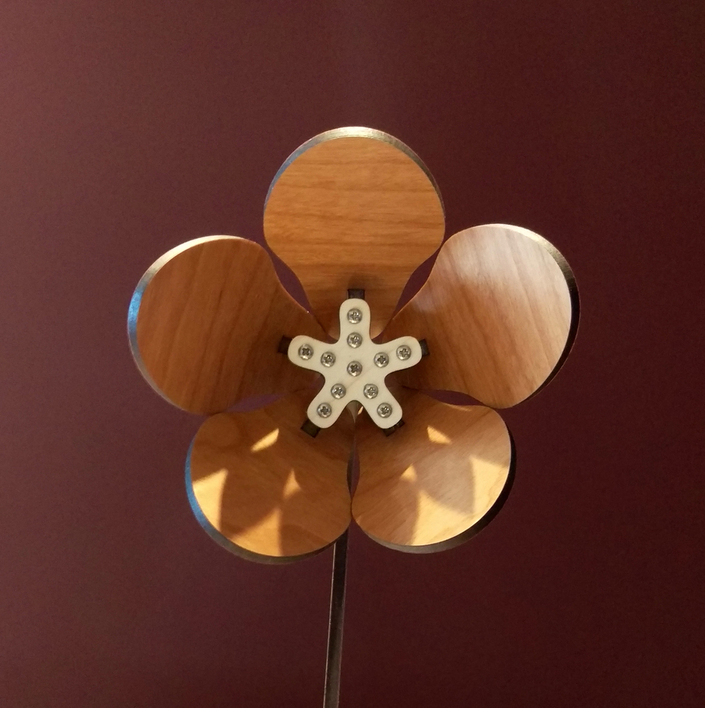
The flower:
From the side, the flower and base look rather Dr. Seuss’ish:
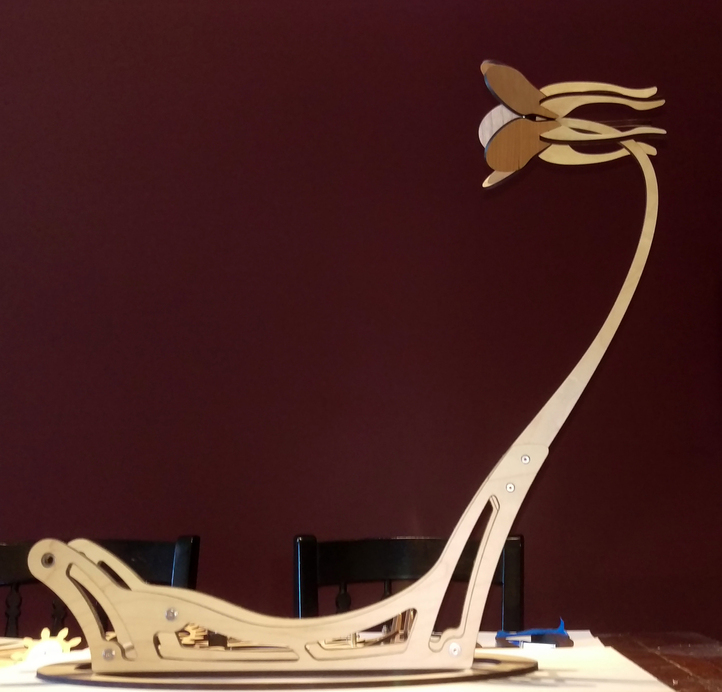
It’s hard to tell from the pictures, but this thing is BIG. The top of the flower stands at 20".
I tried to assemble the gear train, but ran into an issue. The instructions call for making everything out of wood, but make the recommendation that some parts are made out of something more durable. Turns out that is less of a suggestion and more of a requirement.
Specifically, there are 3 hypocycloid cams that attach to shafts and are secured with a set screw. Yes, a set screw in a wooden piece. This did not hold up well, and I was unable to get it to secure very well. So, I whipped up a prototype of the piece in brass:
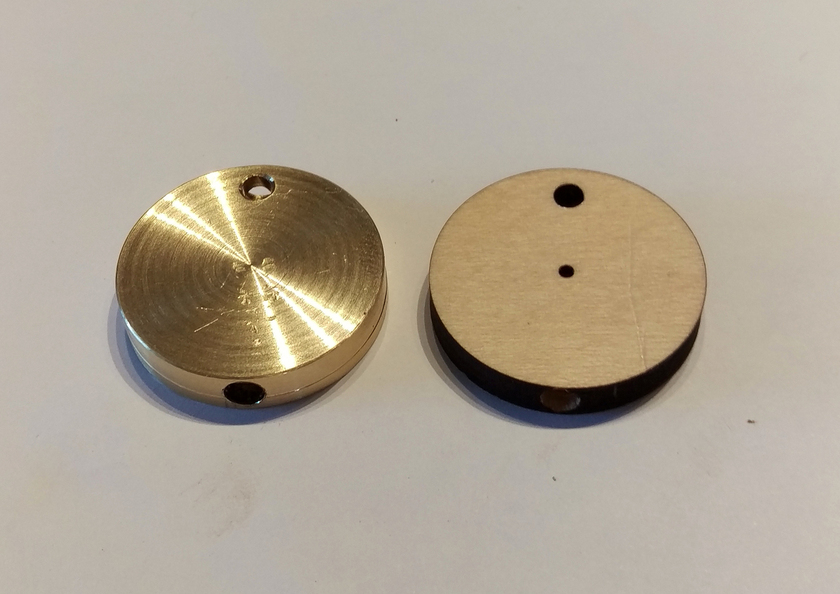
This worked very well, and I’ll be making three of these (with minor adjustments) to use in place of the wood pieces.
The entire project is made out of Proofgrade, which is performing pretty well. Most of it is Proofgrade plywood, and many of the accent pieces (wings, tail feathers, flower petals…) are made with Proofgrade hardwood.
17 Likes
Curse you! ![]()
That does look huge, though. The chair behind it gives an idea of the scale. Can’t wait to see the finished product!
1 Like
+100 on that! Binder clips are great clamps for a lot of the projects you can do in a laser because we tend to use sub-1/2" stock. They’re quick, cheap and everywhere.
1 Like
That’s a great idea.
1 Like
By the way - I assume you did this the tough way since you mentioned select all of the paths (I know what they say about assuming…) - which is to use the “Direct Selection Tool” (keyboard shortcut - “A”)?
If you’re using Illustrator CC17, they have a join tool that works quite well. It’s basically like a paint brush. It’s not instant and amazing but it’s much faster than finely selecting end points and joining by that method.
Here’s how Adobe sells it:
4 Likes
I never knew about that tool! That would save me a lot of detail work. Off to try it now, thanks!
1 Like
I did it the easy (somewhat) way with the direct selection tool, and then doing a CTRL-A to select all the paths.
My fingers have calluses from my excessive use of CTRL-A, and even more so from CTRL-Z. ![]()
4 Likes
As a slight distraction from all the “other things” being passionately discussed in other threads, here’s the newly machined gear collars and cam lobes in beautiful brass:

I’ve started assembling the gear train and cams. They’re a bit tricky and require much patience.
When I get them tweaked, a post will surely follow. ![]()
17 Likes
A quick update…
Moving along fairly well.
I’m a bit disappointed in the operation of the gear train at this point. Not due to design, but just the need for some serious tweaking. It binds up a little in a few places and just doesn’t have a nice smooth operating feel to it. I get that it is wood and it won’t be super fluid, but I endeavor to refine it to the point of silky smooth movement.
I’ll be able to correct a lot of it with some patience and my Dremel. Some of it may require the use of different materials.
The Proofgrade, while holding it’s own pretty well in a role it was certainly never intended for, tends to be a little “sticky”. It’s could be from the special laser safe finish, but I can’t be sure. It certainly works well for the structural parts, but isn’t seeming to do so well for the moving parts (especially the cams and the hypercycloids, which rub together quite a bit).
Some pictures:

Off to cover it in saw dust…
26 Likes
I’ll try to dig up a video of MDF gears I did for a clock I will pretend to finish one day. I did the MDF as a prototype. It ran super smooth and great so don’t blame the wood to much. Having any finish in the gear tooth can affect it. Also look at the balance of the gear, does it tilt when it spins. In which case you may need to balance them a hair.
1 Like