So, I’ve taken the plunge on making Derek Hugger’s Colbri scultpture. If you haven’t seen this yet, take a minute and check it out.
While you’re there, buy the plans (full disclosure: I have no relationship with the artist). They are worth every penny. Extremely detailed instructions with exploded diagrams showing every assembly.
When I started on this, I quickly found out that it was going to be more difficult on the Glowforge than I anticipated. The plans come with both PDF and DXF models of all the parts. Problem for the Glowforge is that it does not currently do any kerf correction.
I have an extensive background in Solidworks and taking 3D models from CAM to my CNC mill, but the laser thing is new to me. That being said, going from DXF to Glowforge ready SVG was a bit of a challenge for me. I finally ferreted out a workflow that left me with accurately sized parts and GF “drilled” holes that I only needed to pass a drill bit through for clean up and final sizing.
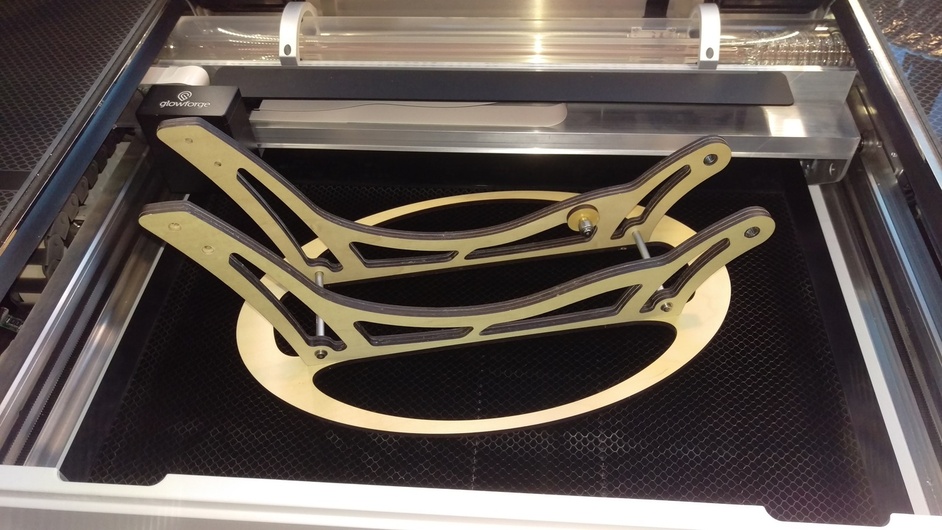
Today has been a long day of learning and making. Here is what I have accomplished so far:
Pay no attention to the glue and other minor cleanup issues… I plan to tear it completely apart after the initial build and give it a full detailing.
It’s made from maple. The uprights call for 3/8" plywood, which I made by gluing 3 sheets of medium (1/8") together - fully sanded, of course. The base is thick maple plywood (1/4").
Notable note for those who are thinking of taking on this build: The plans assume you have machinist skills and capabilities. I had to machine everything metal in that picture but the bearings, washers and screws. You could probably get many of the machined parts of the shelf, but that would increase the BOM cost exponentially. As it is, my parts order from McMaster (following the artist’s BOM) was almost $300.
I’d been waiting to do this, and ironically, today I looked at the parts list and figured it would cost a pretty penny in hardware. Not sure I’m up for it now that thing is amazing
Those designs are remarkable. You have a challenge in front of you. I have a CNC mill, a lathe and soon a GF. I’ll be curious how this goes for you. You have seriously tempted me to tackle one of his mechanisms as well. Undoubtedly, you have cost me money.
I really hope there is a direct path from dxf to glowforge soon. This is trivial even with the crappy setup for a epilog (coreldraw takes my dxf perfectly, “prints” to laser through the driver)
Ha ha… my boy is the the same age as my theoretical Glowforge!
He came 7 weeks early which was a much bigger shock than the Glowforge coming 2 years late (and counting)
Same thing! Daughter came Aug 31 and I ordered my forge a few weeks later :p. She was only 2 weeks early, so a tad less intense then your experience in sure.
Indeed!
I had a long dive planned for the next morning so lucky the little fella came at 3am instead of just 4 hours later… I would have been out of contact until noon.
As it was we had friends over this weekend.
(me knocking on the guestroom door)
Guest: (bleary eyed) “yeah…?”
Me: “Wife’s just had her water’s break and looks like we are off for an emergency birth. I know i promised bacon and pancakes… can you make your own?”
(exunt me)
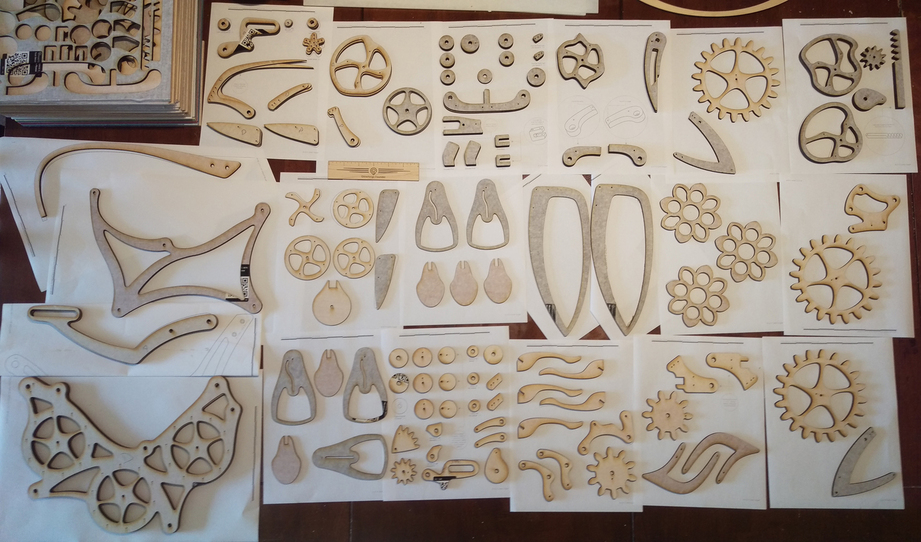
Update: I’ve finished cutting the remaining wood pieces.
Prepping all the DXF’s was tedious, but not terrible. I followed @Jules excellent guide, with one tweak. I had to select all the paths, and then join them before I converted them to strokes. It could be that way for all DXF’s, or just the one’s provided with the plans (this is my first DXF → GF conversion, so I don’t have a reference).
The Glowforge cut them all beautifully, almost.
After having several full sheets ruined by not cutting all the way through, I gave up on the “automagical” cut settings and tweaked them manually. Yes: they were not warped, they were held down by magnets, and the optics were clean. This machine has less than 10 hours on it, but it just didn’t make it all the way through in most places. Strangely, if I loaded another sheet and ran the same automagic cut, it would work fine. Tired of wasting full (and expensive) Proofgrade sheets, I just started slowing the cut speed by about 10, and it worked perfectly.
 that thing is amazing