Please shoot a quick note to support@glowforge.com if you haven’t already to let them know if and when this happens!
2 Likes
It’s been a couple weeks, but those haven’t been without progress. Most of it has been unworthy of posting an update. I’ve been mostly tweaking here and there.
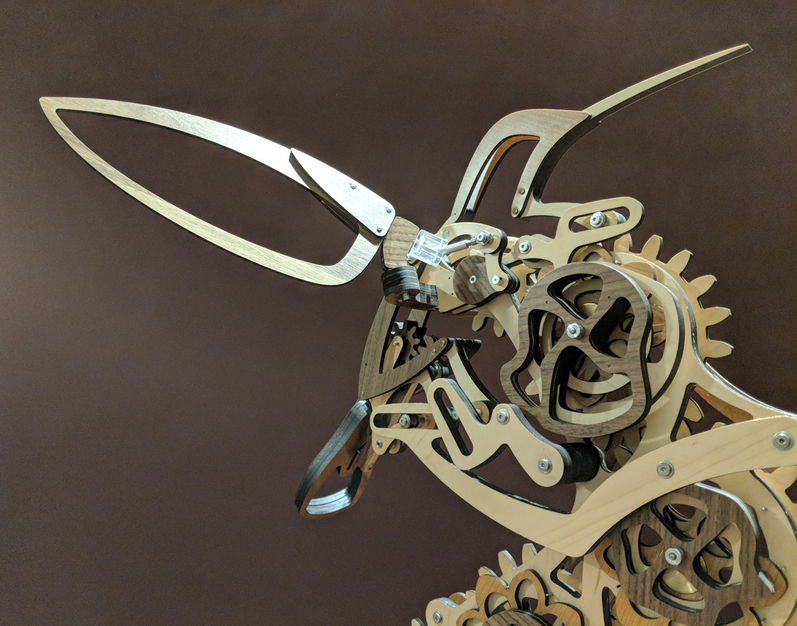
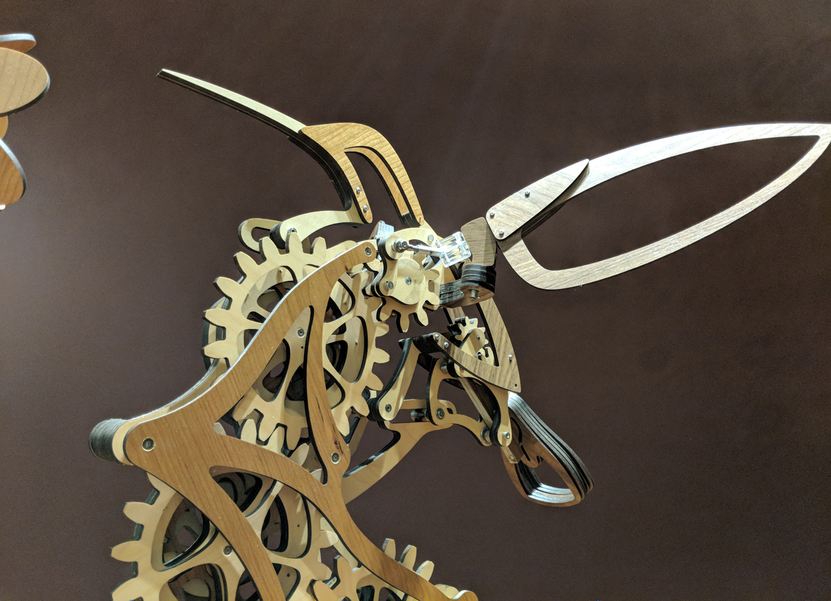
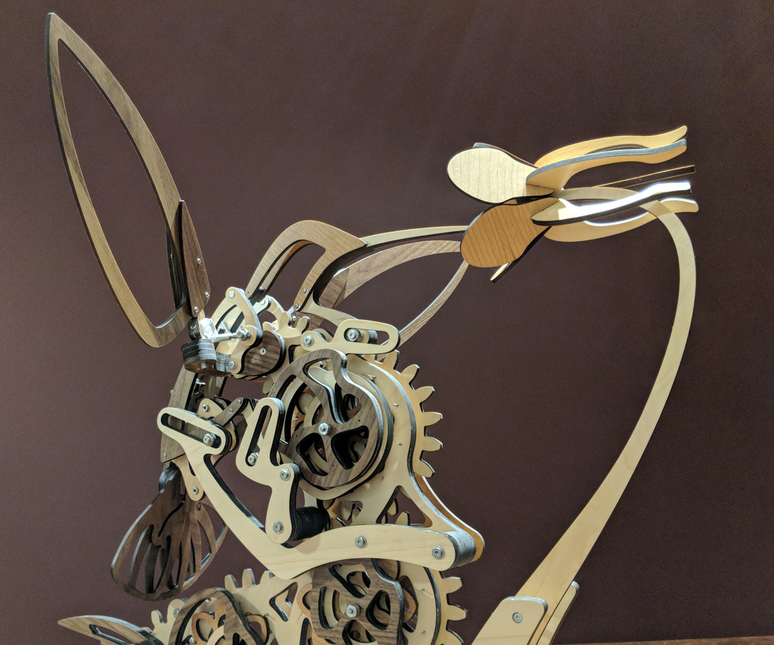
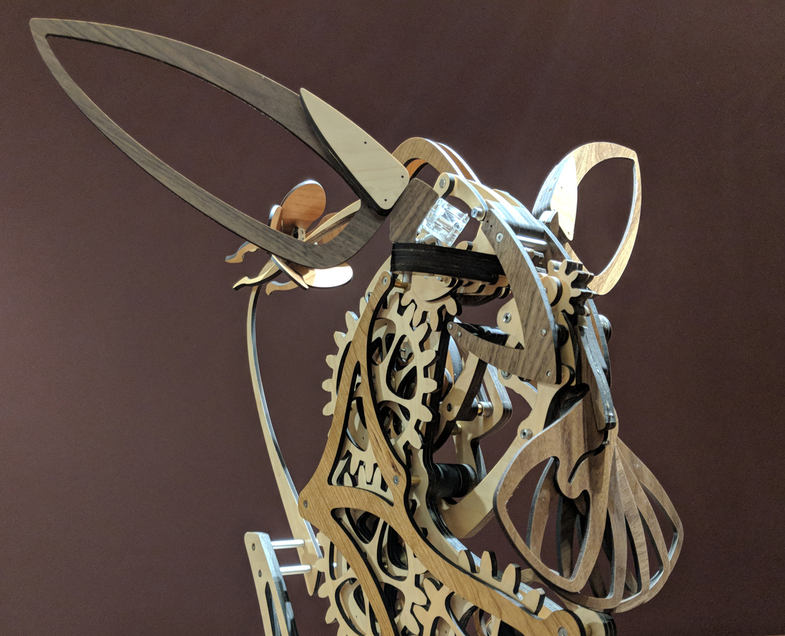
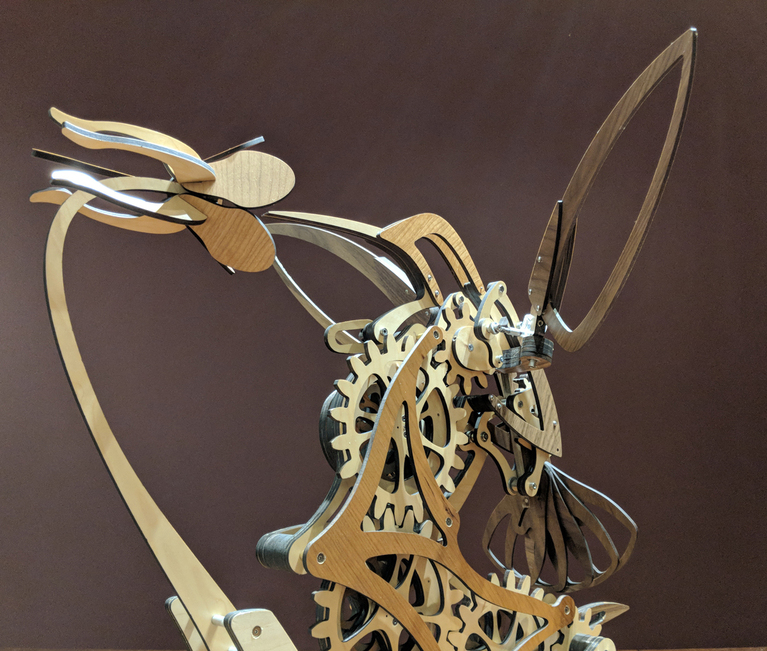
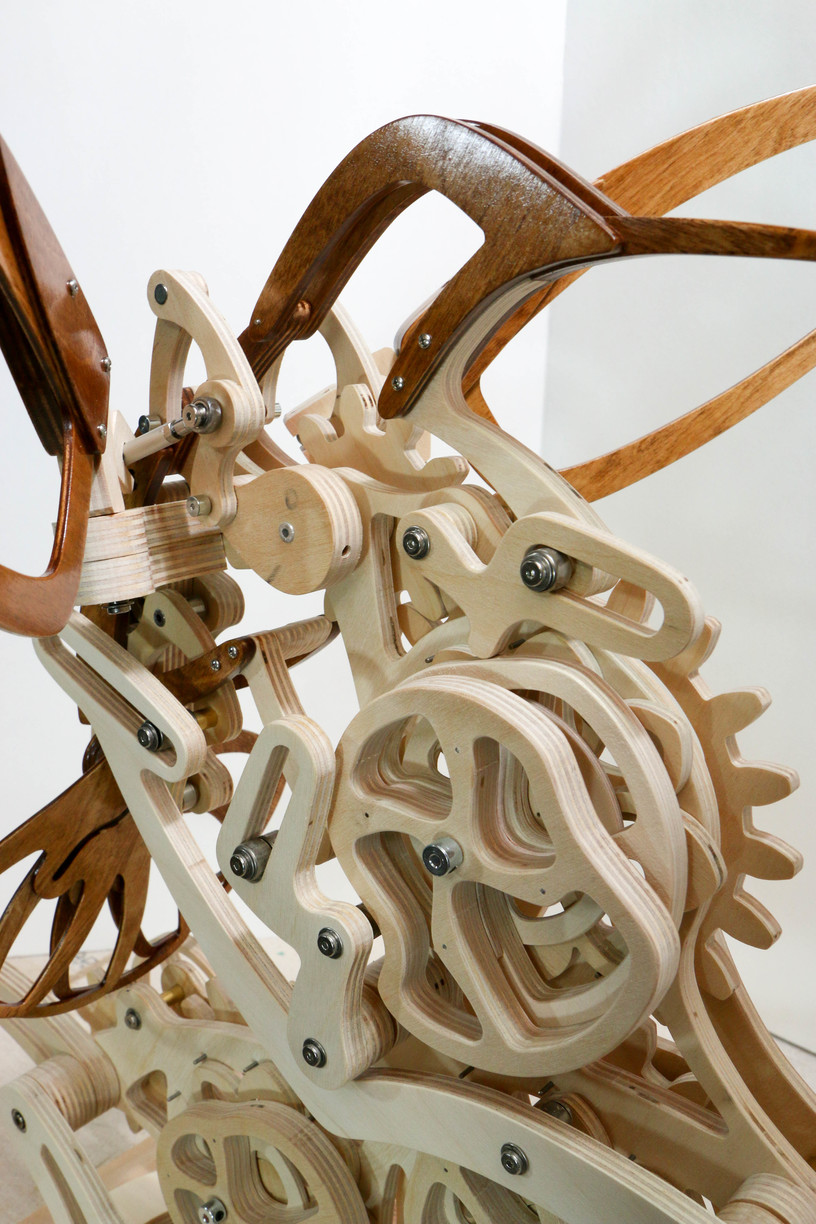
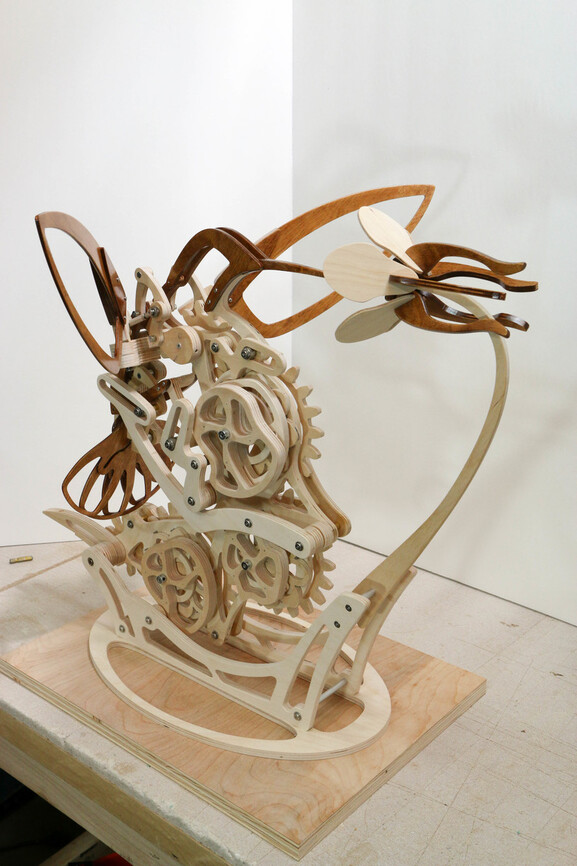
A few parts do not hold up well in wood. You can see in the pictures below there are two sore-thumb clear acrylic pieces. Those are temporary place holders until I find something more suitable. I just couldn’t get the Proofgrade to hold up in those parts. I don’t blame the Proofgrade - these are just small pieces that have a lot of holes (including a threaded one for a set screw) and they undergo a lot of stress.
It’s pretty well finished, though I am not entirely happy with smoothness of the motion. I have a little more tweaking to do, and I am going to re-machine a few of the parts to make their sizing a better fit with the differences in wood thickness from the original plans.
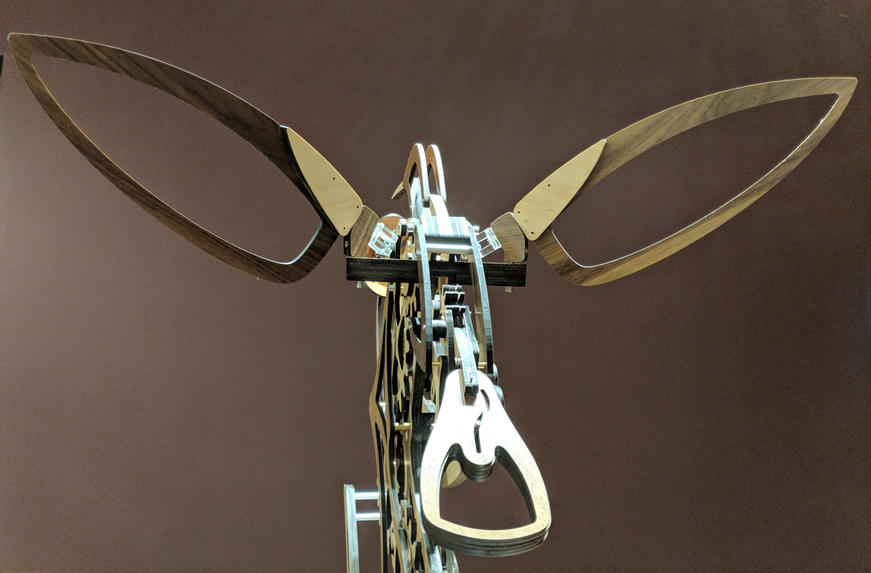
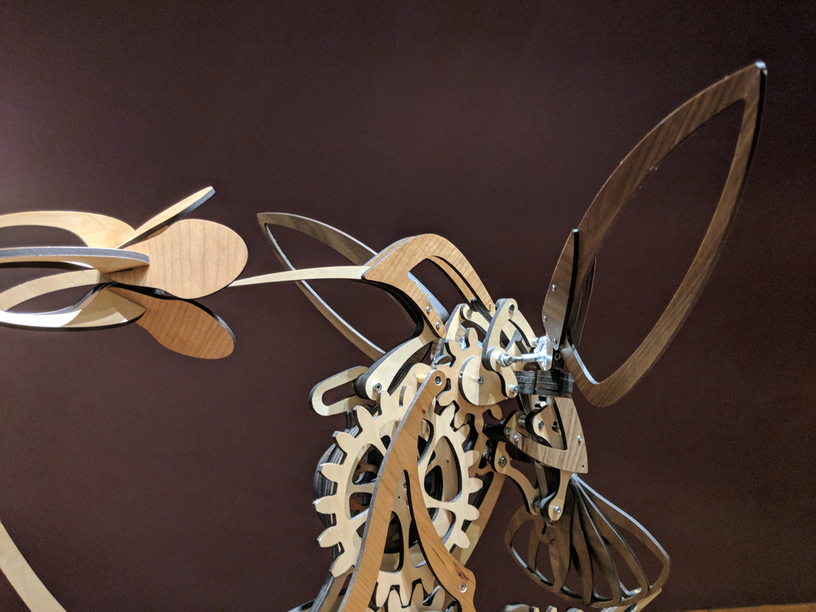
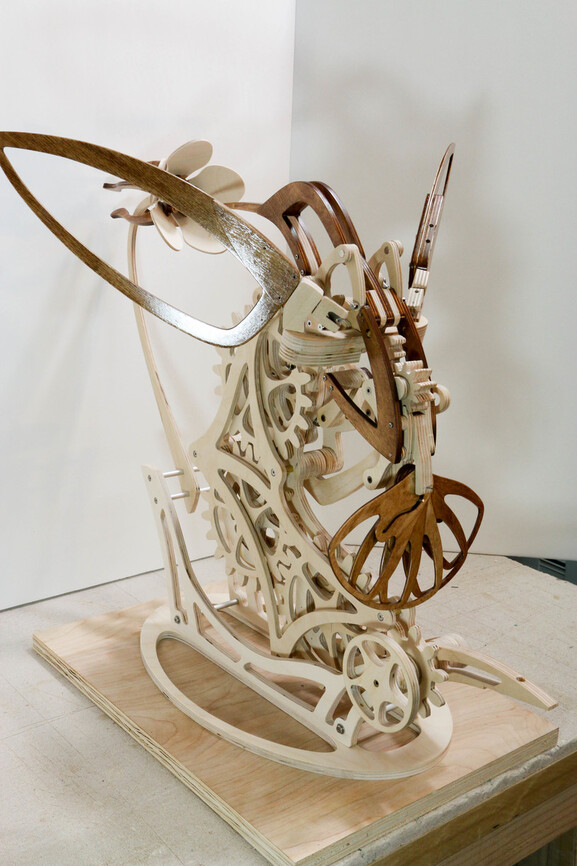
The bird body is impressive. It’s 18" from the tip of the beak to bottom of the tail feathers, and the wing span is 25" !!
Here’s some pictures:
Sorry, no video of it in motion… My next step is to motorize it. I’ll post some video of it moving under power, rather than the somewhat jerkiness of my hand cranking it. ![]()
It may be another couple weeks before I get that worked out, though…
25 Likes
Beautiful work on your Colibri. I wish I had my Glowforge when I built mine. I cut every last peice out using a scrollsaw.
21 Likes
Thats is gorgeous!
There is definitely a more artistic look to the hand crafted pieces versus the laser cut. I think it is the round sanded edges and the softer lines.
1 Like
Both Colibri are looking good, I would also have appreciated having the Glowforge around. Did my cutting on the X-carve CNC. I still need to get the motor and the counterweight mounted.
16 Likes
Nice! I like the dark wings. Are those painted or is it a dark stain?
The wings and the beak is black metallic spraypaint, the brown color is stain.
1 Like
Hey! I am considering taking this on. Any status?
1 Like
I’ve been immersed in another GF related project, so I haven’t had much time to finish the fine tuning.
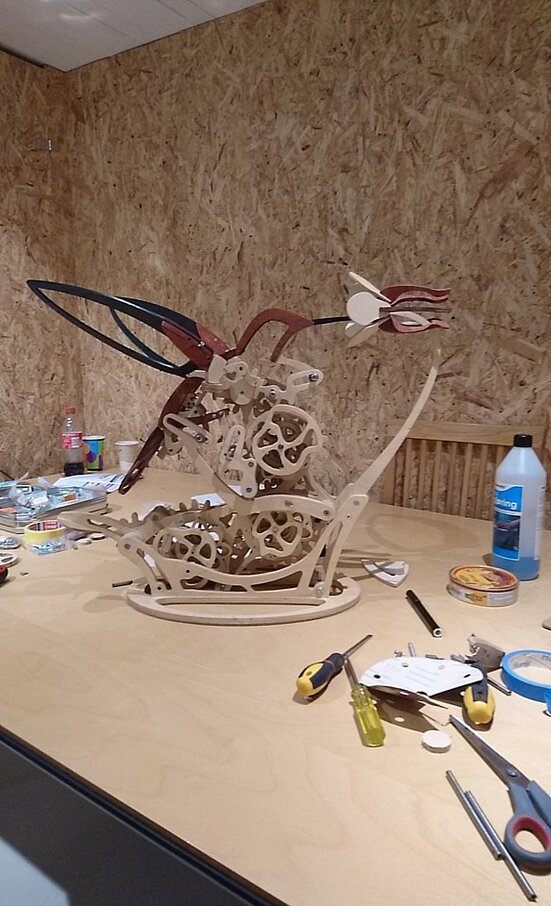
I did get it motorized:

The gear connected to the motor is the same one from the plans that is used to drive it manually.
I purchased the motor from McMaster-Carr. I picked up both the 5 and 7 RPM versions. The 5 RPM has more torque, which aids in smoother running, but the 7 RPM is more visually appealing. If I was only going to purchase one, I would get the 7 RPM - but you will need to fine tune the mechanism to be smooth as silk.
This is the motor bracket design I whipped up:

Discourse Friendly ZIP’ed SVG: MotorBracket.zip (4.0 KB)
The four small holes along the bottom were intended to add screws for additional strength. They don’t seem to be needed and could be omitted.
As far as construction tips…
You’re going to curse GF for not having the capability to directly import DXF or kerf compensation. Easily, one of the longest and most tedious parts of this process was manually converting and correcting the large number of parts for this project.
An open offer to anyone undertaking this project: If you want to save some time, I can send you my converted, kerf corrected, GF ready SVG files (to protect the intellectual property of the artist, you’ll need to provide me with proof of purchase of the plans, and agree not to redistribute to them to others without the same).
I had fairly good luck building up the thicker components by gluing layers of Proofgrade together. In places where it took three layers, I used draftboard for the middle piece. A quick sanding with some coarse grit on the mating surfaces before gluing is necessary to get the finished PG to adhere. In the end, they are surprisingly rigid.
The downfall to making the pieces with Proofgrade was that they don’t always build up to the exact thickness of the plywood used in the plans. You’ll find that in some places you’ll need to add and extra spacer or two. YMMV.
Also due to the thickness differences - some of the parts you need to machine will need slight adjustment. You’ll know those when you see them.
The pivot blocks for the wings will not hold up if you make them from wood. I made them from 1/2" acrylic from Inventables. See this post for details on cutting acrylic that thick - you’ll get pretty good results.
All around, this was a pretty enjoyable build. It was the first real project I took on with the GF, and it helped me to develop my workflow.
11 Likes