One of the big reasons we ordered our GF was to be able to customize a wide range of items for our clients. Cork coasters being one of the items we sell a lot of.
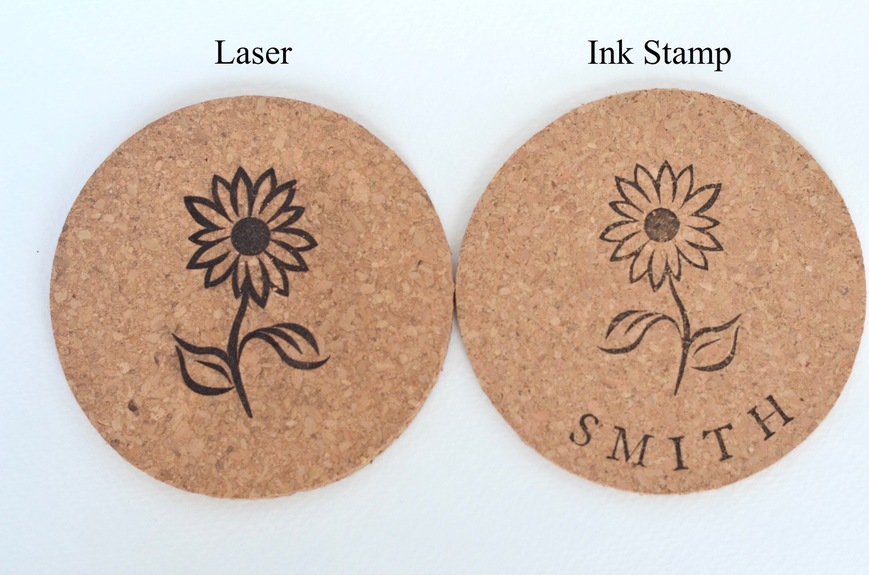
I wanted to see what the laser would do directly on the cork. So in our first test, we engrave directly on the cork. Worked like a charm (see picture below), but took about 7min. to complete. We get orders ranging from 4-100s of coasters. So, 7min. per is just not efficient enough. The “char” from the laser on the coaster was also an issue. We need the final image to be water proof. You can’t really see it in the picture, but the “char” was easy to smear across the coaster. If I need a high detailed coaster for around the house…this would be a real option.
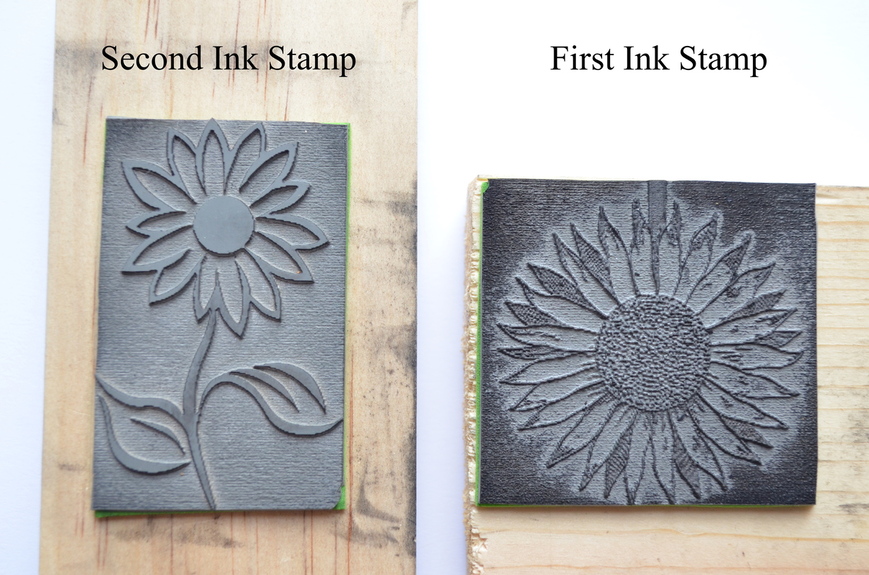
So, next was to make a rubber stamp. We ordered some low order (gray) laser rubber on Amazon and in our first attempted, we tried a very detailed sunflower image. Boy, did we learn a lot. The GF was so detailed in creating the image (which I had not altered) it was almost impossible to use as an ink stamp. The gradient color scale on the image had caused the stamp to have mountain peaks and valleys that were so details, we could not get enough ink on the stamp to ink coasters (let alone paper). It was also clear we needed to increase the power to create better definition of the image verses the stamp base (i.e. better depth).
So, back to the drawing board. I went back to the bold image we engraved directly on the coaster and created a rubber stamp using the gray rubber. As you can see in the picture, in my rush of pure joy I forgot to flip the image so it would match the first coaster…o well. This time we used a higher power setting and the depth is perfect. This rubber stamp took about 21min., but can be used over and over. We ended up making over 30 coasters for the client and the stamp was flawless.
The name at the bottom was hand stamped to show the client. They ended up using a date which we hand stamped. On bigger projects we will create a big stamp so it can all be done at once.
In the end, WOW! We are so happy with our GF. We have made several other rubber stamps since then and got it down to a science. It is so quick and easy to turn a clients idea into reality. The reason we wanted the GF in the first place!
Notes:
Each coaster is about 4.5" wide (we have a steel die to cut them out).
The cork in the pictures is not Proofgrade.
If anyone is wanting info on settings, let me know and would be happy to share. Just not sure if this was the place to post that info considering the cork and rubber were not Proofgrade.
Oh and also: really good thinking, speeding up your workflow with a stamp. So tempting to laser everything, but stamping is so much more efficient. Gold star!
It will make a mess. So I tend to run 2-3 small/med. stamps and then clean up the GF (I like to keep it sparkling!)
After the stamp has been engraved, carefully carry the whole rubber sheet to the sink and rinse off with cold water. Then, using an old toothbrush, scrub with soap and rinse again. Dry. Bam!
Leave a little room around the outside of your stamp and you can cut it out with a sharp pair of scissors. I have been using double sided tape and some craft foam to build the pad. Work nicely and you can always pull it off and adjust if needed.
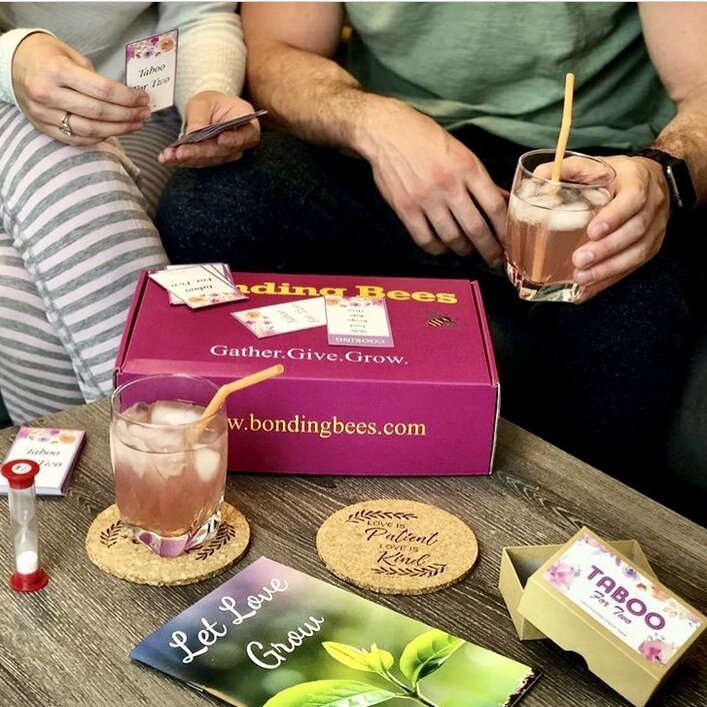
Here is a picture of coasters we did for a project a few weeks ago for a monthly subscription box called Bonding Bees. We designed the image, cut the stamp on the GF, and hand inked well over 2,000 coasters. With out our GF, we would not have been a part of the project…so, thanks GF!!
As for the ink, we have found several standard ink pads that work well. Most of them can be found at JoAnn’s or Hobby Lobby in their ink stamp section. A few brands we use are:
StazOn (dries VERY quickly and sticks to everything including leather. Can be found in a lot of colors).
VersaFine (Drys slower than StazOn, but is very forgiving and very consistent).
Ranger Archival Ink is another one that drys quickly, but the stamp pad makes it difficult to get an even coating on the stamp. Not my top choice.
All of the inks above are water proof/resistant once dry.
I just tried out these settings and got a nice engrave, thanks. Need to play with cut settings another night.
I haven’t used the stamp yet, the glue is drying, but it doesn’t seem like I needed to beef up the lines with the outer gradient. I’ll find out soon.
I tried a couple of glues to stick the stamp to a block, but the thin rubber edges really want to curl up. My test stamp is clamped all the way around with chip clips and binder clips… I think I need to find a good double-sided tape for this job.
I have had great success with just using off the shelf double sided tape to stick the rubber to whatever block I am using.
As you start stamping, you might find it difficult to line up your stamp with the exactly where you want it on the coaster. Especially on larger coasters. To help with this, we found that clear, large stamp blocks work great. We have used this one before - Inkadinkado Clear Stamp Block. Amazon has them and so do Hobby Lobby and JoAnn’s.
Trace your coaster onto the clear stamp block with a Sharpie, position your new stamp based on the trace, and then you can see through the block to align everything when you go to ink. The Sharpie and double sided tape can be scrubbed off later with warm soapy water when you are done with the project.