I think the location changed in inkscape 1.0. I’d ask google.
Also don’t miss this:
I think the location changed in inkscape 1.0. I’d ask google.
Also don’t miss this:
Always possible to use the user config directory, but from the file list, all the other palettes are there.
Best practice to use config directory, but still
C:\Users\username\AppData\Roaming\Inkscape
Yup, able to pull up the other pallets (just couldn’t take a screenshot with the pallets menu expanded within Inkscape).
Can you elaborate on “well formed” document? I copied and pasted what was in the forum under “copy and paste this into a notepad document”. Is there something else I should be checking /formatting?
Thanks!
No idea if this is the cause of your issue, but the path for me on a Windows machine is:
C:/Program Files/Inkscape/share/inkscape/palettes
and yours is:
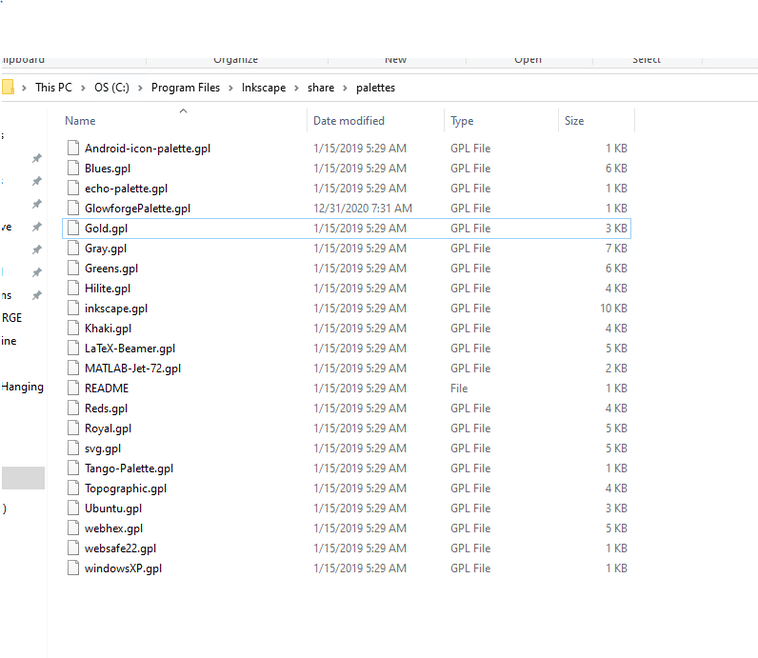
C:/Program Files/Inkscape/share/palettes
There might be a deeper folder, or their might not be. I’ve had problems when installing through the Windows store, although I don’t think that is your issue.
That is the only thing I can think of right now.
Like there is something in the document that isn’t quite right at the beginning or end.
Show a screen shot of the file. Maybe we could see something.
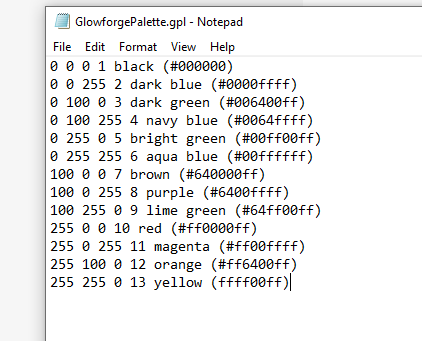
Here’s the .gpl file as it’s seen in notepad, and then the file in location in the palettes folder (the only pathway I can find for a folder that says palettes … @jamely found theirs in a different subfolder - I couldn’t find anything else)
Talk about drivin’ me batty!
All the palettes have this header with the name of the palette after Name
GIMP Palette
Name: Reds
#
I assume the hash is for comments
So I’ve barely started using my glowforge as I’ve only had it for a week lol. But I’ve read through the thread and the only thing I haven’t figured out is where to go to create the gpl file to input the pallet text to create the pallet for Inkscape. If someone could explain that it would be super helpful! Sorry for being green
Use any text editor like Notepad on a Windows Machine or save the file as text only. Save as and give it that extension. It’s just a text file that is used as a configuration file.
This was super helpful to me.
I adore my Inkscape ![]() palette, but this morning I ran across an oddity - and I have no idea if this has always been the case, or if something changed!
palette, but this morning I ran across an oddity - and I have no idea if this has always been the case, or if something changed!
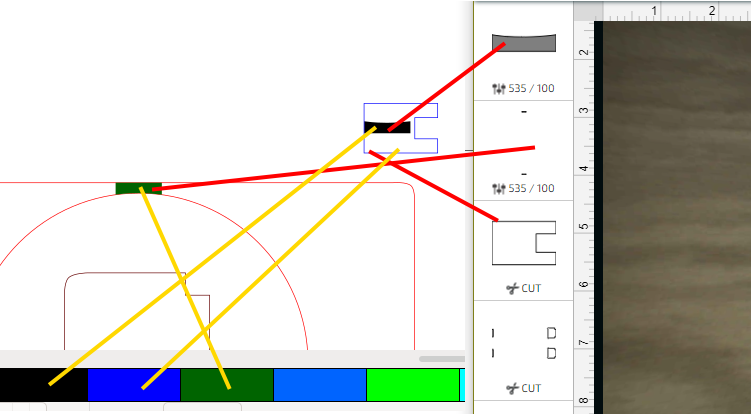
I did items in the order I wanted them to show as normal, but my engraves popped up above my cuts, despite the colour order. Is that new?
I thought that engraves always defaulted to first in color order then the cuts came, in color order.
I think that Glowforge changed this at some point, which is good. The optimal cut order is roughly engraving and scoring, then cutting from the inside to the outside. The reason for this is that every time you cut, there is the chance that the material will shift. If your cut is a complete shape, there is pretty much a guarantee that the material will shift, at least a little. So, you should always engrave, score, and cut inner lines in a piece before cutting it out.
There is a caveat. There are times when you want to separate cuts to allow the material time to cool down. So, sometimes, you might engrave, then cut, then engrave some more, etc. Just always do all engraving and scoring on a piece before you cut it out (Glowforge does seem to do this automatically). And always cut inner lines before you cut outer lines (Glowforge does not do this automatically, but some laser software does).
Possibly you could make different parts different colors so they would be in order but then they would have to be different objects as well. I cut a lot of intricate stuff and the path it takes does a lot of that wandering automatically, and it checks first to inform you when things will be tight. If they are randomly spread about I normally do not worry, but if tightly packed into an area that is of concern. Restarting the process will make a different random path with different points of concern but a tight-packed batch over and over is a risk, that at least you will want to watch closely.
Yes, it depends on what’s being cut. I have one item I cut where there are two lines that are 1/72" apart. It’s necessary to make the inner piece an appropriate amount smaller than the hole it comes out of. If they are cut too close together, there is excessive charring, so the order is set so I cut the inner one, then go do something else, then come back and cut the outer one. I use colors so that the Glowforge UI puts them in the proper order automatically.
A third of a millimeter is pretty thin though I just looked at a piece I am working on that is a tenth of a millimeter. A good laser cut alone is about a quarter millimeter but then what I am working on has a lot of work ahead. Another already done has a lot of places ~1/100th of an inch or a quarter millimeter because I made it 8" square instead of 4".
The really shocking thing is that 1/72" piece comes out in one piece, if I give the hardwood time to cool. If the cuts happen right after another, it has more char and is more fragile.
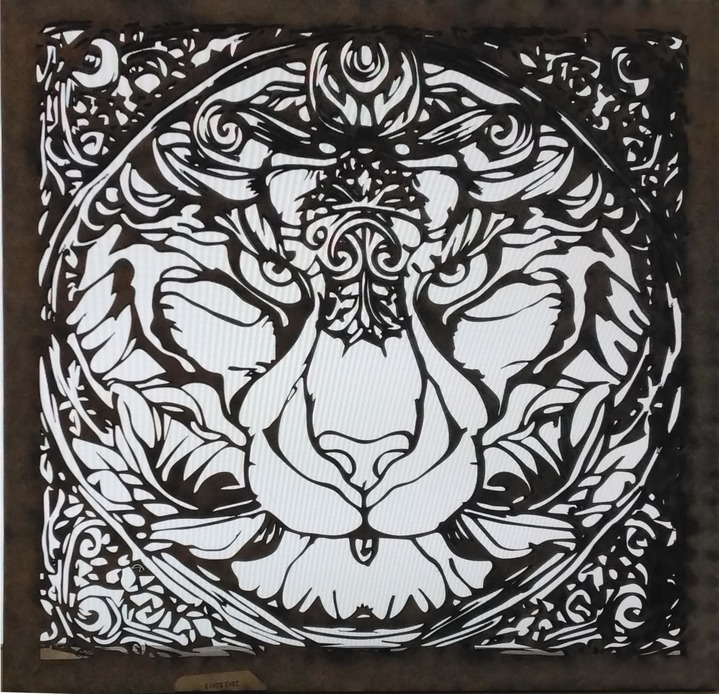
The tiger is ![]() medium walnut so that is very resistant, If I made the tiger in zebrawood it would be eaten by the laser.
medium walnut so that is very resistant, If I made the tiger in zebrawood it would be eaten by the laser.
Still tricker is this tiger in light cherry and only 4.5 inches high and wide it is too delicate and was all I could do to weed it on one side to be able to apply the paper at which time it was a hair easier to weed. In many cases an entire section is held in place by a series of 0.01" links and no secondary so just waving in the wind. I tested it in cherry so I will do what it takes to finish it but I went in and beefed up several places and made so anything complicated had at least two connections.
A note on weeding:
The key fact is that the masking sticky side will stick to itself far stronger that it will stick to anything else, even if the connection is less than a square millimeter.
This also includes the wood material. A secondary fact is that a very tiny pull will still pull the masking from the wood however slowly. Therefore, even if the masking is a quarter millimeter wide and will break if pulled too hard, it can be pulled below its breaking point and eventually pull cleanly away.
This means that even if hard to get started, if the tiniest bit can be pulled free and facing up, another piece of masking sticky side down will not grab anything hard except that tiny bit of flipped masking and it will grab that very well. If the piece is engraved with lots of tiny islands the sticky side down masking will pull the edge of that island just enough to grab the whole piece and remove it. If the piece is pierced as with the tiger the entire masking could be pulled as one piece if one is careful and patient enough. I was not patient enough for this piece but do that with slightly less challenging pieces all the time by just keeping up a very slight and steady pull.