Using Inkscape drawings, I am trying to design butt-joined inlays and finger-slot joints which need kerf corrections. On an older Glowforge machine, this was not a problem. However now it is more so.
Kerf is measured using either a 1.000-inch square or a 1.000-inch diameter circle as drawing dimensions. These geometries are cut at different locations on Proof Grade Acrylic or Draftboard. Measured dimensions of the cut pieces vary from 1.003 to 0.990 inches, depending on location on the bed and/or orientation of the part. See the SVG zip file of the 20x12, (X,Y), bed area showing approximate locations and measured dimensions of the cut parts.
How should I make a kerf correction with such a variation in cut dimensions?
Is this spread of 0.013 inches typical for Glowforge machines?
It seems unlikely that material inhomogeneity is the cause of the problem. If the laser beam were elliptical, that could cause an orientation-dependent cut. However it seems more likely that variations are machine specific due to belt-driven positioning problems.
Is it possible to fix or correct this varying cut dimension problem or at least reduce the magnitude of the errors?
Could machine specific corrections be downloaded into the Glowforge for position error-correcting training? Maybe start with a printed sheet of Snapmarks to calibrate the position errors?
Proofgrade parameters read from the QR codes were used. I used Proofgrade acrylic and Proofgrade Draftboard to remove possible user-generated problems. Cuts were clean for both media. In some cases the cut dimension is actually larger than the dimension on the drawing.
I have not calibrated and have managed to find a camera calibration procedure by searching the internet. Is this what to use? There is a section in this on Camera Calibration.
Thank you for reaching out about this, and our team will be happy to assist you.
Regarding expected kerf on a Glowforge, the X/Y axis motors can position the beam to within 0.001" (0.00254 cm), which allows the laser to engrave with 1,000 DPI resolution. The laser beam removes material in a circular pattern. The diameter of the circle depends on what the material is, but generally ranges from 0.008" - 0.025" (0.02032 - 0.0635 cm).
May we have a bit more information about the type of material you’re printing on?
Regarding the camera recalibrator, running that tool will impact how accurate the preview you see in the app is as compared to where the print lands on the material. It will only make changes if it can make your camera more accurate; otherwise, it will exit without any changes. It takes about half an hour.
You’ll need a 12” x 20” piece of Proofgrade material with no markings or stickers. The feature was designed to be used with a flat piece of medium Proofgrade Draftboard, used upside-down (with the QR code side down). It may work with other materials that are the same size and use the same print settings as well, like Proofgrade plywood.
It prints a grid of markings, takes a picture, then measures its height in multiple locations. This data is used to make your camera more accurate for future prints.
To get started, click on this link: Launch the Camera Recalibrator. Please let me know if clicking on this link to start the process works. If it doesn’t, please send me a screenshot of what you see in the app.
As was in the original narrative above, [quote=“brok09, post:1, topic:102657”]
“… geometries are cut at different locations on Proof Grade Acrylic or Draftboard. Measured dimensions of the cut pieces vary from 1.003 to 0.990 inches, depending on location on the bed and/or orientation of the part. See the SVG zip file of the 20x12, (X,Y), bed area showing approximate locations and measured dimensions of the cut parts.”
[/quote]
So as was in the narrative, Proof Grade Acrylic and Proof Grade Draft Board were used.
Were you able to see the SVG showing the geometries, locations, and measurements? Cut dimension dependence on orientation and location.zip (9.8 KB)
Some of the locations give cut dimensions larger than the dimensions on the Inkscape drawing.
I am waiting to try the Camera Recalibrator until later.
Thank you for helping.
11/11/2021
Hello Ivan1Staff. 11/11/2021 date.
I am waiting for your suggestion and help with my Cut Dimension problem.
The materials used were PROOFGRADE Medium Clear Acrylic (111-03) and PROOFGRADE Medium Draftboard (500-03). For 1.000 inch drawn squares or circles, the measured dimensions vary from 1.003 to 0.990 inches depending on the location on the Glowforge bed and the orientation of the object. Data showing all of the measurements was in the zip file in the narrative submitted previously. Please let me know if the zip of the SVG was readable.
Trying to set a kerf for making finger-slot joints or butt-joint inlays is not possible with these cut dimension variations.
Can my machine be corrected by error correction training?
Hello brok09 I’m going to review this information with Ivan to get you the best answer to your question. But for now, I would wait on running the Camera Recalibrator as that will only affect how accurate the preview you see in the app is compared to where the print lands on the material.
Please let me know if you need anything besides the SVG showing measured dimensions of the test geometries on the Glowforge bed.
I will postpone camera re calibration.
I generally use the precision numbers to assure that the object loaded is scaled correctly, so have not had a problem with the translation being a bit off. Having had to replace the machine with a referb I have fount it to be so close that I have not felt the need to recalibrate the machine.
Error correction training is a great idea for a feature! Unfortunately we haven’t announced anything like that, but I’ll share this suggestion with our product team with a note that it came from one of our Glowforge owners.
The SVG you sent was readable, and an excellent report. To ensure that I’m understanding everything correctly, you’re seeing a total variation of up to 0.013in (0.33mm) in the dimensions of your completed parts from one area of the bed to the next?
Did you happen to already check the tension of the belts in your Glowforge? My apologies for not asking this sooner. When pressing lightly on one side of the belt, the other side should not move.
Please reply with a photo of the belt if you are unsure about the tension. I’ll be checking in with one of our team’s top mechanical experts early this upcoming week to check and see if there are any other steps we can suggest.
Yes, I am seeing a total variation of 0.013 inches in the completed parts depending on location on the bed. This makes correcting a drawing for good fitting of finger-slot or butt-joined inlays about impossible. “Kerf correction” doesn’t have much meaning when the cut dimension is larger than the drawn dimension or when the cut dimension varies on location on the bed.
I tested the belt tension as suggested and can see no motion of the lower section of belt when pressing the upper section. This was true for both belts in the 12-inch direction and for the gantry belt in the 20-inch direction.
What should be done next?
On the amount of positioning error for a drawn one inch object, taking the measured cut dimension, (1.003), equal to the bed positioned dimension minus the beam diameter, (kerf 0.008), gives the bed positioned dimension = 1.003 + 0.008 = 1.011 inches.
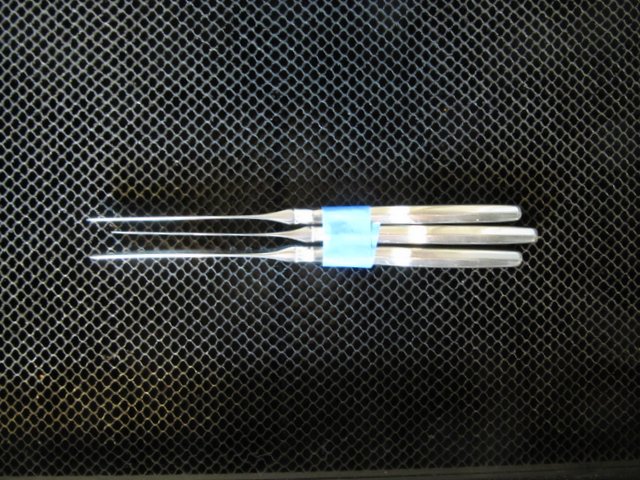
Picture of a 198.0 gram (3 knives taped together) weight pressing near the center of the left-side drive belt. All three belts feel like they have similar tensions.
11/16/2021 9:20 Eastern
One explanation for the problem my machine exhibits could be variations in the drive belt geometry. All teeth should be separated by the same distance, i.e. constant belt tooth pitch. All teeth should have the same size/shape. If not, then the effective drive pulley radius, r, would change with belt position making the distance moved for a constant step rotation angle, theta, dependent on belt imperfection.
Has the supplier of drive belts changed?
Thank you for the additional, detailed information. I’ll be reaching out to you very soon with something else we can try. As it involves verifying your shipping address, I’m going to close this thread and move our conversation to email and our team will continue to assist you on the email ticket I create for you.