Hello All - I am having an issue that may be inherent in the product or software, but I would think it would affect others.
Cutting 0.06 thick clear acrylic with protective paper on both sides on my older Glowforge Pro.
Recently cleaned mirrors and lens with isopropyl alcohol wipes.
I am cutting out rectangles for a small display bezel. I cut out a lot of these at one time.
I just cut out a hundred or so and when I tested them in a bezel, about 1/2 of them fit great and the other half would not.
The two groups of sizes are from a single run, single focus and the material is very flat.
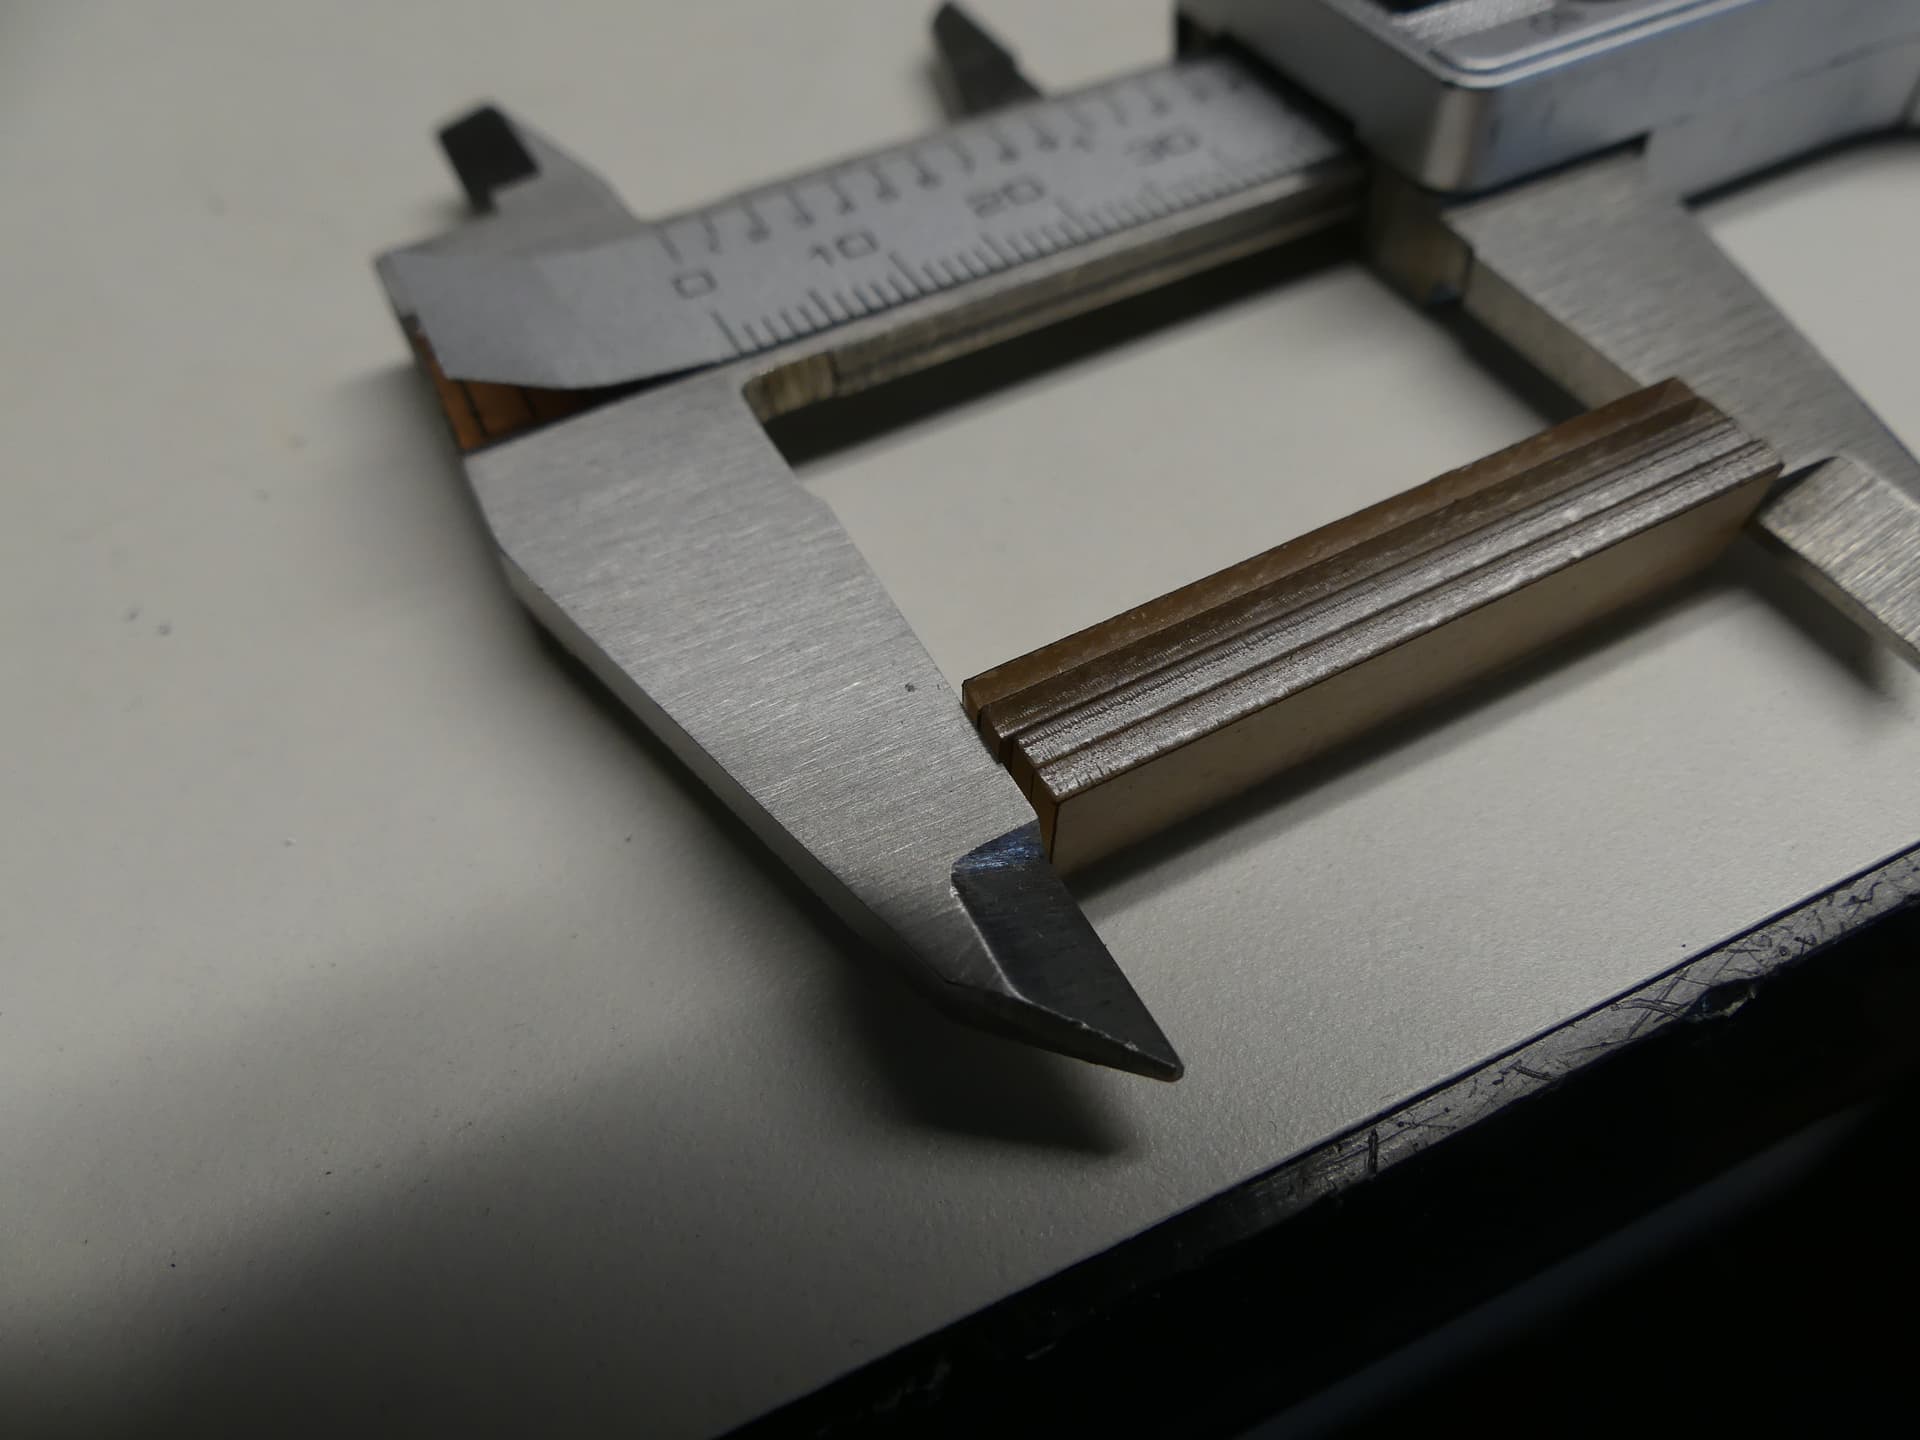
Measured the two piles (fits and don’t fit): 37.2mm for fits and 37.6mm long for the ones that do not fit. Not a continuous range of lengths, but two distinct sets of lengths.
Could this be some problem with the steppers/belt or is there some resolution constraint that quantizes the files and depending on their placement they may be different?
Just wondering where a 0.4mm increment in the product or software to help me narrow down where to look.
Moved a set of 20 over and numbered them to see which ones were longer, and all ended up the same length. So I am suspecting it is position based. I ran out of material so cannot print more just to see what is driving this.
At this point I am going to make print two different sized bezels, but would like to understand or fix this for future projects.
I cut entire sheets of identical parts that require sub-millimeter accuracy, and have not run into this. So, it is probably not the Glowforge processing.
Have you mapped out exactly where on the sheet pieces of each size occur? Any consistencies with that might provide a clue. This would be pursuing your “position based” hypothesis.
Are you certain that each of your rectangles is identical? It is possible to accidentally resize while arranging in the GFUI. I usually do all my arranging for stuff like that in my design app (usually Inkscape these days), and just upload and cut the file. I would likely use an array of clones to insure the pieces are identical.
Can you reproduce this with some cheaper material like cardboard or Draftboard so you can experiment to sort it out?
I swapped the left two columns of parts and the results of size did not change.
The length (same as width in this orientation) was consistent: the outside two columns of parts (8 total) were identical and the inside two columns of parts (8 total) were identical.
I am confused about why the Y axis changes from the first column to the second column. (I am confused by this whole puzzle, actually). Would you mind sharing the file and letting one of us see if we get the same result on our machine?
Hmmm - not sure how to share the glowforge file…
In the app I used “Export design” and that generates an svg file. I “Uploaded” it here. Hopefully that is useful.
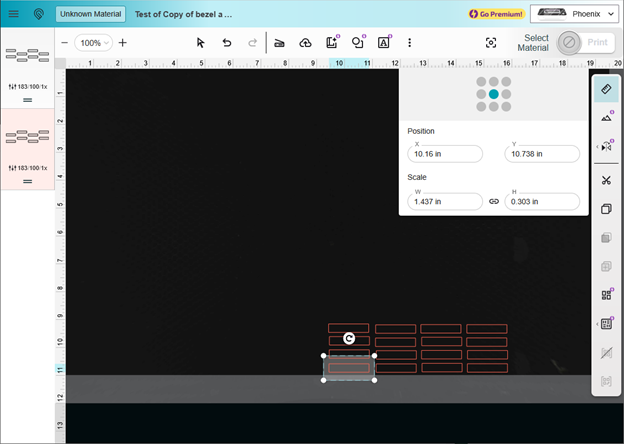
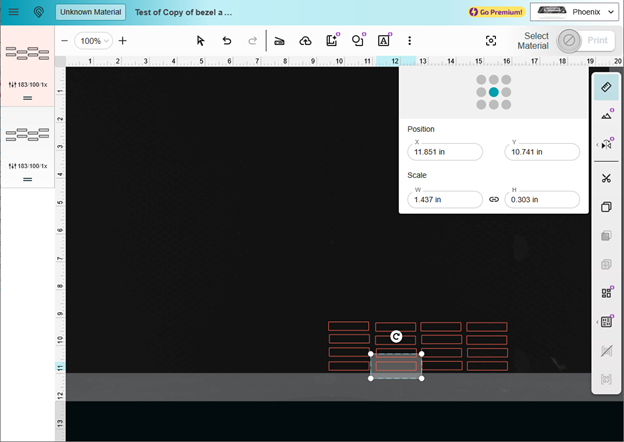
You can see the coordinates of a couple of the parts in the screen captures earlier in this post, in case it does not place it in the same location for you.
I would keep a couple things in mind. #1. If you are measuring and using Set Focus where you measure will be accurate. #2. the laser cuts a “V” and the cut will be wider at the top, with the specifics defined by Set Focus #3. If you are seeing a percentage error, the error will be most obvious where the total is longest. #4. The set focus is taking a fish eye image and warping it flat. a big effect of that is a tiny distance in height makes a huge difference in size and location the image will appear on the screen. #5, The numbers in the measurement widget rule. Set focus will approximate your screen to the image (sometimes very well) but the actual numbers repeated multiple times will hit the same place below.
I will cut this file tomorrow. Is there a reason that half are black stroke and half red? Is there a reason that they are not aligned via middles and centers?
I have re-printed precision parts all over the bed on scraps or to save as much material as possible. The machine will never resize an object, and the camera has nothing to do with scaling - it’s merely for approximate object positioning.
You have a mechanical issue if I objects are not printing identically at any position on the bed.
I have had issues with the heat of the laser warping the material when closely packed cut sequentially. By alternating, the material has more time to cool down between adjacent parts being cut out.
I just brought in a single piece (rectangle) and then copied and pasted a bunch of parts. All hand placed. Just lazy I guess!
Good job figuring that out. I have some extremely intricate designs where I had to spend considerable time breaking apart and changing the color of the “inside” and “outside” paths or they would get destroyed by the close proximity of each path.