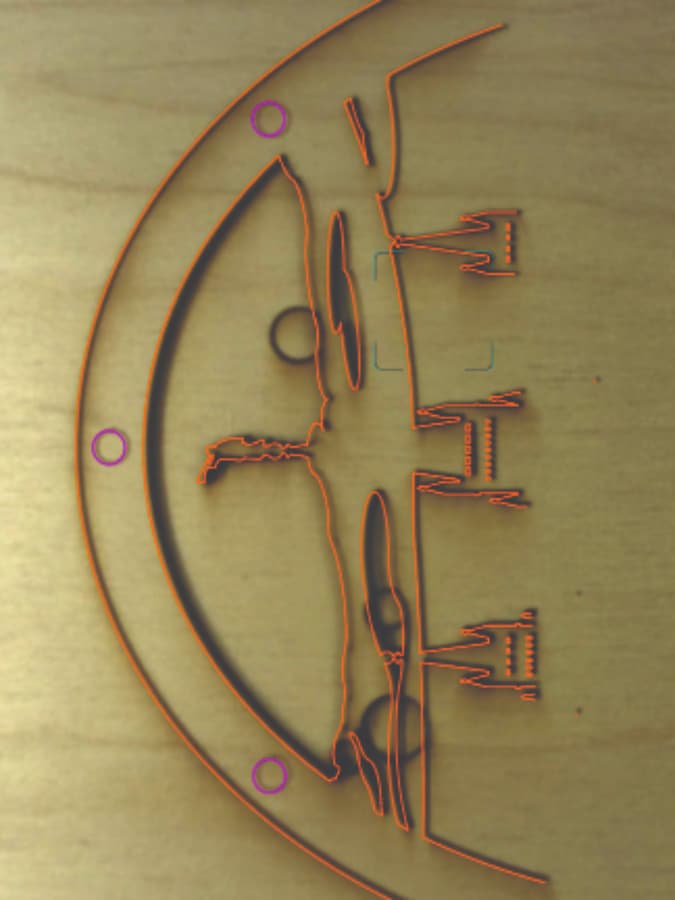
Help! This is a design I’ve used before and it looked great. Now in the clouds at the top of the page it cuts 3 circles out. They don’t appear on the design, the svg or even in the window setting it up. But when I run it always cuts 3 holes. Looking at the screen after it’s done… there are 3 small holes along the edge that are scored for gluing spacers. Those are fine. But there’s those pesky holes cut and there’s nothing design-wise over them!
I don’t know if it’s a Corel issue or Glowforge. I design in CorelDraw. Always have. Never had this happen before. I rane a few different jobs and they were fine. Came back to this… still cuts those invisible ghost lines!
Any suggestions? I need to make this for a wedding gift and I’ve wasted a bunch of birch trying to figure it out.
They are definitely not in the design. I loaded the SVG but also looked at the source - and you can tell as there is no red cut line in the workspace.
Likely a glitch in processing, you should send to support. That said, it could take some time to get a response, so in the meantime, you could try rotating that part to see if that gets rid of them.
If I were you I’d try re-uploading the original design. Sometimes we add a few extra things to a design in the GFUI that we forget about, and they can be hard to locate.
So I printed what you had uploaded, same result.
I copied all elements of that design to a new file to make sure they weren’t artifacts from a previous version, same result.
I then rotated the design 90 degrees, same result.
I then found several “invalid” objects by browsing thru the object list and deleted them. They were off to the right side and did not extend the “select all” box size to be included, or show in the GFUI, but they were there, and had been copied over to my new file. They would not accept a stroke.
Printed again, and now the circles moved to new positions but they were still printed.
I suggest you start with a clean design and re-create that piece. I also suggest making it continuous object (except for the three circles and whatever those pieces are across the middle. At the moments it is dozens of disconnected paths. Also confused by the complexity on those three parts on the right. I can’t think of a material that would support that level of detail.
Thank you both for the advice. Trying all of the above. As to the complexity… this is one page of a layered wood temple scene that I make from baltic birch and set into a base. The first 3 are for gates, entryway, landscaping, and the 4th is the building, with all the spires, windows, etc. I sliced it off here so it would include just the part in question without all the other details and take less time to test. Was hoping i wouldn’t have to redraw the whole thing, it was a massive effort.
Trying your suggestions and sending an email to tech. Then I guess I start drawing. If you have anything else to try I’m all ears! Thanks!
Well I tried it and, when zoomed in, I found a BUNCH of really weird nodes causing what I would describe as “impossible curves”. The first idea was to use Stroke to Path, then just save the new path.
Hang tight though, I actually had two ideas and I’m going to try the second. Shouldn’t take long more than another few minutes.
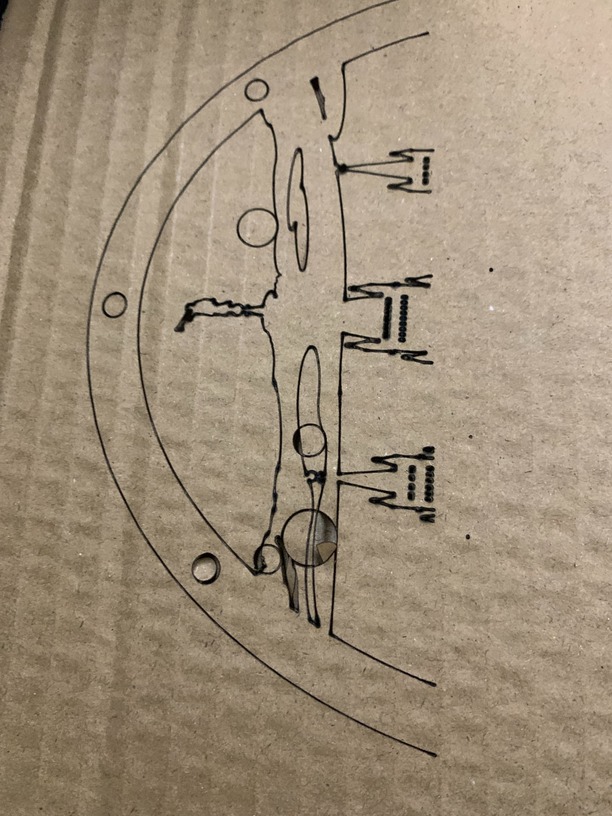
So that worked (pic on left obviously - right is an earlier test.)
I killed the print during engrave of the lower windows (now I realize what they were) - the circles were coming up during the score of the middle section.
Here’s what I did, and I don’t know if Corel has the same functions. I joined everything together except the windows and location pin circles - those were joined as single paths each (not grouped.)
Then I selected the function in Inkscape to make a bitmap copy, and deleted the main path.
Next I used the “centerline trace” option in the “trace bitmap” function, and finally deleted the bitmap copy I made previously.
There still some weird artifacts (on sharp corners like the smaller spires and some corners) but it would be easy to clean those up compared to re-creating the whole thing.
Ok, so I’ve used that trick in the past (convert to BMP and then trace) to help get rid of the GF tendency to fill shapes when you don’t want them filled, and to fix clipart, but the centerline trace always came out squiggly. Maybe in this case, since the lines are already straight & accurate, it’s easier for it to follow them. Had to adjust gamma to get them dark enought to read, but this section came out clean and no #@$! circles! Next step is to do the whole page and see what happens. I’ll post in a bit with the results. Here’s hoping!
Glad to hear it!
I’m an Illustrator user, no clue if these steps can be replicated in Corel. It’s a handy AI trick to get rid of weirdness while preserving the precision of the original artwork. Converting a vector to raster to vector again is never as good as the original and something I prefer never to do.
closed open shapes
used Live Paint to fill with a color (LP is different than assigning a fill because it creates new objects the exact shapes of the lines)
expanded the LP object
ungroup and delete the original lines (leaving just the new fill object)
change the new object to stroke/no fill, delete the extra added segments
reset the blue circles (all three came in way off to the side)
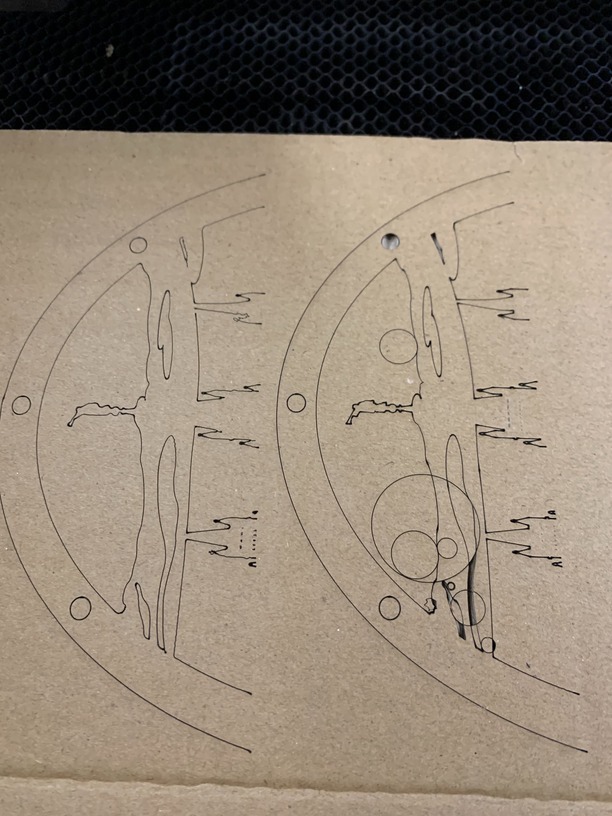
Thanks for the help you guys! Lots to digest here! The little section we’re looking at got fixed two different ways and worked. On the whole page there’s so much detail it overloaded autotrace. Since we now had a good top section I cut and wiped that part of the original drawing and joined the two together. Successful burn this time! Here’s a pic. Still needs spacers, front layer, base & finishing but the panic is over.
I took notes. Will be going over all your hints so I’ll be better prepared.