Hey all, I’m having some problems getting shapes I’ve cut to match up and could use some advice.
I’m cutting multiple 21cm (8.2inch) circles that I intend to glue together- the problem is they never come out of the glow forge the same!
I’m using the same artwork, same material, same settings and have even been careful to place the artwork on the same place in the bed every time in case the camera is adjusting the shape. If you lay the pieces on top they don’t fit each over evenly around the edges but one overhangs in a certain place and the other overhangs somewhere different. It’s about a 3mm (10th inch) difference.
It’s frustrating as one of the main reasons I ordered the Glowforge was to be able to cut a perfect circle. Any suggestions or help would be appreciated.
There is something mechanically wrong with your machine if it doesn’t cut circles consistently. Perhaps a loose belt or pulley, something catching or the gantry not square.
it would be more of the machine. You might need to clean out some small piece that has/is interfering with the movement of the belts, if you watch it move does it look like it sicks ?
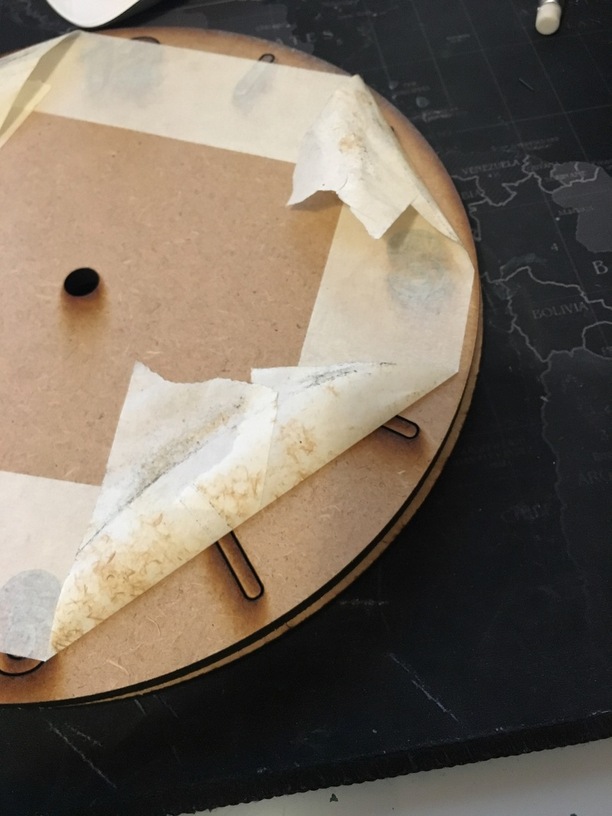
Also pic of some of the circles to see how is is failing.
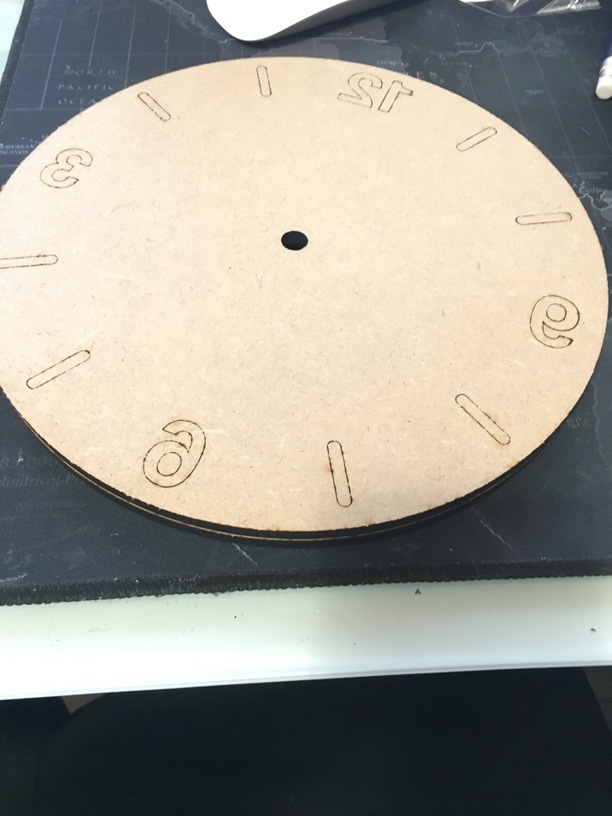
OK, here are pictures of the cuts and as I was doing it I noticed something strange. I’m making a clock. When placed the right way round (the numbers facing the right way) I have the issue of the inconsistent overhang but when I place one piece the wrong way up (see back to front numbers) they align perfectly. Am I missing something obvious?
An obvious fix for this project would be to reverse the numbers in the artwork, however- I’d really like to know what’s going on here.
With regards to the machine it never seems to stick, the circle seems to cut smoothly.
Settings for this cut at 155 Speed, Full Power, 3 passes.
Are you 100% sure they are circles and not just very close ellipses?
Uploading the source file is the only way to get good help from the community otherwise you’re asking us to speculate and spin our wheels… Staff can probably look at your file via some fancy admin interface, but we can’t unless you provide it.
If you upload an SVG, and you don’t know this trick, it’s best to zip it first and then upload the zipped version.
With how the gantry is, it seems like the closest we can get is… very close. Hopefully support can help you figure it out to a degree that works for you. But you might have to end up having to do some trick like reversing the numbers you mentioned since you’re cutting out fairly big pieces.
If the “circles” align when placed together one way, but not the other, they are not perfect circles. And since they ARE aligning in one direction, the issue seems likely to be with your design, not with the cut. What software are you using? I know in Inkscape, for example, you need to hold down Ctrl (on Windows) to create a perfect circle. I’d double check that you have a created a true circle in your design.
That is what would happen with a slanted gantry. Circles would come out as ellipses aligned diagonally. If placed back to back they would need to be rotated to match up.
I’m using Illustrator and am sure the circles are perfect circles in both sets of artwork, to confirm I’ve attached the SVG files. clockcircles.zip (3.3 KB)
I’ve checked with a set square and it looks OK to me, the issue is the problem is just millimetres so it could be this but it would be very hard to tell.
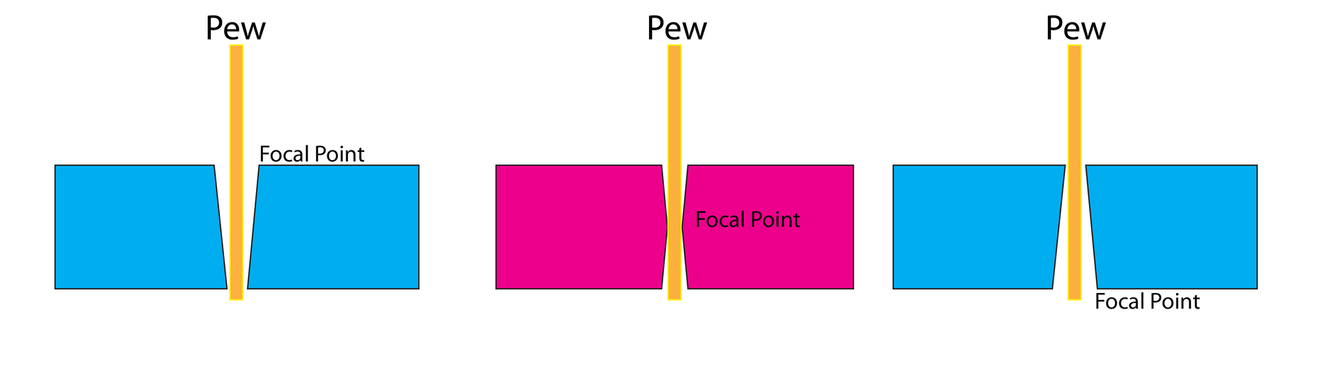
If I understand what you are asking about here, it’s the normal result of the shape of the cut profile with a surface focal point.
A laser that is focused at the surface of the material does not cut (or burn in this case) straight up and down because it burns a little bit less farther away from the focal point, than it does right at the focal point. It’s an intensity and focus thing. So a side view of the cut edge looks like this at different focal points inside the material:
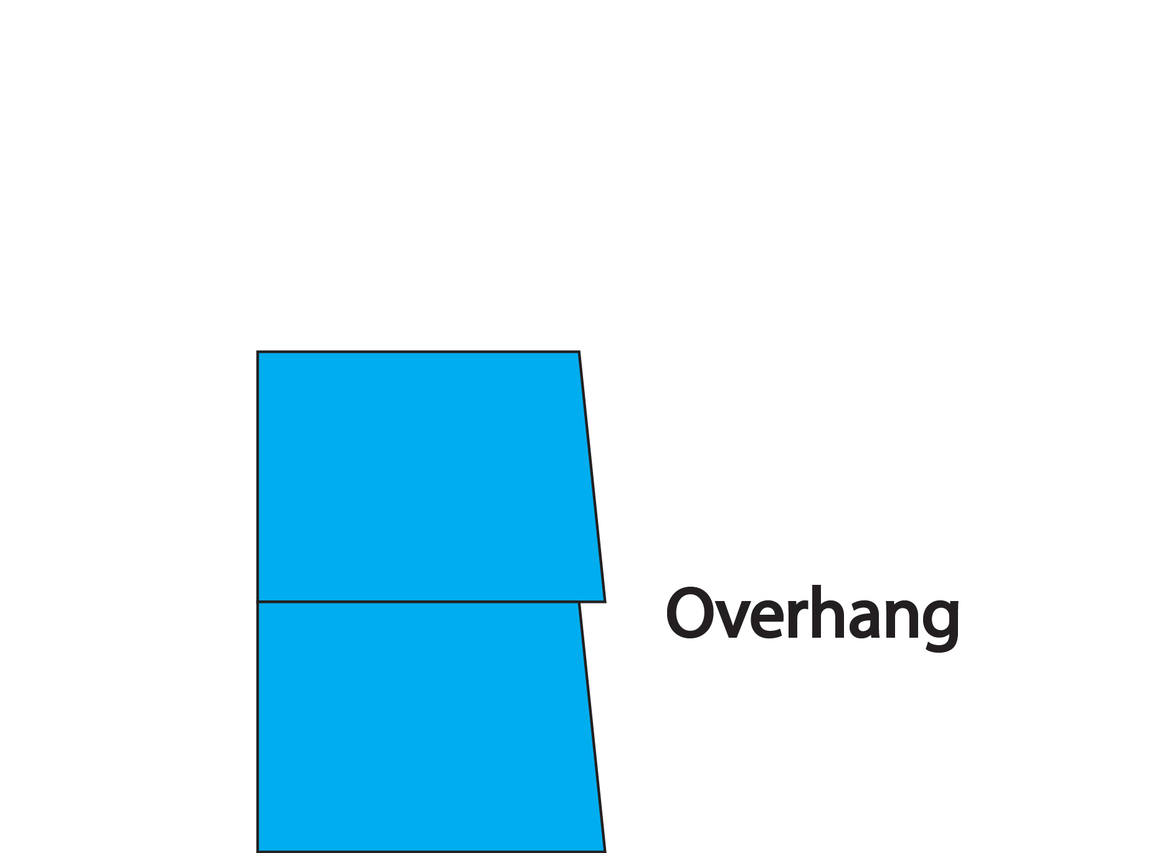
And if you stack two surface cut shapes on top of each other you get this:
The thicker the material, the more exaggerated the effect will be. If you flip the top one, yes they will line up perfectly, they were both cut at the same angle.
I’ve done some experimenting with using a center of material focal point - you still need to sand it down, it creates ripples in side stacked material.
Just the nature of the beast…might be worth experimenting with flipping it over in the hole and cutting a second time at a lower power to just burn off that edge. Haven’t tried it yet myself, but it seems like it would work in theory.
(Just looked at your file - the circles are fine. If you are actually experiencing a distorted shape, the issue might be mechanical. If the circles are rotating smoothly in the holes they were cut out of, it’s not mechanical, and you might be experiencing some degree of overhang, depending on whether you are trying to line the circles up at one side…the effect will be doubled.)
Sorry, that’s my crappy artwork…that’s supposed to be showing how much material is removed from the shape, not the beam shape itself. I was thinking that as the beam gets broader it disperses a little and removes less material…but that is showing what happens as measured. There is a larger kerf on the surface of a surface focused beam than there is at the bottom side of the material.
The one I don’t quite get is the center focus…I’ve always thought it should be reversed from what actually happens.
Ran a bunch of tests though and as far as I could tell - it does what the center image shows. Maybe someone with more familiarity can explain it.