Design layout in UI compared to actual positioning

I have searched the forum for a bit now and I will admit that it is hard to read all of it because most topics get off topic quick.

I used to do photography so I get the concept of the fisheye lens on the lid. It is a necessity due to the close distance to the tray and the relatively large area of the bed compared to the short distance. I understand that as you travel further from center of the lens that the view gets distorted.

I try to place small objects extremely close to center of the camera in both axis, but you can’t do that all of the time. I have even placed a square ruler flush against the bottom wall of the Glowforge to keep things aligned for repeatable results.

Like others, though, when working towards the edges of material it is really a crap shoot. I guess they say that it can be off by upwards of a .25". Is this what most are experiencing? Is this going to be improved on with software development?

My biggest question is, has anyone designed anything that compensates for the distortion that they can lay in the bed so that it is easier to align things in the UI to get realistic results? If so, can anyone share their file?

Also, the visible area that you see on the UI is very limited. I know this comes back to the fisheye lens issue.

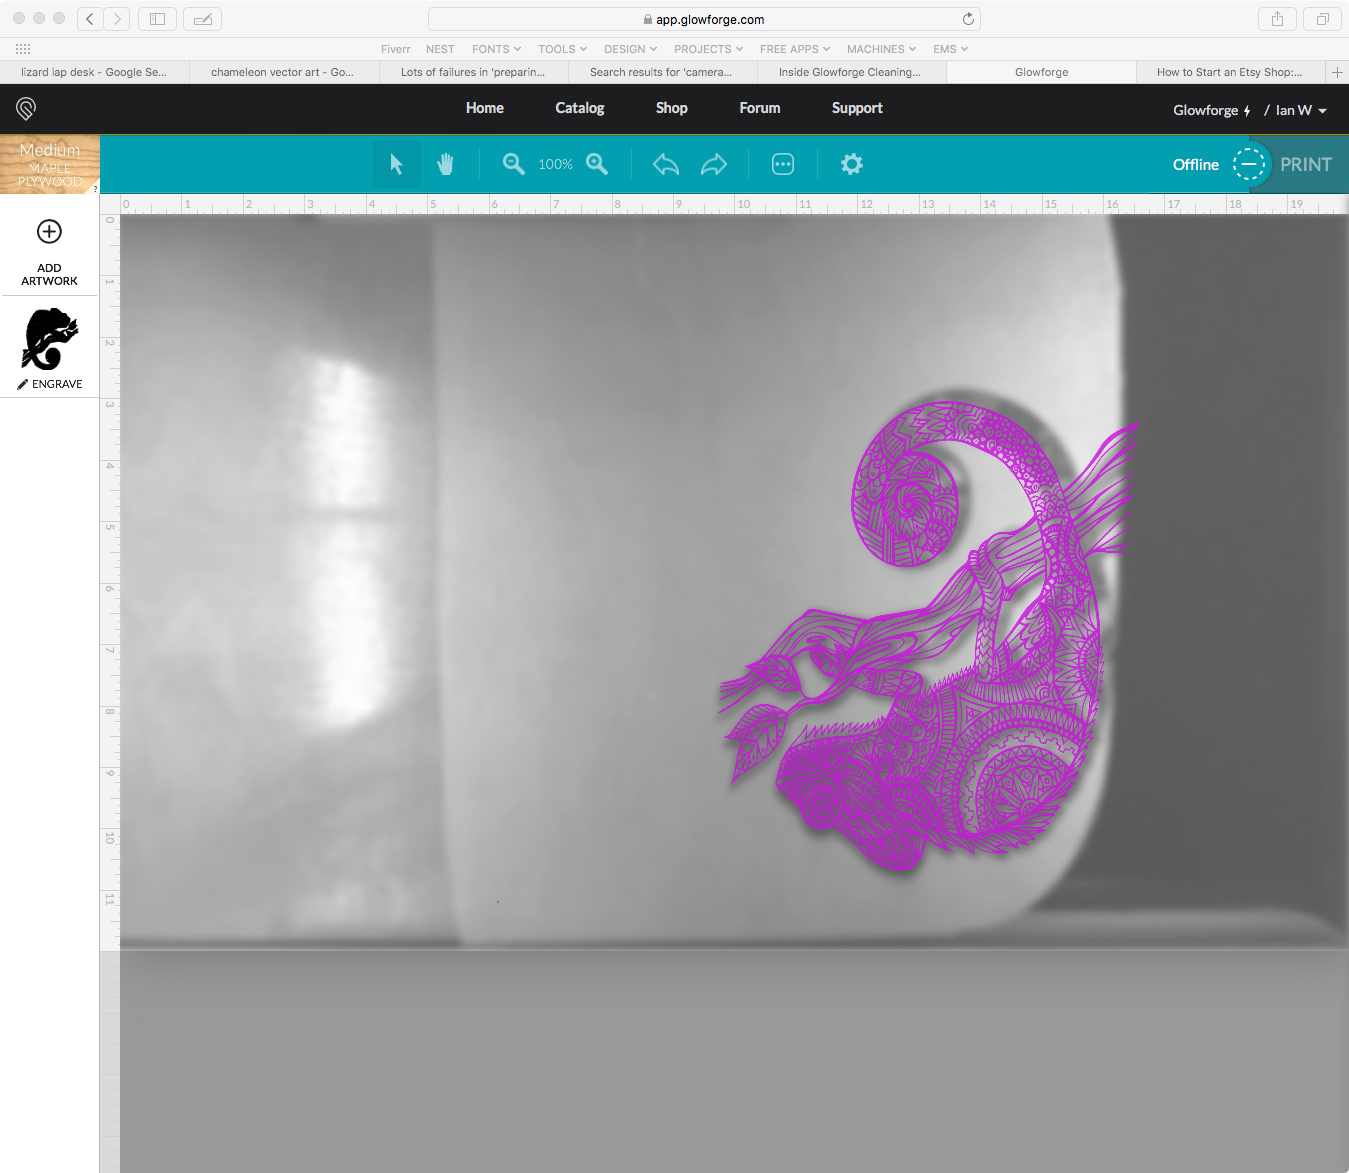
That looks like an image taken after the engrave? The refreshed bed image after an operation is displaced, but it should burn where you placed the file initially. If nothing is moved you can run the file again and it will burn in exactly the same place even though the camera image shows it off.
Over 8 months there have only been a couple of instances where my engrave or cut was off by less than 1/4". The original placement is almost always dead on.
So for accuracy, I have my whole design in the file I open in the UI, or copy and paste additional copies at that point and avoid loading additional elements after an operation has completed.

Hope that helps.

2 Likes

Jigs, jigs, jigs. They work perfectly, and require less time than fiddling in the ui.

2 Likes

That is the scan after then engrave. It shows how far off the actual engraving was from where it was intended. Nothing was moved. You can see how far off it was in reality vs. where it was set to be in the UI.

I agree. I do a lot of woodworking and jigs are always the answer. It would just be nice if this expensive machine was smart enough to compensate for the wide angle lens.

I do scratch my head on the jig design because the further from center the more off the placement gets. Any ideas on a jig?

Pretty much the only think one can do at this time is run a test every time and then perfectly place the piece over where the test actually came out. It just doubles the time for everything. Pain.

@dan Looking at the image above…should it be off this much? Or is there an issue? If you have time to read the whole post…do you have any insight on what is going on?

Thanks!

Well… Yes and no. As you were commenting, you realize the issue is how the scan is displayed and several of the regulars have noted that the after scan is weirdly different than the before scan. It may be because it uses a different height as the material height.

The engrave happened precisely where you said relative to the rulers, so if you place the engrave in the same spot relative to the rulers it will (should) engrave repeatably in the same spot. The thing that varies is where it draws the image from the fish eye camera. You can easily see what I mean by typing different material heights into the uncertified material box and clicking “submit”. The image will refresh and show your engrave in the same place relative to the ruler, but a different place relative to the material.

To work around this, I either leave sufficient space around my design and cut it out. Or… In the case where I’m engraving something I don’t want to cut, I cut a jig to put the material in. Sometimes I just use tape on the honeycomb as the jig if eyeballing to visual precision (in person, ignoring the camera image) is sufficient.

It’s a little ironic that a thing some UI designers might argue simplifies use of the machine actually significantly complicates for a commonly desired use case (engraving an object you are not cutting out).

1 Like

Wild speculation presented as fact warning:

I personally believe that perfect camera alignment will never happen. There are too many variables and not enough data to get a really tight lock on a position. You’ll always [well, for the foreseeable future] be limited by camera resolution, which you can probably mitigate with careful software and multiple images doing sub-pixel calculations, but you’ll probably see diminishing returns in terms of time to lock position versus fractional improvements… and that’s not even getting into tiny warping in the material, which, again, you might be able to solve for with enough images and processing time, but I personally want the forge to start faster and make jigging easier. It’s a far more practical solution.

So, I view the camera as a rough guide – if I need tight tolerances, it’ll always be jigs.

TO THAT END:

Please please make it possible to pause a job by adding a “pause” step. Jigs are a giant pain because you have to send the job to the Glowforge twice, resulting in twice the setup and breakdown times [which are irritatingly long]. It seems like a small thing, but it adds up. Sending the job twice is a terrible workaround, it seems like it would be so easy to add a delay action and solve a number of problems. In fact, I think it’s safe to say that this is easily my #1 complaint about the whole Glowforge experience [and I’m already pretty outspoken about the faults with the UI layout, but this is a much bigger issue].

Way I see it:
Upload file.
Add pause job(s).
Drag pause job(s) to appropriate point in the sidebar list of tasks. (right below the jig cutout)

Hit the print (cut) button.

Glowforge cuts the jig. It then parks the laser and shuts down like the job is over… but we know better, button is pulsing…

Open forge. Adjust pieces as necessary. Close forge. Hit pulsing button, it resumes.

There are so many use cases for this, and it’s been requested so many times I’m really astonished that it’s not already done.

Wanna do 5 sets of jigged cuts? Create file with 5 engraves stacked on each other, wrapped in a jig cutout. Hit print. Cut jig. Pause. Insert material. Engrave #1. Pause. Remove material. Add new material. Engrave. Pause. (repeat as necessary)

Release early and often, Glowforge! Also consider a beta server ( edit to remove what it thought was a link here) like “betaapp dot glowforge dot com” so you can test stuff out on us, your willing guinea pigs. Put us to work, we’re dying for some of the small improvements that we keep requesting (like pause).

(Note to any GF staff that may read this. You really are awesome, and you have a great product, and I know you’re working hard. Chances are you’re way ahead of us here – we wouldn’t know because @dan has stated that no software roadmaps will be announced. I get it, really, but throw us a bone, we’re all eager to help!)
3 Likes

You know what, maybe I’m wrong about camera resolution, this is pretty amazing:

1 Like

That is pretty impressive!

I think there’s no physics-violating reason the positioning couldn’t be very accurate even with the resolution it has. I do worry that the tolerances aren’t good enough – in particular, the lid seems to be the weakest link in the chain. So it may be calibrated on a granite slab, but by the time it’s been thrown around by UPS, rolled end over end, and placed on a crappy desk that was never true to begin with and sags under the weight of the Glowforge, I don’t know how useful those factory measurements are going to be.

But it doesn’t seem too crazy to either use the close-up camera to directly position things more accurately (e.g. with a “zoom” button in the UI) or to be able to run a calibration routine at home.

Of course, why not both? We all have different preferred ways of working. I really don’t want to be making jigs, so I’m hoping the visual alignment can be perfected. But I have nothing against those who choose the jig lifestyle and Glowforge should support them as well.

1 Like

I would think that they use the factory ones to establish a baseline and then use data retrieved from the machine at its new resting place and come up with a delta. That would allow them to calculate a correction factor for the changes caused by shipping & local conditions. They could use honeycomb cells as a fiduciary for calculation purposes.

1 Like

Plus, just the fact that the camera is mounted to the door, you’ve got hinges and a door stop that seem like it’d be easy for it to vary in closed height by a few thousandths and that’s enough to cause a problem.

3 Likes

I’m so sorry for my late response.

Thank you for your question and suggestions.

The software on your Glowforge is responsible for ensuring that the print lands on the material in the same place as the preview. When you’re done with a print, let a new image load. If the print appears on screen far from where it was supposed to go, you may have an alignment problem.

Most alignment problems come from the material being closer or farther from the camera than expected. While the software is still improving, you can take these steps for the most accurate alignment results:

  • Use Proofgrade™ materials.
  • If you don’t use Proofgrade materials, use a precision set of calipers to measure your material, and enter the thickness in the “uncertified materials” dialog.
  • Use material that is not warped or tilted.
  • Place your design near the center of the bed.
  • Clean the area underneath your crumb tray, particularly the four indentations on the floor.
  • Reboot the machine. Alignment can drift over time, particularly if you bump the head of your Glowforge while removing material.

Should you finish all of these steps, and find that you have an alignment error of more than 1/4", please let me know so I can investigate.

If you want see if the community has suggestions about jigs, you can search or post in Beyond the Manual. Note however that advice in this section is unsupported and is not reviewed by Glowforge.

Thanks @evansd2 for your suggestion! I’ve shared it with the rest of the team.

It’s been a little while since I’ve seen any replies on this thread so I’m going to close it. If you still need help with this please either start a new thread or email support@glowforge.com.