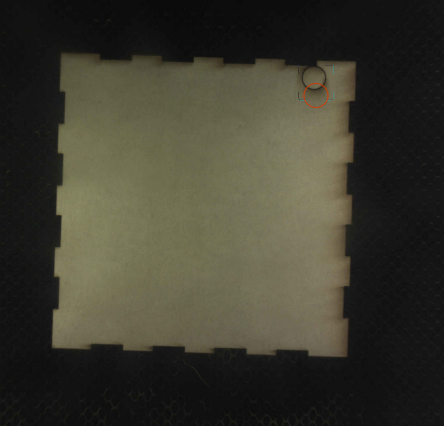
As of about three days ago my print has been suddenly off. I put a previously cut piece back in the machine to cut a hole in it and it ended up in completely the wrong spot! I thought it was a fluke and that maybe I had to wipe down the camera lens. I had a couple good prints after that ill minimal deviation in placement. Tonight it happened again? Any ideas?! (this has all been draft board which I have both chosen from the materials menu and used the “set focus” option to see if there was a difference.
Could your head have gotten moved? If it’s bumped or shifted with the machine on, it loses track of its location.
Is it possible the laser got bumped? One way to be sure is to a hut it all down and start over. This has happened to me before.
I suppose that could have happened, although not while it was actively printing. I can check that everything is still tight. Shutting down might help. I wondered if it might just “get tired” after a bit and mess up but I can’t imagine I’m overloading it in any way…
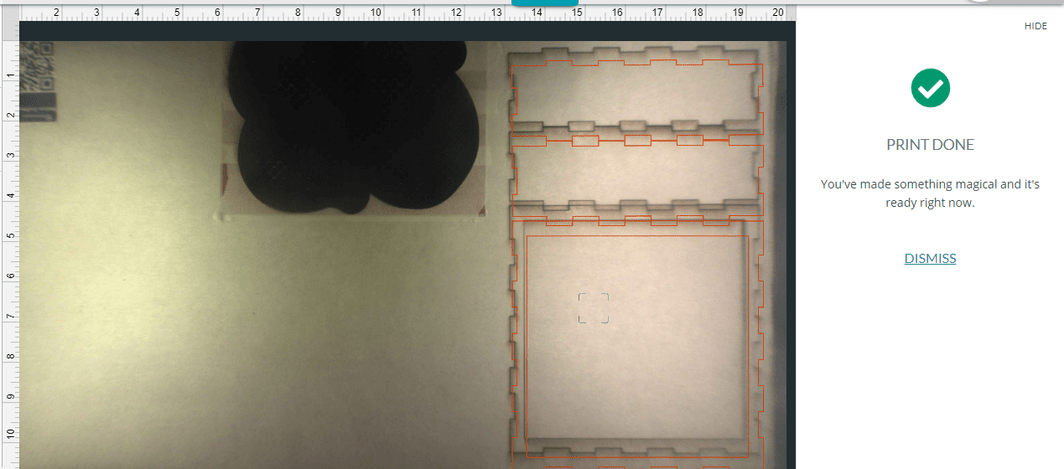
this is what I just got. I think that this is still useable for my application but I almost lost it…
Is this after you re-started the machine?
If so, and the crumb tray is still sitting level, I would re-run the camera calibration routine.
Like was said it may have gotten bumped and shutting down would fix that. If not you may want to try and recalibrate the camera which can be done here, Launch the Camera Recalibrator
I gave everything a good wipe down and made sure everything is crud free and not loose. I got a good print when I restarted so I will leave it for now but I appreciate the camera recalibrator suggestion as I have never had to do this yet and it might come in handy. About how often if ever should this be done?
Once should do it, unless you move your machine, in which case it would be a good idea to do it again.
1 Like
For your future reference, a bumped head will cause alignment to be off whether it was bumped while moving or while stationary. Either way, the calibration will be lost and a restart of the Glowforge is needed.
2 Likes
It is easy to bump the head when removing a full sheet of material - and it typically moves vertically, which is how your prints were showing to be offset.
If there’s any question the head might have been touched, just power it off and back on, and let it recalibrate while you grab a coffee or go pee.
More than anything else, material placement has a lot to do with how closely related the image and the finished cut are to each other. The camera is fish-eyed, using a very short focal range, so there is going to be some distortion between what it ‘sees’ and what the laser cuts. The closer your workpiece is to the center of the workspace (crumb tray center), the image/cut relationship is more accurately aligned, and the farther away from the center, the greater the distortion and difference between image and cut.
If you want to learn more about how this distortion affects your machine’s image/cut alignment, you can download this file and run some tests with your machine.
Fisheye Calibration.pdf (343.7 KB)
Upload the file to your Glowforge, set the sequences for the blue content to ‘Draft Score’ and the red can either be ignored or set to a heavy score. Place your material as you normally would any full sheet, then center the image on the material and take a screenshot using keyboard commands.
Run the print and wait for the screen image to be refreshed with the image superimposed on the actual cut results, then refer to the screenshot and note the differences between what is cut and what your Glowforge saw at the beginning, noting specifically the point where the image and cut are most closely aligned. That point is your sweet spot, the point at which you want to place projects that require accurate placement, which will help keep you from wasting material and time when working with small parts or materials in limited availability.
1 Like
When critical or in doubt I always run a 500 speed least power(1) on the cut to see where it will land, one you know where it is thinking you can use the “Precision Placement” to precisely move the cut the other way by the same amount, and even if it looks weird it will cut where “PP” says it will.
Since your prints are landing more than ¼” away from where they were positioned in the preview, I recommend recalibrating the camera in your Glowforge to fix it.
You’ll need a 12” x 20” piece of Proofgrade material with no markings or stickers. The feature was designed to be used with a flat piece of medium Proofgrade Draftboard, used upside-down (with the QR code side down). It may work with other materials that are the same size and use the same print settings as well, like Proofgrade plywood.
It prints a grid of markings, takes a picture, then measures its height in multiple locations. This data is used to make your camera more accurate for future prints.
To get started, click on this link: Launch the Camera Recalibrator
Should you finish all of these steps, and find that you have an alignment error of more than 1/4", please measure the accuracy of the camera and send us a screenshot of the results.
It’s been a little while since I’ve seen any replies on this thread so I’m going to close it. If you still need help with this please either start a new thread or email support@glowforge.com.