I do, I do! I have a vertical opening also and I have NO CLUE where to start with making a window panel. Glowforge just arrived today and the cut draftboard smell is giving me a headache. Any help would be so appreciated!
1 Like
You should not operate the machine indoors without a vent or a filter.
3 Likes
Those files on my computer at home, will send a PM when I get back!
1 Like
I have a vertical window opening and bought a thingy on Amazon. Scroll up a couple posts and you can see the pictures. If you want something more permanent the pictures may be able to help you design it.
Well, I ended up working out a setup for my own window and took a few pics; hopefully, this helps someone else!
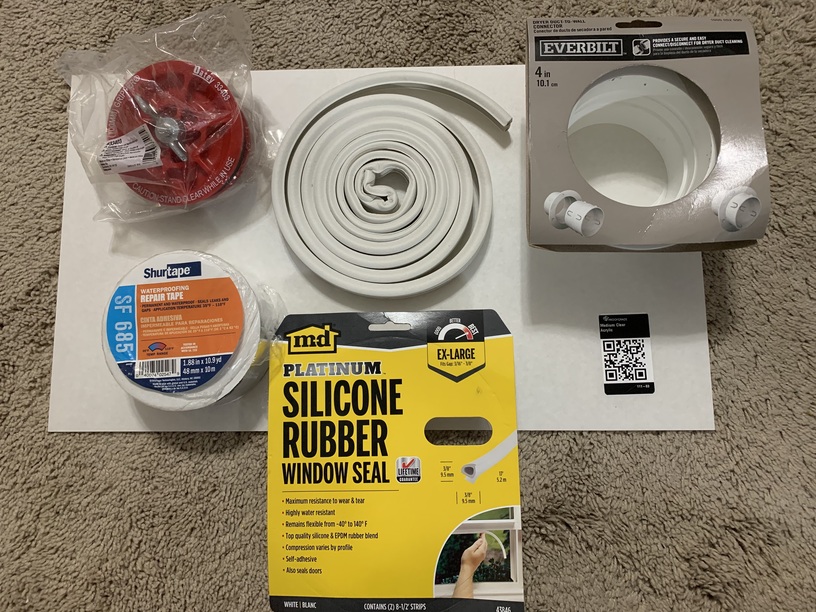
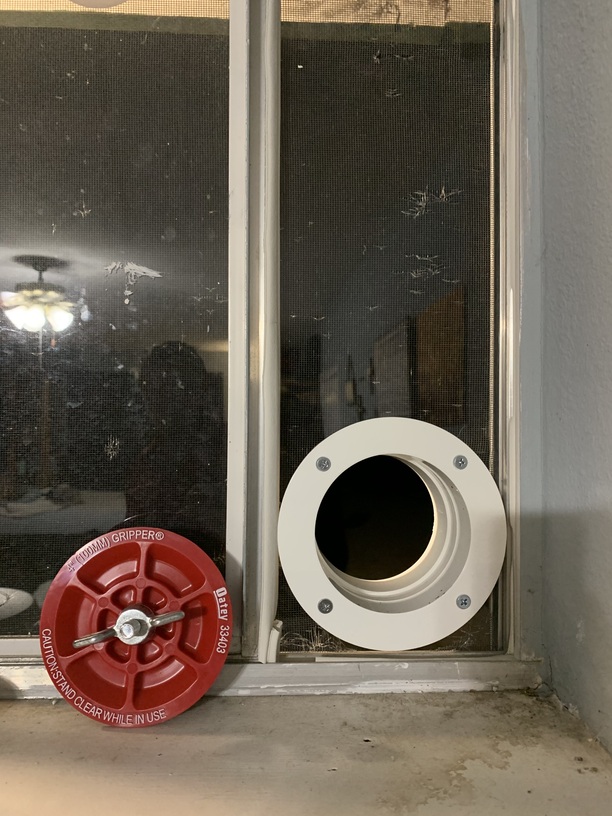
This is a “permanent” install (until I move someday), so I wanted the main piece to be acrylic so I could still use the window even with the vent installed. Based on a lot of other designs I’ve seen here, I wanted something that would allow for a quick-release of the hose and an airtight plug to put in said hole when the GF isn’t on. These are the supplies I got from Home Depot (along with an 8 piece set of #10-24 x 3/4in Flat Phillips bolts with nuts).
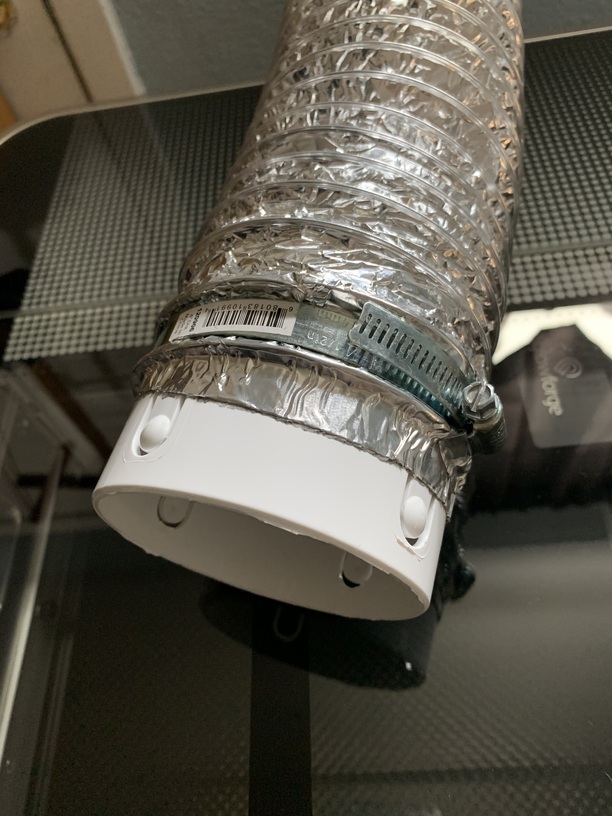
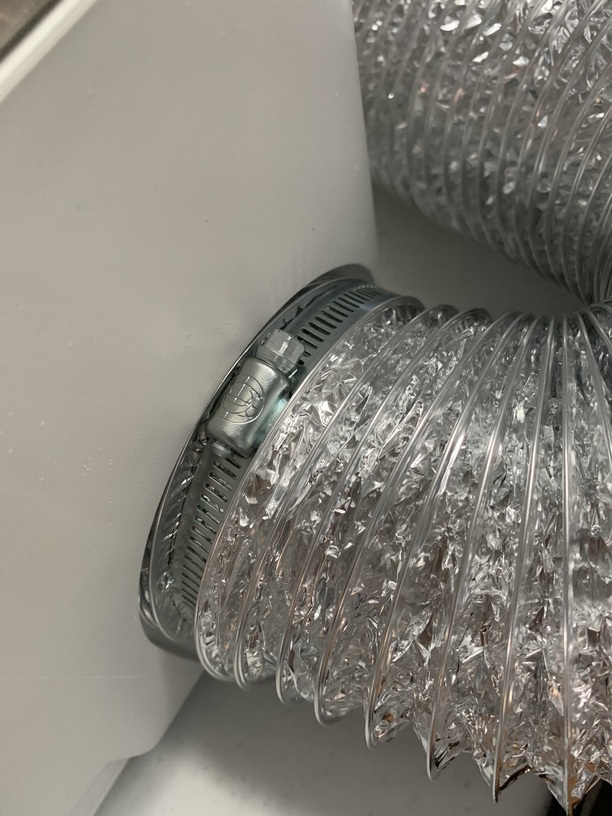
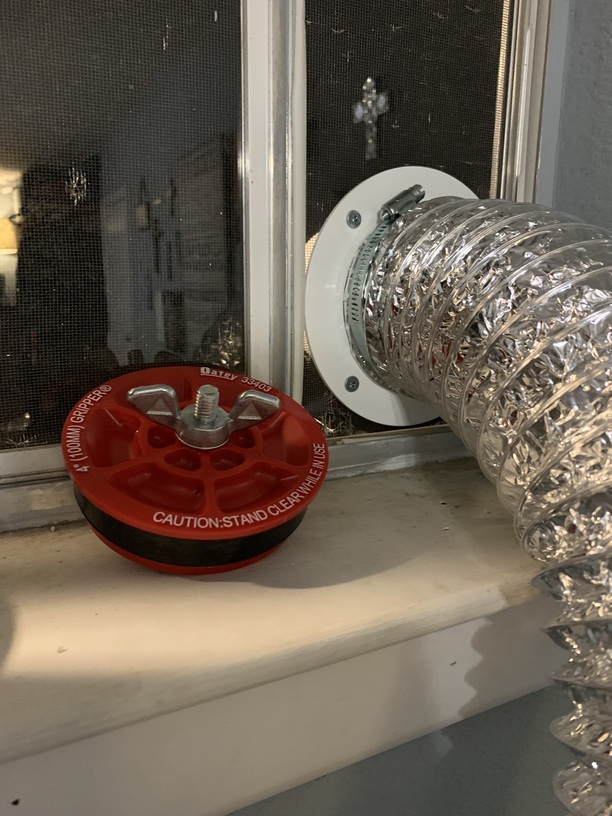
I went ahead and installed the male end of my Dryer Duct-to-Wall Connection to the hose itself, using foil tape and a worm clamp to try and get it as airtight as possible, as well as replacing the spring clamp with another worm clamp on the back of GF. Stinky smell is gone!
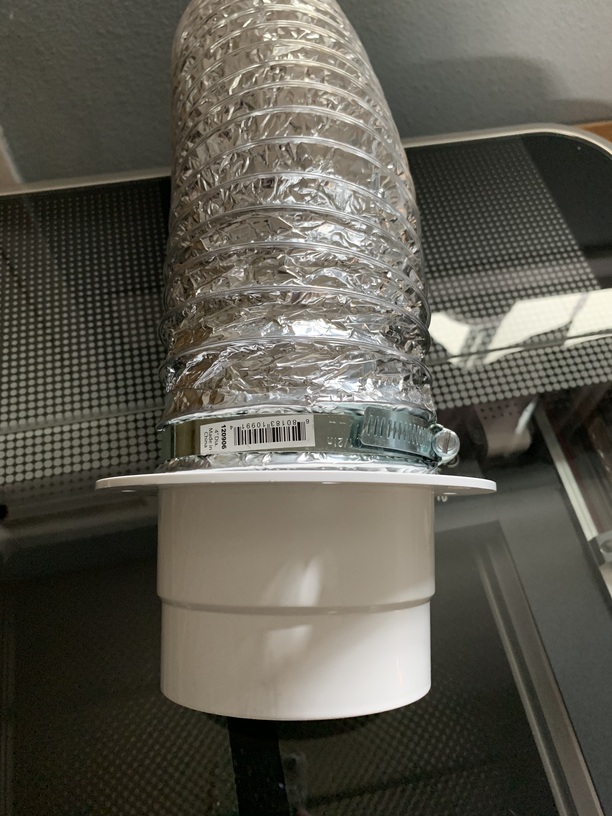
I dry fit the hose and the plug to the female end of my Dryer Duct-to-Wall Connection; both fit great! On to the panel.
I didn’t want to ruin the acrylic so my husband suggested cutting a test out of cardboard first. I used a permanent marker (extra fine point) to trace all the holes in the female end of my D D-t-W C onto cardboard and then cut out the circles and tested the fit. The little holes lined up perfectly but the big circle was too small to go around the outside of the tube (I traced the inside of the tube, which doesn’t account for the exterior thickness of the tube itself). The top hole in the picture was my first try.
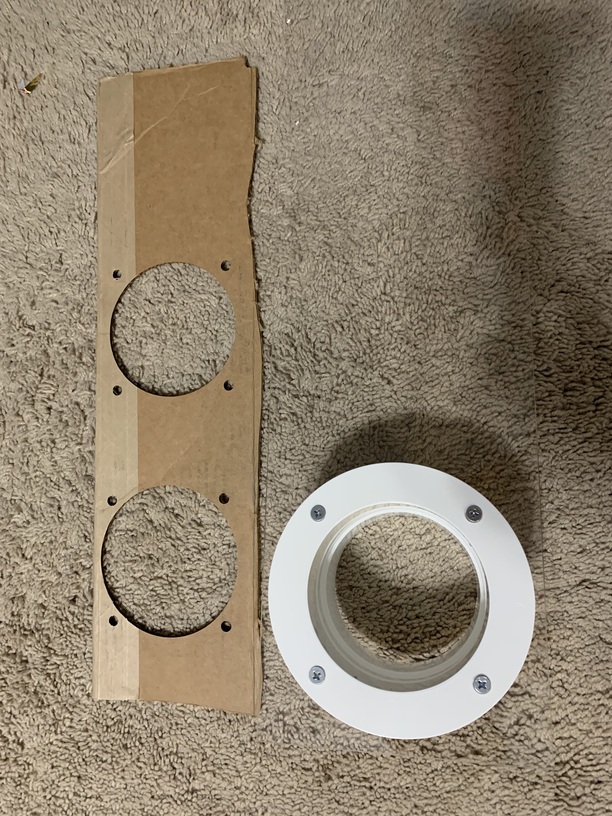
So, back to the GFI. I added circles from the Premium Beta and laid those overtop my traced lines, made the big circle a little bigger, and cut again. Second time fit like a charm.
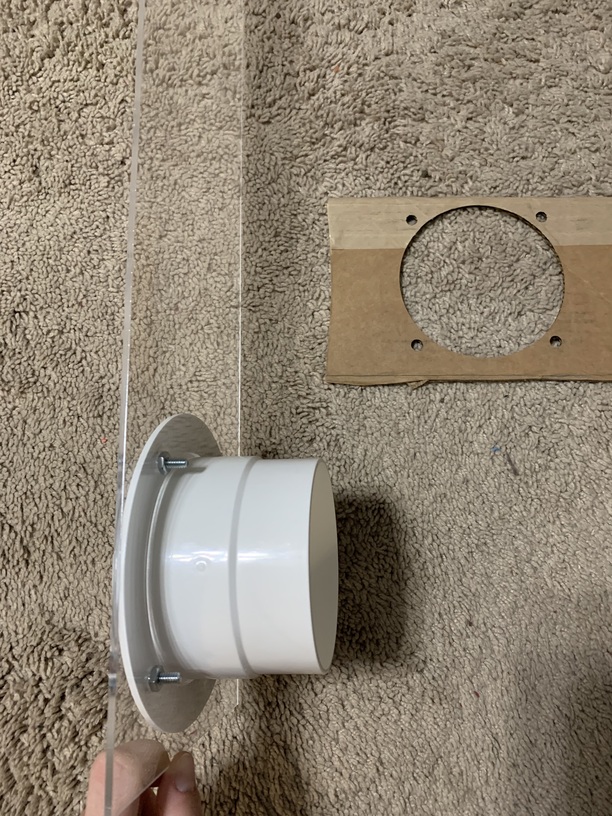
After that was made, my husband measured the lengths of the gaps where the weatherstripping would go (in the window tracts around all four sides of the acrylic panel). We cut and placed the weatherstripping, added a wooden chalk to hold the sliding window panel in place and it’s done!
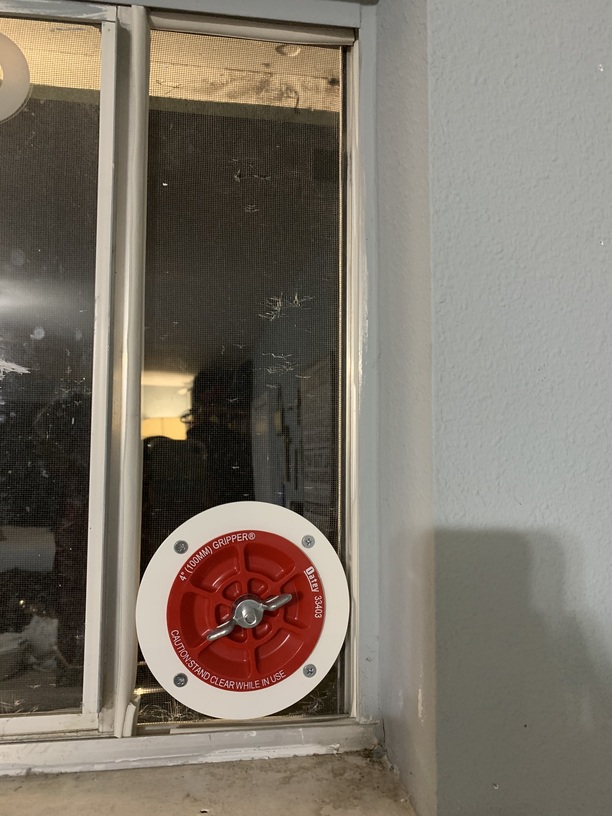
Sadly I don’t have a .svg file of what I did since I literally made it up as I went, but once I had all the pieces the whole thing took about 20 minutes. Hopefully this helps someone else! I was pretty worried about wasting materials or screwing something up and the simple addition of making it from cardboard first really freed me up to go for it and get it made. Looking forward to what else I can do with this thing! ![]()
11 Likes
Hi. I just started with my Glowforge this week. My window also opens vertically. I have yet to remove the screen. Could I get a copy of your vent svg please? I would really appreciate any help. Thank you.
hello…just curious if you vent out this window with the screen still on? thank you
We actually cut a hole in the screen so the end of the pipe could stick through  It fits nicely and allows us to keep the screen in place. We plan on replacing the screen if we ever move the GF.
Carolyn
I vent with the screen still on FYI.
1 Like
mistaken entry, sorry.
thank you
1 Like
thanks
I’m so sorry! I just saw this today 
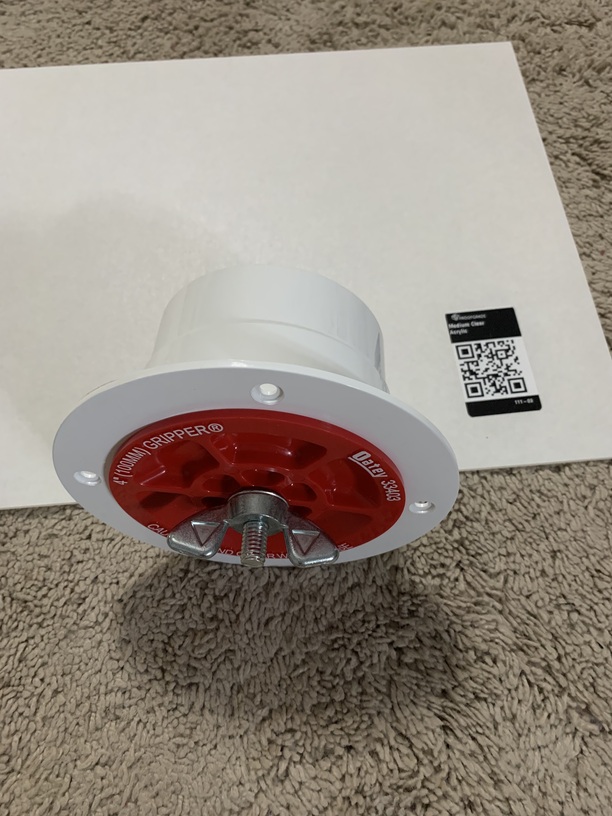
I don’t actually have an .svg file for what I made. After I chose my venting supplies from Lowes, I traced the holes that would need to be cut in the acrylic onto a piece of white paper with a black Sharpie and used the overhead camera to capture those lines. After that, I added my PG acrylic to the GF, used the GFUI to add a cut line at my desired width and positioned my traced holes where I wanted them to be on the finished acrylic. Set the whole thing to cut and then used weatherstripping to seal the acrylic in my window.
My best advice I can give is to test first on cardboard. That way you know you have the correct sizes and placement for all your holes before you cut your acrylic. Using the PG that’s sent with your GF makes the final cutting much simpler, so the biggest issue is usually making sure your holes are in the correct places.
2 Likes
I love what you did! I will have to try this with my set up down cellar! What is the name of the red cap? I can’t remember? Do you have any air coming in from the cap at all?
No air comes through the cap (the acrylic didn’t end up completely sealed though ). I honestly can’t remember the name of the red cap but I got it from Home Depot in the plumbing/pvc area. The cap is for testing pipe pressure so it expands and contracts when the silver nut is twisted/untwisted and creates a liquid-tight seal. It works really well for keeping outside air out when I’m not using my Forge! 
Carolyn
1 Like
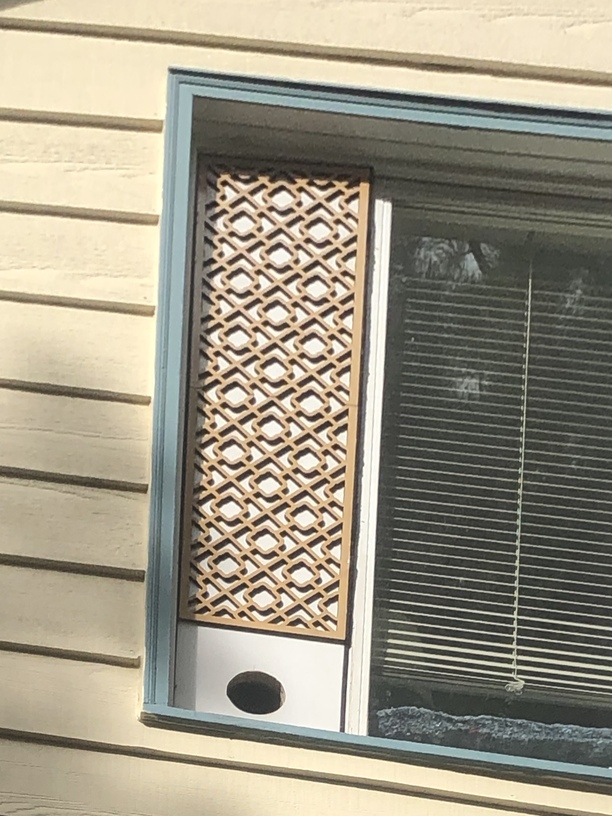
I had a vertical slide window to work with and came up with this. Took 2 sheets for the decorative parts (painted ahead of time with outdoor acrylic paint) and then I aligned and glued them down to 3/4” plywood I spray painted white so the neighbors wouldn’t hate me.
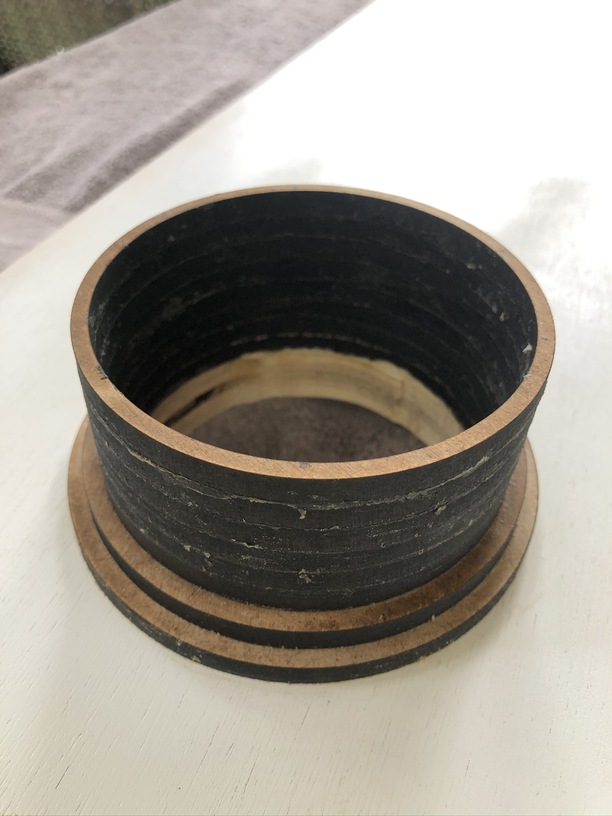
Also laser cut my own coupling with several circles glued together and extra glue afterward to help seal any cracks.
Last step was putting some 3/4” weather stripping around all edges to help secure it in place and manage the weather.
Has worked great for over a year now.

10 Likes
Neat idea and very nice looking too.
2 Likes
Hi, Could you please post the link?
Oh. Oops. I did scroll up to see what they were referencing but never made that connection. Just deleted my post…thanks.
Make sure you have a flap or screen over the exhaust or you could have bugs and mice taking up residence in your glowforge. Also rain coming in the vent could be bad.