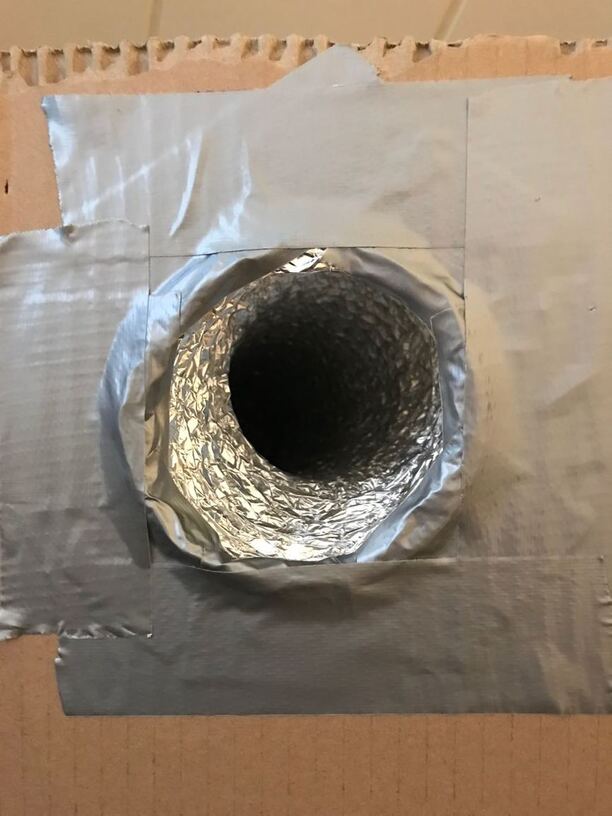
Until the air filters are done, I have to exhaust out my window. It’s starting to get nippy here, and when I had to remove the screen and when I leave the window open, disturbingly large flying insects with legs that look like daddy long legs come inside. Here is my temporary solution. I cut a 4" hole in some cardboard (on the Glowforge, of course), and duct taped the vent hose to it.
I want to improve on this situation, and I’m looking for suggestions. I was thinking maybe a 4" PVC pipe through plywood? I don’t really know what I’m doing.
Here’s what I’m using and it works great. It’s adjustable from side to side. I put a piece of air conditioning hose insulation along the top edge to cushion against the window and that cuts down on sound as well as blowback.
Grab some foam insulation board at Home Depot. The couple inch thick stuff will be good for keeping it warm inside as it gets nippy outside. Cut it to the height you’d like (6 or 7" would work fine) and a length you can wedge in the window.
Put a dryer vent thru it and an optional blast gate. Tape it all up with foil tape and you’ll be good to go. Under $25.
I have two requirements: I don’t want to leave this set up in the window permanently, and I don’t want to attach a 36" piece of hardware to the end of the exhaust hose.
I was thinking 4" diameter PVC pipe. I was at Lowes today, and they have something called a coupling fitting which looks like it accepts standard pipe with a fairly snug fit. I was thinking I could clamp the hose to that, and find something with a flange that I could screw to a board that it would slot into. I don’t know my way around plumbing hardware, though, so I’m searching for something that would work.
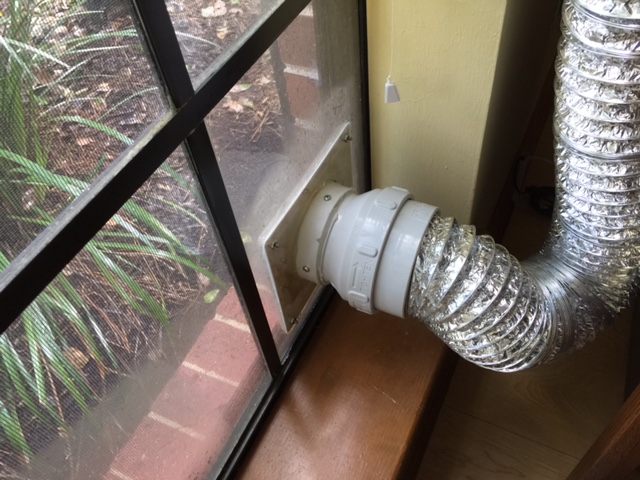
Home Depot and Lowe’s have a plastic quick connect coupling for those 4" dryer hoses - you can run it through a piece of wood or acrylic (we did ours through a piece of acrylic and replaced a small pane in a window with it, but you could use wood as well) and then connect and disconnect the hose from that. It could be stuffed with rags when not in use…although it has one of those little flap things on the outside, it is fairly open to temperatures.
With a double hung window like yours, I cut a piece of shelving material, found in the scrap pile a Home Depot, to the width of the window (about like your cardboard solution) and cut a hole in it so the following blast gate will fit through.
I then calked around the hole as the blast gate was inserted and used mirror clips to fasten the blast gate into the wooden shelving material.
In general, this stays in the window all of the time and the blast gate can be closed when not in use and opened when the Glowforge is powered up. It’s easy to insert and remove the entire blast gate and board from the window as needed.
With this setup, I don’t even expect I’ll use the Pro air filter other than on really cold days when I don’t want to open the window.
Oh, that second one looks exactly like what I had in mind: flanged pipe with screw holes, and a press fit pipe that goes into it. The HD reviews utterly pan it, but I’m sure there’s something similar I can find next time I go, now that I know what to look for. Thanks.
We got this setup at Lowes I think. There are lots of different styles available. Just look in the dryer hose section at any hardware store.
Talked to hubs and he actually adapted that Quick Connect by screwing it into the vent flange in the acrylic panel and filling the gap with clear silicone caulk to create a seal…it wasn’t designed to fit tightly originally.
On the other hand, it’s a leak proof seal, so I’d recommend anyone having issues to give the caulk a try. (Oh, and we used a worm clamp up at the top, not the little spring ones that come with the unit.)
I used a worm clamp and also wrapped some of that supposedly magic silicone tape around the exhaust before putting on the hose. It would really be nice if the exhaust bit extended about an inch further, but I can see all manner of reasons why that would be an expensive and stupid idea.
I cut a circle of non-PG plywood to the exact inside diameter (with my GF, of course), glued on a curved handle likewise cut from scrap, and use it to plug the hole when not in use.
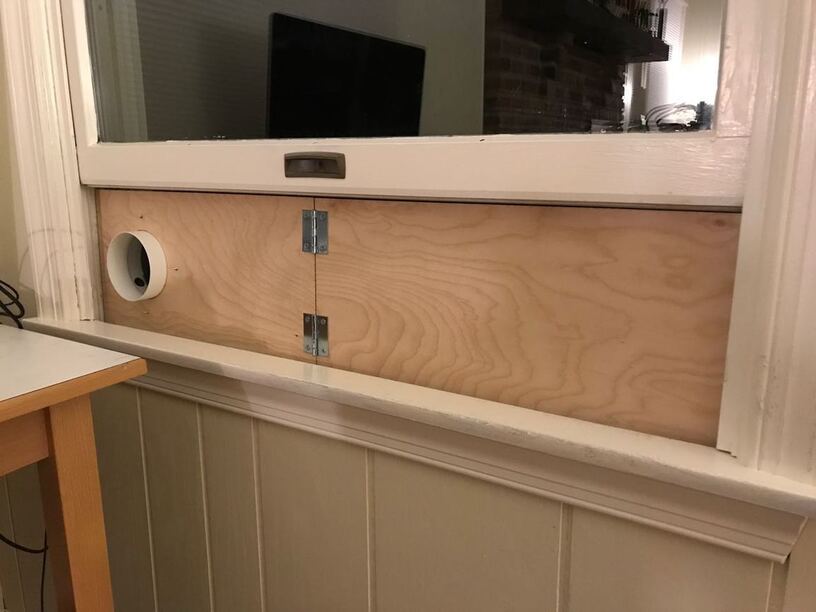
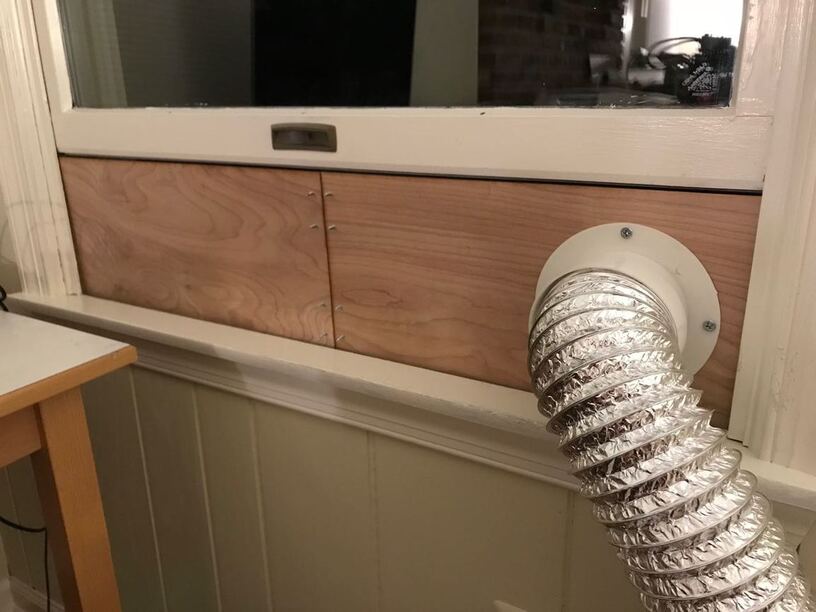
Improvements! I went to Home Depot and found this dryer duct to wall connector. Also picked up some 2x4 1" birch plywood which I had them cut in half vertically so I could break it down easier, some #10x5/8" wood screws, and this pack of utility hinges.
Did some measuring, cut out the vent hole and pilot holes for the mounting screws and squared off the stock:
The plywood cuts well at the common Proofgrade thick plywood setting of 150 speed at full power, with the focus adjusted to the measured thickness.