I keep looking at this and think: I have a 3D printer. Why have I not designed and printed a quick coupler? On the to do list. Well. My original tomato can and Glowforge print still works great, even if a bit rustic.
@pam4arts have you seen this thread? Lots of great suggestions and free patterns here, tried and tested by the community!
I think that it might be hard for GF to supply something like this for us, due to the fact that each venting set up is fairly unique. Still, there are lots of illustrations in this thread for how to go about it, as well as files that you should be able to adapt to your own needs.
My solution will not work for everybody.
It isn’t a window exhaust vent; it’s a permanently installed exhaust vent.
I had a house, and my dad helped me install a vent. Then I sold that house while waiting for my Glowforge to arrive. The vent wasn’t even a consideration for the buyer… it didn’t reduce my selling capabilities. Basement office space. For pictures of that unused vent, you can see conversations I had last year:
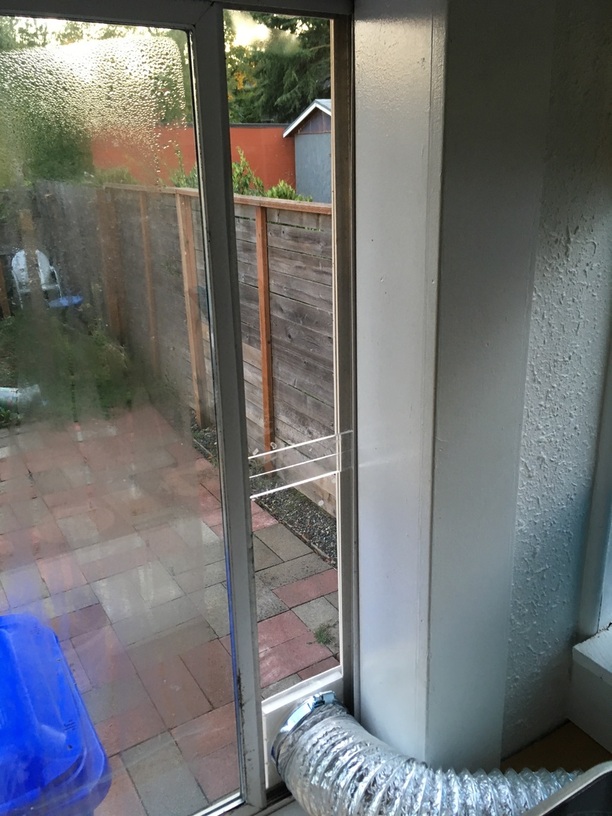
I own my second house, and my studio has a wall that’s behind my fence. Even on the front of the house, I would do this; but I have no restrictions preventing my solution.
I admit it seems pretty intimidating to cut through the external wall; but with a few tools and a “what the heck” attitude, anybody who can lean, bend, pry, and cuss will be able to do this - provided they are allowed and wish to. I did this one by myself. And hey, there are more pictures!
My hose is capped with a quick-connect from Home Depot like others in this thread. When winter comes and temperatures drop, I will probably disconnect when not in use. At that time, I’ll make some kind of insulated plug.
Rather than reinvent the wheel with a whole new thread, I’m just going to add links from various forum posts, to illustrate how others have tackled this task:
Okay, I found a short post on my venting setup - just going to copy it here instead of trying to find the link again:
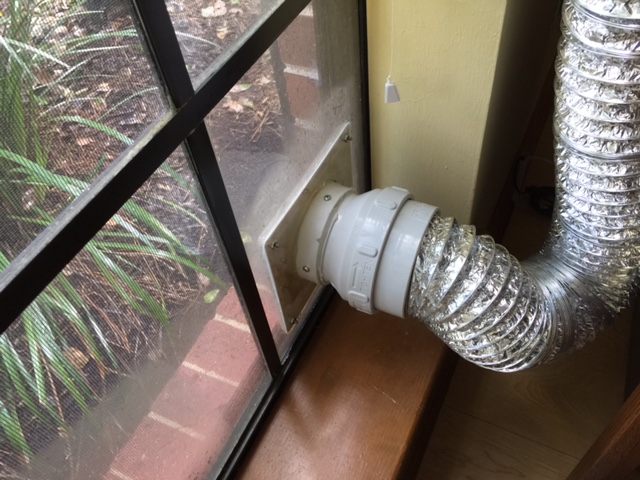
We got this setup at Lowes I think. There are lots of different styles available. Just look in the dryer hose section at any hardware store.
Talked to hubs and he actually adapted that Quick Connect by screwing it into the vent flange in the acrylic panel and filling the gap with clear silicone caulk to create a seal…it wasn’t designed to fit tightly originally.
On the other hand, it’s a leak proof seal, so I’d recommend anyone having issues to give the caulk a try. (Oh, and we used a worm clamp up at the top, not the little spring ones that come with the unit.)
I think I may have shown my venting solution somewhere already but I’ll drop this here in hopes it helps someone. There recently was a thread where somebody was concerned with venting it the window in Sub-Zero temps.
As you can imagine we have the same issues in Minnesota. I haven’t tested this in those temps but I’m confident it’ll be mostly effective
Here’s a really crappy video that at least hopefully conveys the concept… https://photos.app.goo.gl/OXhM90uiwFmAKv872
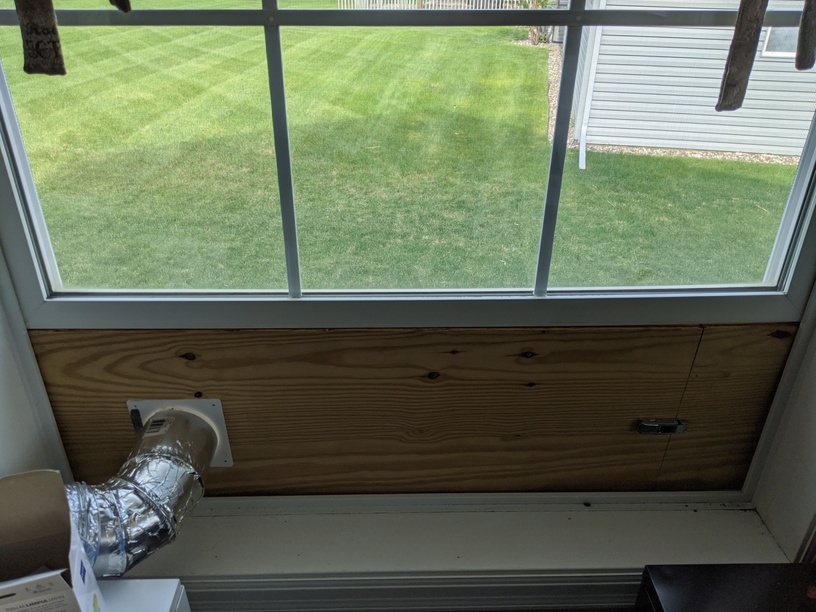
If your vent is anywhere near ground level, you need a cover and filter on the end of your vent to prevent small animals from getting in (just a cover won’t prevent bugs from getting in). Any filter will reduce the air flow meaning the length of your vent hose has to be shorter. Many filters will tell you how many feet of ventilation they are equivalent to. Note that corners also reduce your total vent length. And flexible hosing is less efficient than straight tubes. If you’re building a panel you’re venting through, I recommend plywood instead of cardboard. Mice, rats, squirrels, etc., can and will chew through cardboard, particularly in the winter if they think it’s warmer inside. There’s a lot to get right.
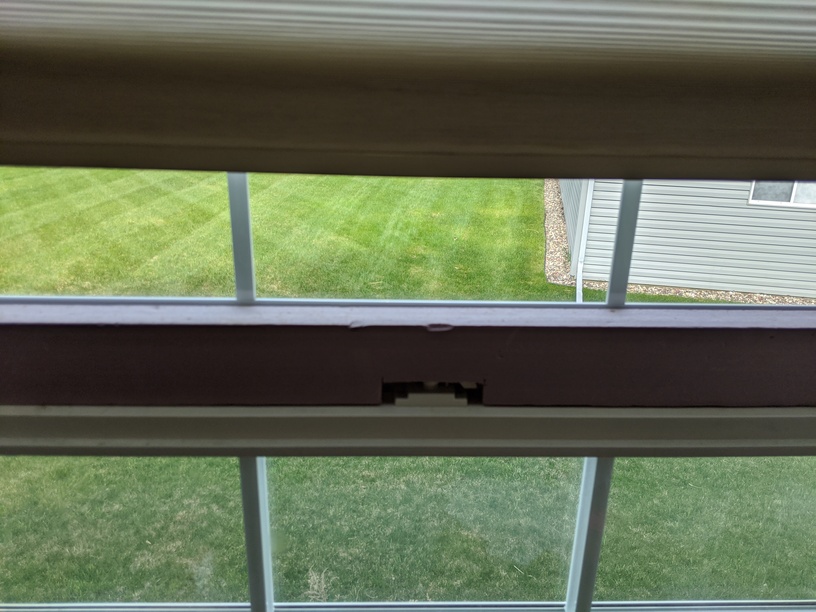
My own situation is that the only openable window anywhere near where the Glowforge will be is 2’x4’, large enough for a person to climb through. It would cost me $1000+ to replace it because it is part of a 4’x9’ window. It can’t practically be opened halfway — it’s all the way open or it’s not. And if I put a vent in and leave it open, it is a security issue, not even counting the risk of animals. So, to avoid having to put my Glowforge in my garage, I will have to build something 2’x4’ with a hose vent in it that I can put in place securely and remove quickly. Folding, as @jsc cleverly did, isn’t an option because it’s 2’ wide and 4’ tall. Plus I’ll have to operating with my blinds open instead of closed.
I’m not happy my filter is coming 5 months after my Glowforge.
Hi I am new to the GF community and was trying to figure out how I would set up my window ventilation system and this particular product seems to be the best out of everything ive seen (without having to make my own).
Moreover, it’s now wide enough for my 45 inch window. Any suggestions? Hopefully I am not 2/3 years too late
I’m still using it and it still works just fine. I don’t like leaving my venting permanently in the window like a lot of people do and this is the least inconvenient way to do it. You can just gather up the hose and insert and lay it on top of your Glowforge when you’re not using it.
Well, you could use your Glowforge to make a side piece to put in each time you put the vent in the window. Just measure after putting the vented piece in. You could edge the extra piece with air conditioning insulation or window insulation so it would seal better against the main piece.
My Glowforge is next to one of those windows that you crank out, so the opening is long and thin with triangles at the top and bottom.
On Amazon I found a long thin piece of fabric with triangular ends and a zipper down the middle. You attach it to your window with velcro, and mine stays attached to the window all the time. I only open the window when I am using my Glowforge - I would not trust this thin fabric in a Pennsylvania winter! You unzip the area where your hose goes out. One mod I did, is to add a couple of magnets to the top to act as a weight to pull down the fabric so that my window can easily close completely.
The company that makes the one I bought is Airly
Seems I’ve deleted that video but it was just showing essentially what jsc posted above. it’s hinged to make it
easier to get in and out and I cut a piece of insulation board to fit on top of the window to eliminate most of the draft.