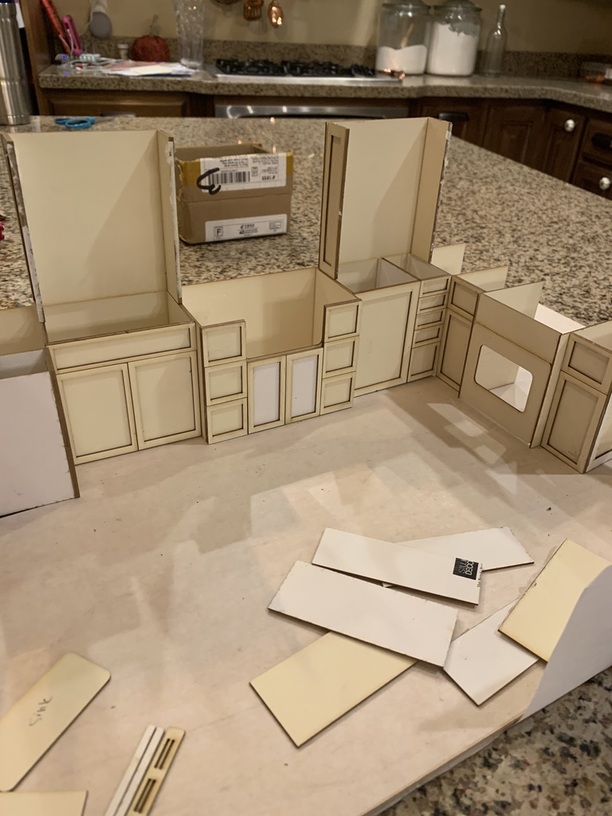
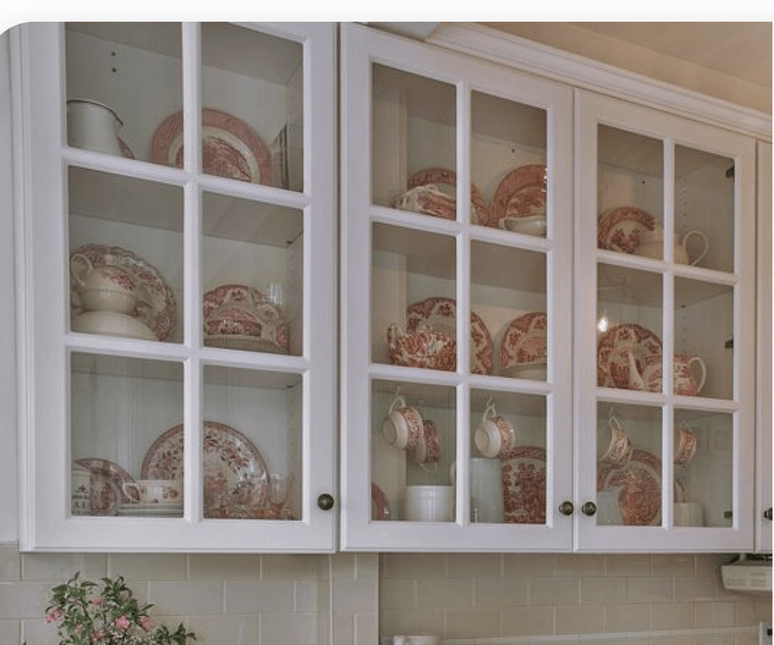
I’ve designed a dollhouse kitchen in illustrator and cut it on the GF. I’m thrilled with the results and can’t wait to complete it. Here is my request for help: I’m new to Illustrator and the learning process is SLLLLOOOOOWWWW. I want to do a french window grid (photo 2) on the upper cabinets. Does anyone have a svg file they’d be willing to share? Or an easy idea how to create one? I’m sure there are plenty of ideas on this but, again, I’m a beginner and a rectangle with rounded corners is about as technical as I can get.
12 Likes
I’m an Illustrator user, have been using for about 4 years now. I guess I’m confused what you’re asking for. It seems all you need to make these windows is rectangles, and you appear to have rectangles figured out pretty well. What’s your struggle here? A window like this would just be a rectangle with smaller rectangles to make the bars.
To combine shapes into one so that it will cut properly, select two or more shapes that overlap, go to Pathfinder and click merge/combine.
7 Likes
If I did that, I would have cuts at the joints because I don’t know how to erase lines (like I said, beginner) but I’m thinking maybe I could do two rows of 3 rectangles and use the negative image for the grid pattern. I’m going to try that.
Let me slap together a file for you real quick, then I’ll walk you through the setup.
3 Likes
Very simple in Illustrator.
-
Make an overall rectangle the size of the outer edge of the door. (Whatever dimensions you want for one door.)
-
Use Offset Path to create a smaller rectangle inside of it. That rectangle would be what you would get if you drew a point to point rectangle around the outer edges of the windows. (Select the 1st rectangle > Object > Path> Offset Path. Enter a negative number.)
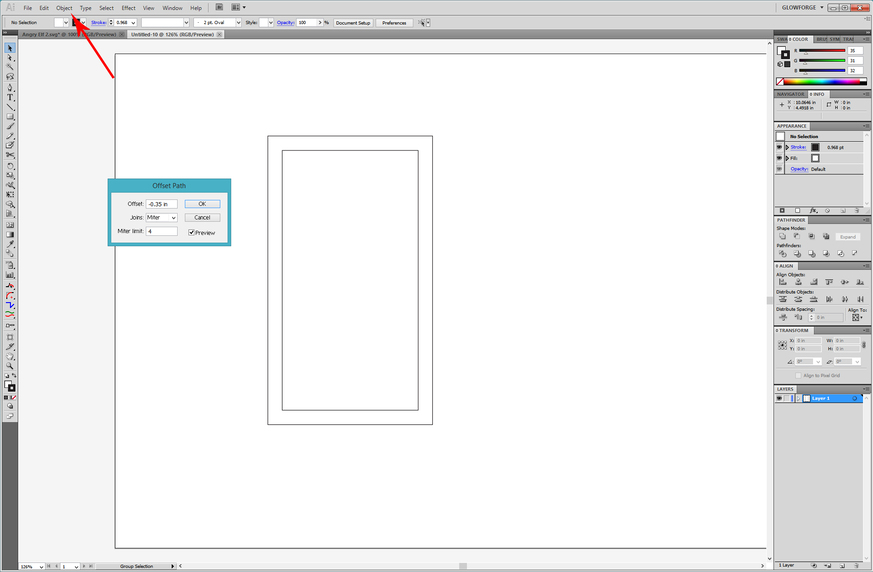
- Select the center rectangle. Split it into a grid.
Object> Path> Split into Grid.

Use a fixed value for the Gutter and set the number of rows and columns you want.
And that’s it.
11 Likes
TOO COOL! Thank you so much! That offset path thing would’ve been super helpful for me instead of trying to guess on all of these. hahah! I really appreciate you help. This is awesome.
2 Likes
Well it looks like @jules got to it first. Happy crafting!
Thank you anyway! I appreciate your generosity!
2 Likes
Oh yeah, sorry i was already working on the explanation of how it’s done when you offered to make it for her. 
1 Like
And I just learned something new today: never heard of Split Into A Grid. Thanks @jules!
5 Likes

Very nice start on the dollhouse stuff. 
6 Likes
Thank you!! It’s a home for ants.
1 Like
What wood are you using. What settings are you using for cuts. I’ve been having burn issues/incomplete cut issues with 3/32 thick basswood and 1/16 basswood. Any help would be appreciated.
Settings are discussed in the Beyond the Manual section. I went there and entered 1/16 in the search box and found a lot of topics. Most seemed to deal with acrylic, but there were some for cutting wood. Even if you find settings, they are only a starting point. When working with your own materials you will need to test them. Here is a link to a handy file for dialing in your settings.
And when working with natural materials be prepared to tweak your settings from time to time. As far as woods go basswood is fairly consistent, but all trees are different and sometimes they cut a little differently.
Thank you so much for your help. Newbie to GF and mini addict. Quarter scale.
Chrissie Clapp, Red Bluff
3 Likes
I’m actually using mat board to make it lighter. That could be an option for you too since you’re working in a smaller scale. I have the settings, let me know if you still want them.
I would love the settings. Regular mat board or task board??
Chrissie Clapp, Red Bluff
Sorry for the slow response. I got regular mat board, from the framing section, and I’ve been cutting at speed 250 and power 100.