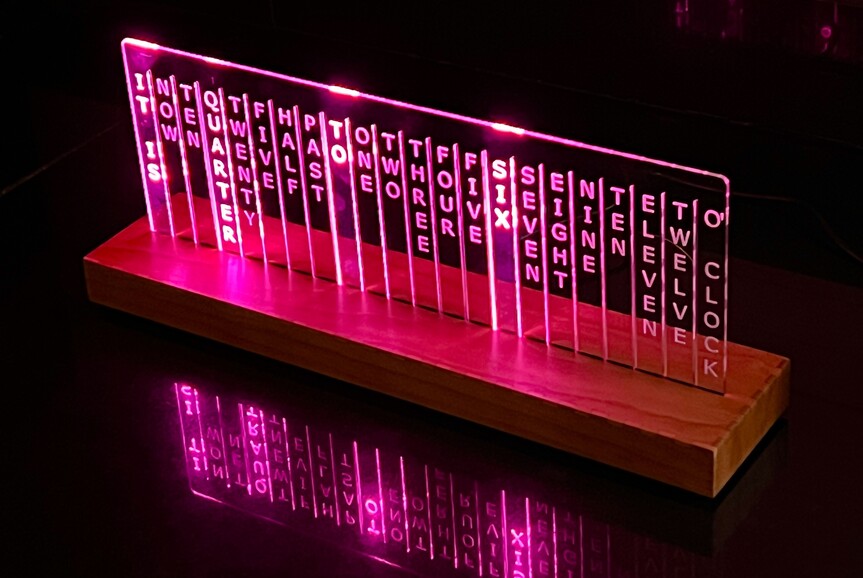
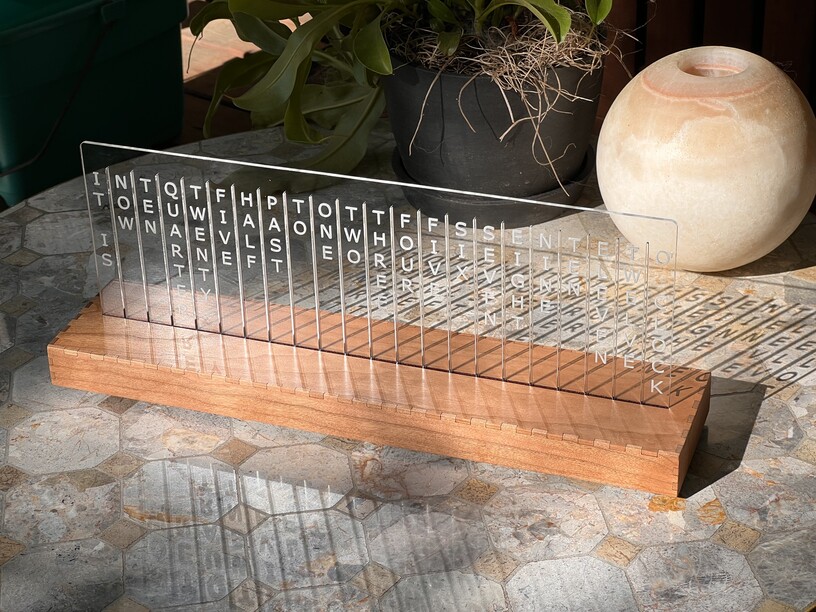
A paid commission to make a vertical word clock, People who have been around here for a while might remember the first one I made:
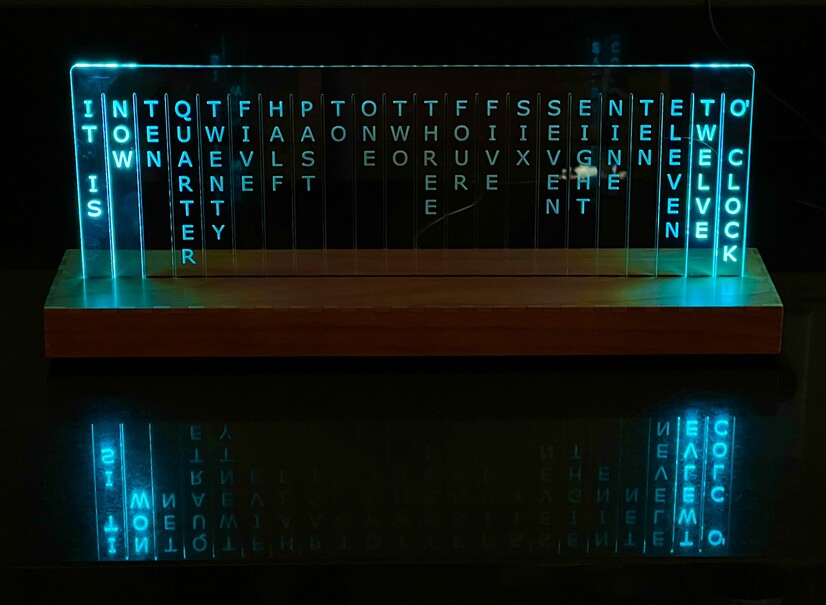
This is #2 of 2, I didn’t modify the design at all – only used Cherry hardwood as per the customer’s request. The first one I sold on a whim and I never got around to making another until now.
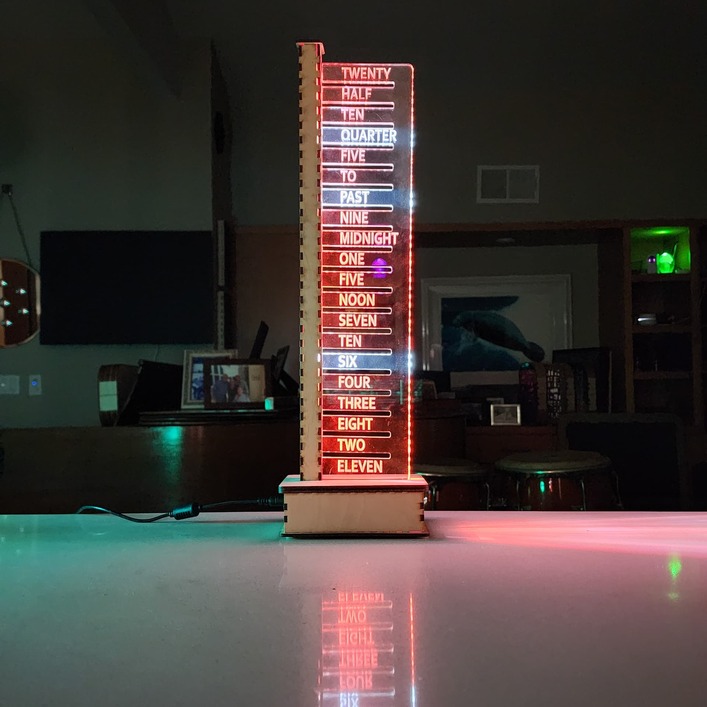
The colors cycle through the entire rainbow every five minutes.
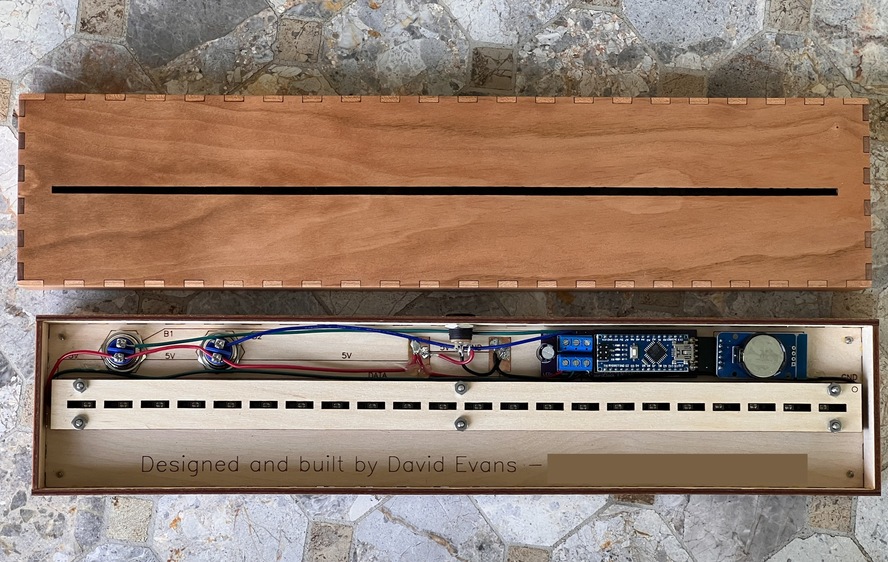
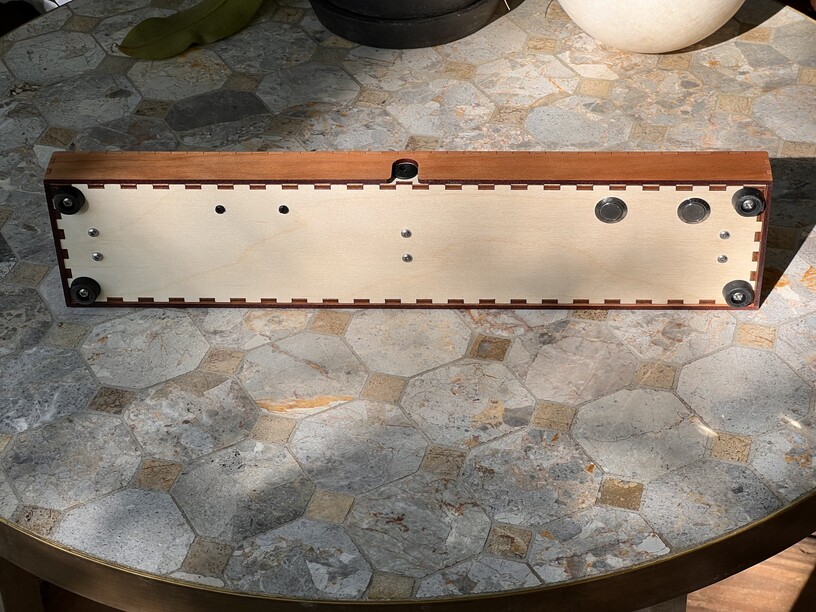
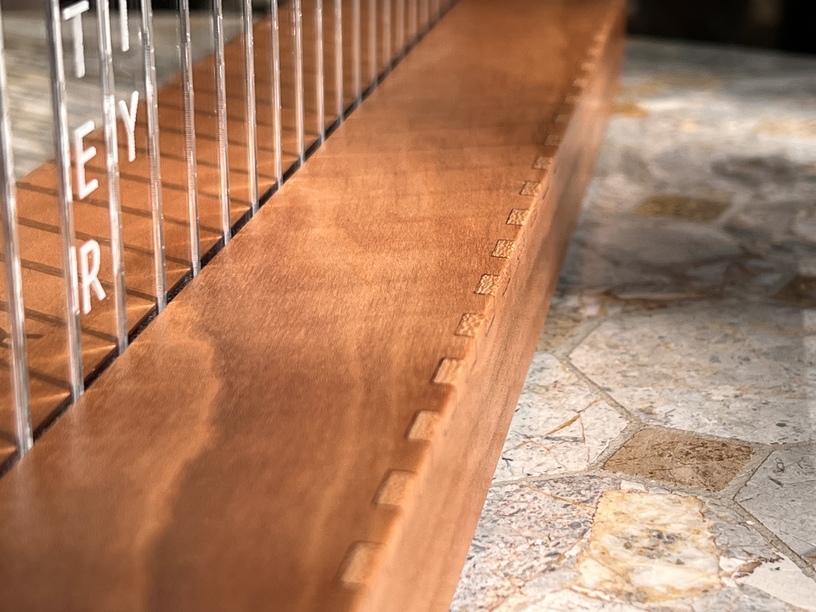
The case is a simple box, but as with most laser projects, take your time and execute well and it still impresses. I added a sort of signature inside the case, and included contact info.
Simple, but nicely done. Pretty happy with the case. This is a good illustration as to why I don’t ever use plywood for these sorts of things. I like my fingers to “disappear”, plywoods – especially MDF core like PG – don’t fit my aesthetic.
To both @evansd2 & @mark14 - is the electronics side of this thing documented? I want to make one of these for my daughter. I’ve found a few on other marker-related sites. I looked thru the original post from '19 and did not see any references. I’m an EE and been soldering since the 80’s, but will pay a little more for a “canned” solution if necessary.
I never opened the code. The hardware is super simple, though. All in it’s about 10-15$, and that’s if you don’t even bargain shop.
I have custom pcbs that I designed but you can do it on veroboard if you want. My first clock was veroboard based and it’s still hanging in my living room, 7 years or so later.
If you’re going to do it fully diy the way I did : You need an arduino nano clone. A real-time clock unit (I suggest a ds3231 based model), two momentary buttons, a 6+ v capacitor of 1000 microfarads capacity, one ~500 ohm and two 10k ohm resistors, a through-hole power jack and a strip of ws2812b addressable leds.
The specifics of which strip to buy were discussed in the previous thread, I use a 60 led/meter strip, others prefer denser strips to get more lights into the mix.
As for software I use the fastLED library, the code is fairly simple all around, there are libraries to interact with the clock unit too.
You will probably want to get a stripboard or proto board if you’re doing it as a one-off, soldering all the wires together is doable but bleh.
Lastly you need a 5v power supply with at least 1A, 2A would be better. I like to overspec my power supplies — the theoretical maximum draw of a rgb led is about 60 mA. This vertical clock uses 22 which means a total of about 1.3A. In practice I never light up all the lights at full power, so my actual draw is somewhere around 100 mA at most.
You’d need to scale your power needs up depending on your led strip density and overall clock design, but 2A has a lot of slack.
As for where to buy this stuff… kind of up to you. Amazon, mostly. Aliexpress is also not a bad option for components.
I appreciate all the time you take to make your finished projects so special. The attention to detail is what really makes them super special. Thanks for sharing and giving me (us) some incentive to slow down and make a quality item.
i have not documented my own but I vaguely recall being inspired by an adafruit blog way back when I built my first square one (not edge lit). The code for all my clocks is similar with the difference being the map for translating time to led positions. At some point I move away from neopixel based code to fast led (i.e. I have mutated away from where I started).
I headed over there and found more documentation on than you would probably want. I did not recognize the original blog that got me started but they all seem in the hood.
The link below is specific to an edge lit version. it looks very much like where I started on a vertical version. I recommend 1/4 inch clear green edge acrylic sheet for a better look.
I have found that most of the edge lit clocks suffer readability issues in brightly lit rooms. To improve on that, I have been using RGBW strips (with the extra white channel) and lighting up the time with the brightest white i cam muster and using a variety of far less bright background colors for the balance of the words. More often than not, I use the background color to tell the minutes. purple = +0, blue = +1, green = +2, yellow = +3, red = +4. I also toss in an animation every hour and half hour for fun.
There is also this. does not use a rtc. Rather it gets the time from a server.
This design seems to have a lot of light bleed from the intended words to adjacent words. A person with a laser cutter could find a way to get more separation by skipping leds and adding a mask that isolated each " leg".