Quick notes:
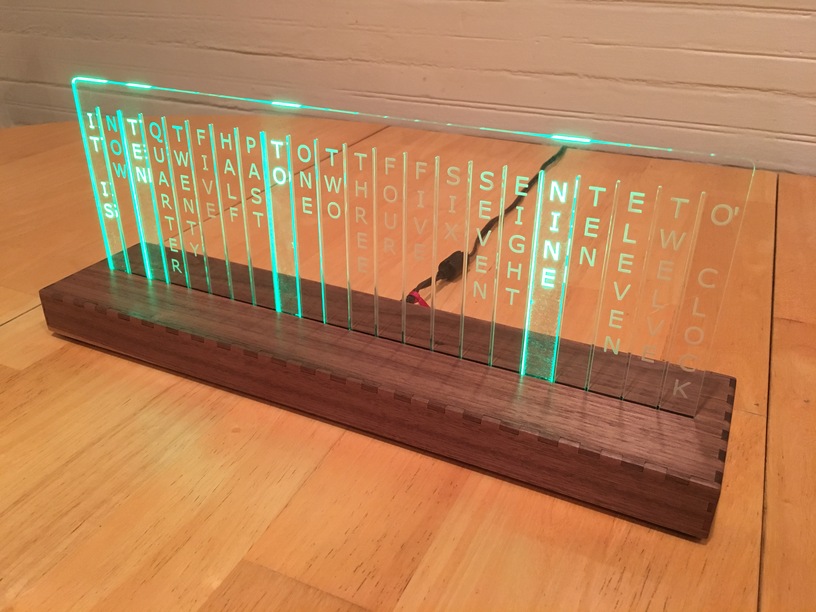
Overall base dimensions, about 14" wide, 3" deep and 1" tall.
Base sanded to 600 grit and finished with wipe on satin polyurethane.
Letters about 0.35" wide.
Overall height of the acrylic is 5.6".
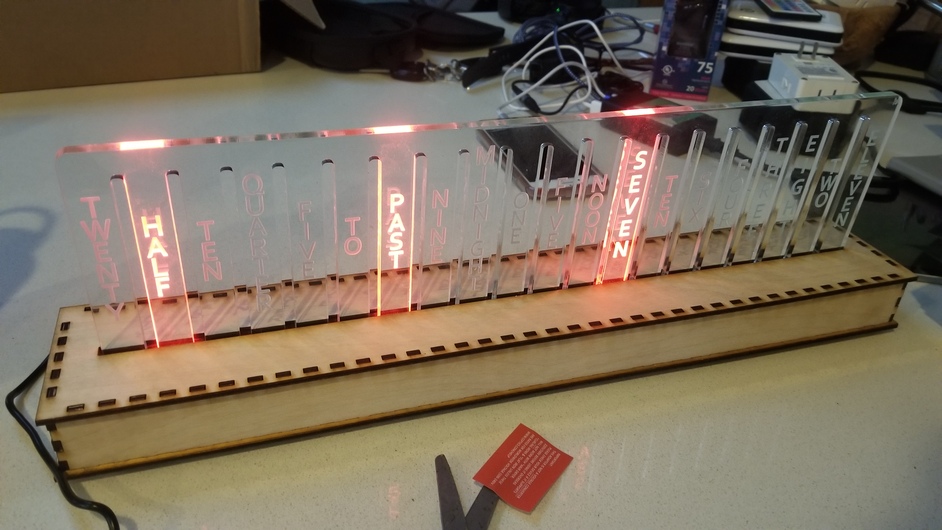
Addressable WS2812B RGB LEDs (60/m) driven by an Arduino nano clone with a DS3231 clock unit.
I wanted the text to be center stage so I intentionally went simple on the base. To that end, I wanted to use a dark colored wood and walnut was a natural choice. No decoration, no fuss, just a base that should hopefully fade away.
What would I improve? Hard to say, this is purposefully pretty bare bones. I might go for a thinner base next time – my hardware is fairly tall, it was designed a few years ago for a larger word clock project (which made a cameo here). I could probably tweak it or leave headers off to shave off a great deal of height, likewise I could leave the leads long on a capacitor and lay it on its side. That savings would probably allow me to get the height of the base closer to half an inch. That being said, I like the way this one turned out and am content with it.
So, I’ve had a couple days with it, and have an observation or two.
Overall still really happy with it but I will need to modify thing or two.
Thing 1: the slot in the walnut is pretty tight, I should have allowed for more play. Next time, up the slot thickness by 0.02" or so.
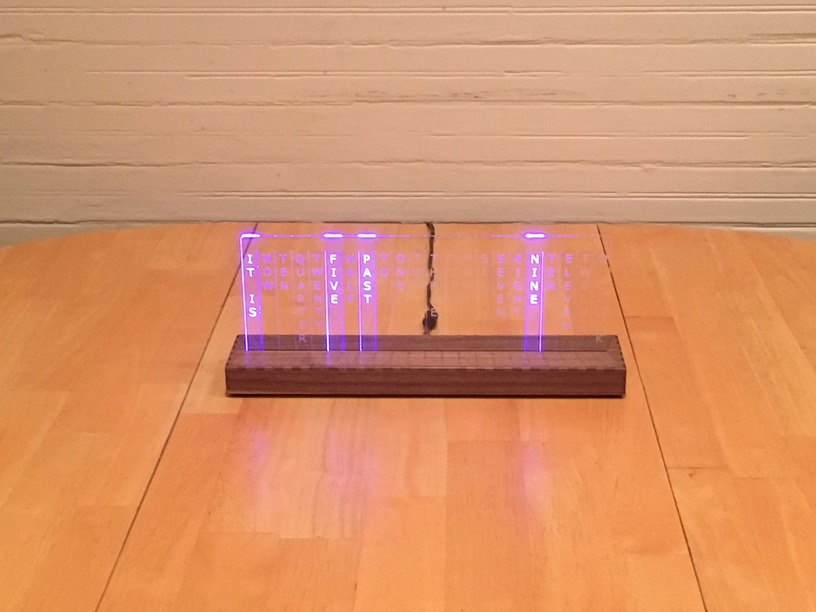
Thing 2: the electronics have a tiny red led on the board that lights up to indicate that it’s getting power. This isn’t an issue in normal light, but in a dark room, you can see the red glow sometimes coming through a little in the acrylic. I should open it up and cover the status LED somehow.
Thing 3: Internal reflections in the acrylic can make viewing at side angles (anything over about 60-70 degrees to the side) a little tricky. Not sure how to solve for this, other than to somehow paint the edges of the acrylic, which…no. I think that’s just how it goes with this design. If I totally redesigned it, I suppose you could make the entire thing wider to give more separation between the columns, or perhaps use 1/16" acrylic (though I like the strength of 1/8").
I am digging your version of the word clock. If lack of brightness ever becomes an issue, I suggest moving the the 144 led per meter strips and using them in pairs to light each element, skipping the 3rd. Makes it a bit bigger but still workable on the forge.
Not a bad idea, and it is one I explored a bit. I have some 144 on hand and did some math, the problem there becomes one of overall scale. You need 3 leds per column, which works out to an overall width (in my design, which uses 22 columns) of 1000/144*3*22 mm in inches, which works out to acrylic that is almost exactly 18" wide. Doable, but larger than I wanted in this clock, I was shooting for on or about 16" wide overall, 12" minimum.
I’m more likely to switch to 2020 size 200-led/m strips, which gives me some flexibility but still isn’t right-- using 3/4 leds on that yields a total strip length of 17.3" which is closer to my target but not perfect.
Of course there is the option of making a custom pcb etc but that’s more than I wanted to do here, and you could cut your strips up and get de facto 100 led/meter spacing, but that’s a lot of soldering, so no go.
In the end, I felt like 60 was the right move, and the 5050-size leds (1/column) seem plenty bright.
My vertical one that uses the 144 has 20 elements which works out to about 16 /5 inches wide. when using the 144s. I think that takes 59 leds. That could be reduced to 19 elements if i removed noon and midnight and added twelve. Your use of “it is” and “now” and “o’clock” make for a different vibe so I can see why you went with more columns. I moved to the 144 after not getting the brightness I wanted in a 60.
If I ever do a vertical one it’ll be framed and I’ll probably light it from both sides.
You ever fool with making your two lights different colors in a single column (row?) in your vertical one? I wonder if you’d be able to resolve the two colors or if they blend too seamlessly and give you the merged color.
the colors blend for the most part. I do not do it often or intentionally any more. given the wide range of colors the leds can put out there is not much need for a blend. if I can find a 144 in rgbw, it might give that a try for even more brightness
.