About 20 years ago I got excited about making Pysanky eggs (where you draw the design in beeswax after immersing it in dye, then repeating with successive colors, followed by melting off the wax). Haven’t done much since then, but a recent random Instagram post got me excited again. These are ones I just finished. Before, I had to make do with napkin rings for egg stands, but now I can design and cut my own.
The stands were cut from 3mm Baltic birch, then stained and glued together.
Here’s the design if you want to try it. (Note: the legs fit really tight; I had to sand a little to get them to fit the slots. You might want to kerf adjust for your material.) Egg Stand.pdf (348.6 KB)
Those are really beautiful! The eggs however are messing with my head. My mother one year bought a few dozen past due eggs and had to poke a hole on the top and bottom and with a vacuum thing my father cooked up, was able to suck the contents (that smelled of rotten eggs) out, and then they were dried in the sun and a spot of glue applied to the top and bottom. You had to look hard to see it but it was there. From there she used them as a canvas to paint desert scenes and animals so the look diverged quite a lot from yours.
Now I have seen successive colors added with wax protecting an increasing amount of the surface as new darker colors are added and it has not been difficult to see the order that which they were added.
On your pieces I do not see the mark on the top and cannot make out an order that the colors would be added. Are you able to explain some of the secrets or is it wrong to ask.
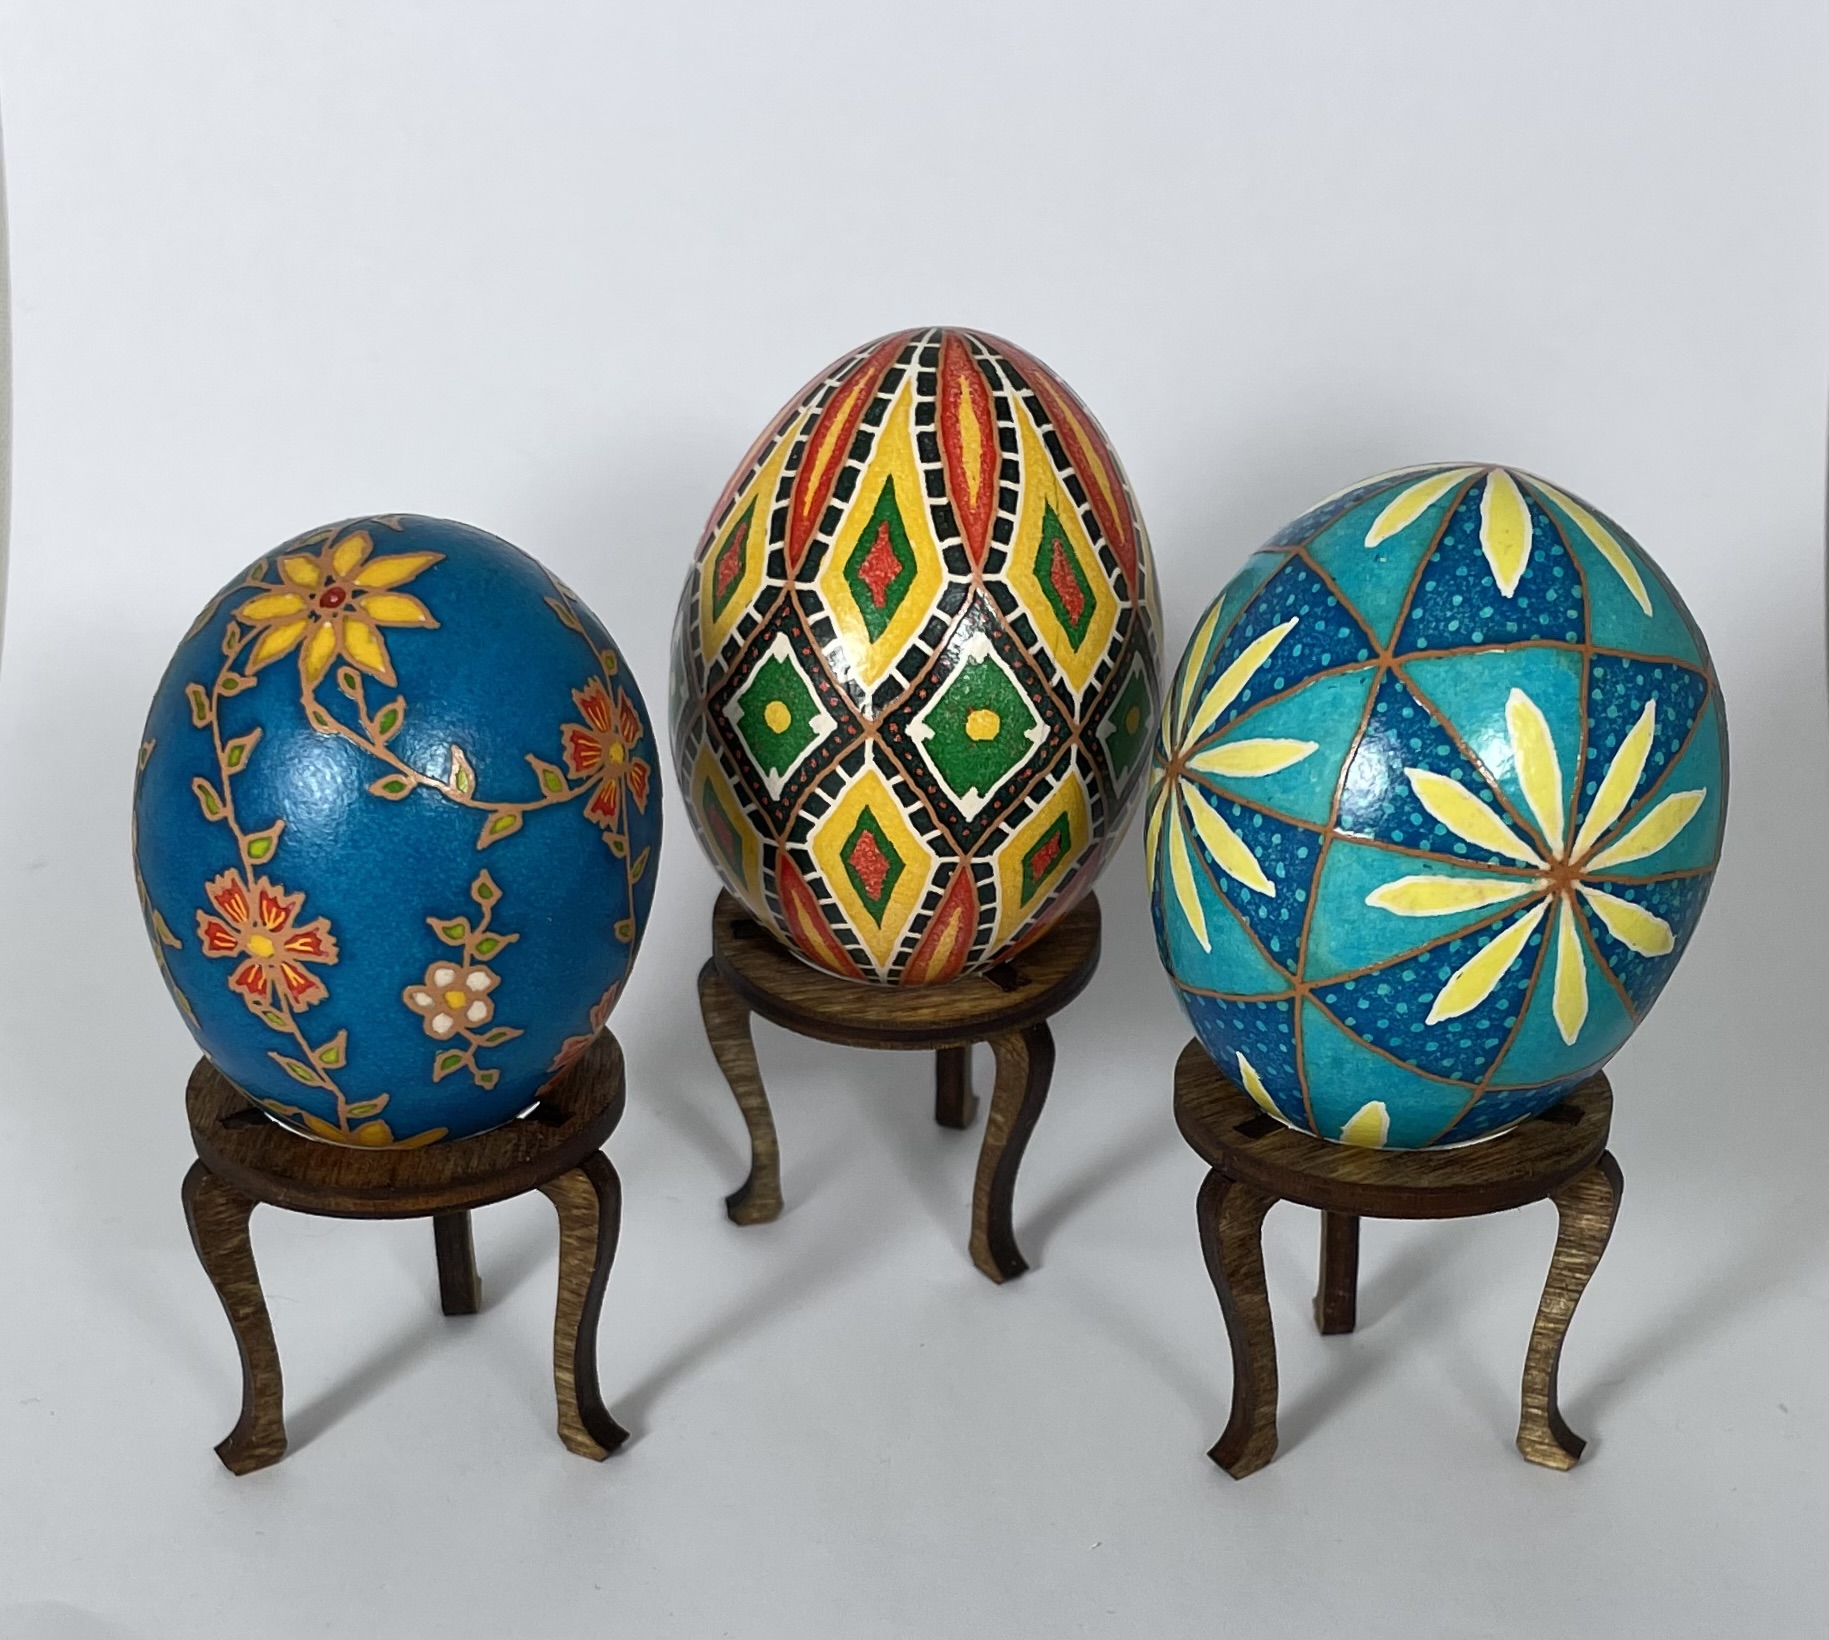
Thanks! I don’t have Slavic ancestry so my eggs are pretty non traditional. I cheated a little on the egg on the left. It started off as a brown egg, and I wrote the brown lines in wax before soaking in a vinegar bath which etched the egg back to white. Then filled in the white flowers. For the colored flowers and the leaves, I dotted some dye in each of the areas with a fine paintbrush before sealing the areas with wax. Then the whole egg was dunked in turquoise dye, which dyed really dark pretty fast.
The egg on the right was started off the same way. After doing the etching, I dunked in yellow then did the flowers. After sealing them with wax I dunked it turquoise. It came out way darker than I wanted so I rinsed under the tap for a minute and that lightened the color. Then I waxed the tiny dots and half (every other) of the triangles. Then dunked in royal blue followed by turquoise again.
The center one was done more traditionally. I believe the succession of colors was white, yellow, red, green, and black. After the red and before the green, I soaked in vinegar to rinse back to white, as I was afraid of making brown.
Forgot to mention how I emptied the eggs. All the dyeing and waxing was done on whole eggs. Then after removing the wax, they were given a coat of oil-based polyurethane. Then I drilled a tiny hole on the bottom, scrambled the egg with a hat pin, and using a 10 mL syringe fitted with a 16 gauge needle, I pulled the contents out then rinsed a couple times with water. The egg that comes out is not suitable for eating as the toxic dyes migrate through the shell and contaminate it.
Which was why my mother used store rejected rotten eggs so as to not feel bad about the loss. … Oh you colored them first? Interesting. I would be afraid of breaking one during the process, as that would be messier than if empty (expecially if rotten).
It would be interesting to have a dual hole so the draining and washing could happen from the same end of the egg. My mother left the empty white areas natural so folks could see they were real eggs (her reasoning) and she spoke French before she spoke English, as was common in New Orleans, so no Slavic background there either.