So not sure what is happening here.
I was doing deep engrave on a long board. The engrave paused to cool down mid engrave and then never started back up, even after waiting over an hour…
So I spent some time cropping my engrave image where it stopped and went to line it up on the partially engraved board. Now its not allowing my to engrave the full length of the image even though everything is the same. The only thing that changed was the allowable engraving area has been reduced, thus not allow me to complete the second half of the engraving. I’ve set the Beta Margin Optimization to maximize margin on the original print of the first half. But now as I try to line up and engrave the second half, the machine or software is not giving me the same amount of width for the second portion of engraving, even though the setting is still set to maximize margins… So I’ve now got half an engrave, which stopped last night mid process, that I cant finish because the machine or whatever has reduced the maximum usable engraving width, thus not allowing me to complete what I started. 30 dollar piece of wood wasted if I cant remedy this,
Any ideas? Wood is in same position, same height, engrave settings are the same. But now the area of engrave is reduced…
Pictures show how the engraveable area looks over whats already been engraved as well as the portion of graphic I’m trying to complete. Other picture shows my settings are set to maximize margins… I’ve done several manual focuses on the material and the margins dont change,
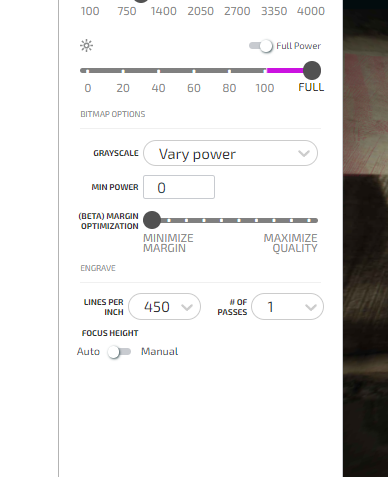

I know you said you didn’t change the settings… but… I can tell you the usable area for engraving depends on the speed.
Also, it’s very hard to line something up like that. I use my Glowforge mostly to cut out shapes so others with more experience may be more helpful with any tips. My understanding from watching from the sidelines is that it usually leaves a visible artifact. So at the very least I wish you luck saving that piece of wood.
So a note about some weirdness on this issue…
I went and dropped back in the original full image that originally stopped half way through,
I added it to the partial image Im currently trying to finish that is not allow me to maximize the margins,
But the full image when set to maximize margins setting, then allows that image to go the original full length, while the partial image I’m using to finish the engrave (it’s just as wide mind you as the full image) still restricts the margin area thus not allowing me to engrave it… Why would one image the same width as another, not create the same margin adjustment?
Here are two screen shots showing both graphics on the bed, but as you can see when I grab each one seperately you can see the different margin widths…


I can line up pretty good and am sure there will be some noticable line, But I do paint these when done so was hoping to make the line disappear with the paint. And the speeds are the same settings. But look at my follow up post showing how two different graphics, with the same width and settings, dont give me the same usable width…
Can you share a screenshot of the interface settings with the original only?
Was in process of dropping in the images fressh to take screen shots and found a solution.
When I dropped the larger image in first and maximized the margins for it, it went in fine.
After taking some screen shots, I added the second partial graphic in on top of the the first full one, adjusted the settings to match again including the margin setting, then scaled up the partial graphic to match the full one and this time it used the same margin area as the full image. So apparently, this has something to do with the first imported-in graphics shape and or size as to how the the margins are determined. While the smaller half image produced a smaller margin, the larger full image produced a larger margin. And as long as the larger one goes first then both seem to follow the larger margins. But apparetnyl if I import the smaller half image first, it produces its smaller margin for it, but still allows the bigger image to come in after and produice a bigger margin for it, but not widen the first smaller image imported. So I guess largest images imprted first then add smaller graphics after if wtill wanting to maintain the larger margins… If that makes sense. But either way, I got it to work now… So back to lining up the graphics the best I can to see if I can complete this piece… Thanks for your suggestions and help. Much appreciated!
I’m presuming you’ve already given it a go at this point - but if this ever happens again - don’t line up to the printed image, line up to the graphic in the GFUI. If you lined up your half image over the whole image and then set the whole image to ignore (and as long as you haven’t moved anything in the laser) it’ll line up perfectly.
If you’ve deleted the graphic, you can hit Control-Z to bring it back (as long as you haven’t exited the screen).
I don’t know if this is the problem or not since I haven’t done anything as nice and complicated as this ![]() I have had problems with size though if I don’t start with my Glowforge Template that is the full bed size, then I can put in small items and have them print the correct size.
I have had problems with size though if I don’t start with my Glowforge Template that is the full bed size, then I can put in small items and have them print the correct size.
Thanks for the input everyone. I was able to save my piece with very minimal alignment issues showing. Here is a pic of the finished piece,
Have a great Holiday!

Wow! That was a great save.
This topic was automatically closed after 30 days. New replies are no longer allowed.