This is good info on how to halftone dither and I appreciate it as I’ll need it when I start doing something only lases to one tone but I don’t think it is right for wood with the  as it is capable of doing so well with all 256 levels.
No I didn’t see it. I don’t know what is controversial about wanting a manual that details what each operations does and how it interprets each file type. How else can anybody use it effectively without lots of trial and error?
Glowforge have hidden all technical details during beta and pre-release but those are machines they still own. Now that is in production they can hide how it works but shouldn’t hide what it does from paid up customers. Things like how it maps greyscale to power / depth and when it decides to use dithering. That information is needed to know how to prepare files for it.
2 Likes
I recall previous discussions on this forum about image prep for engraving, and that the difference between glowforge and all the other lasers out there, is that you do NOT want to dither an image for use with glowforge (directive/suggestion from staff) as the software is supposed to take care of all that for you, in order to make the system as whole, much easier for the less technical mass market customers.
1 Like
That’s true but it’s the intention the software will do it but with it still a work in progress it may not be doing it well yet on production units - they’re still in beta software mode according to the letters people got.
2 Likes
Confirmed. I’m seeing that in the app as well.
2 Likes
Ditto
1 Like
A vector fill that has gradients is not processed in grayscale unless that feature is now enabled. It’s all one color and one setting on the engrave.
1 Like
Well that’s silly. Thanks for the info!
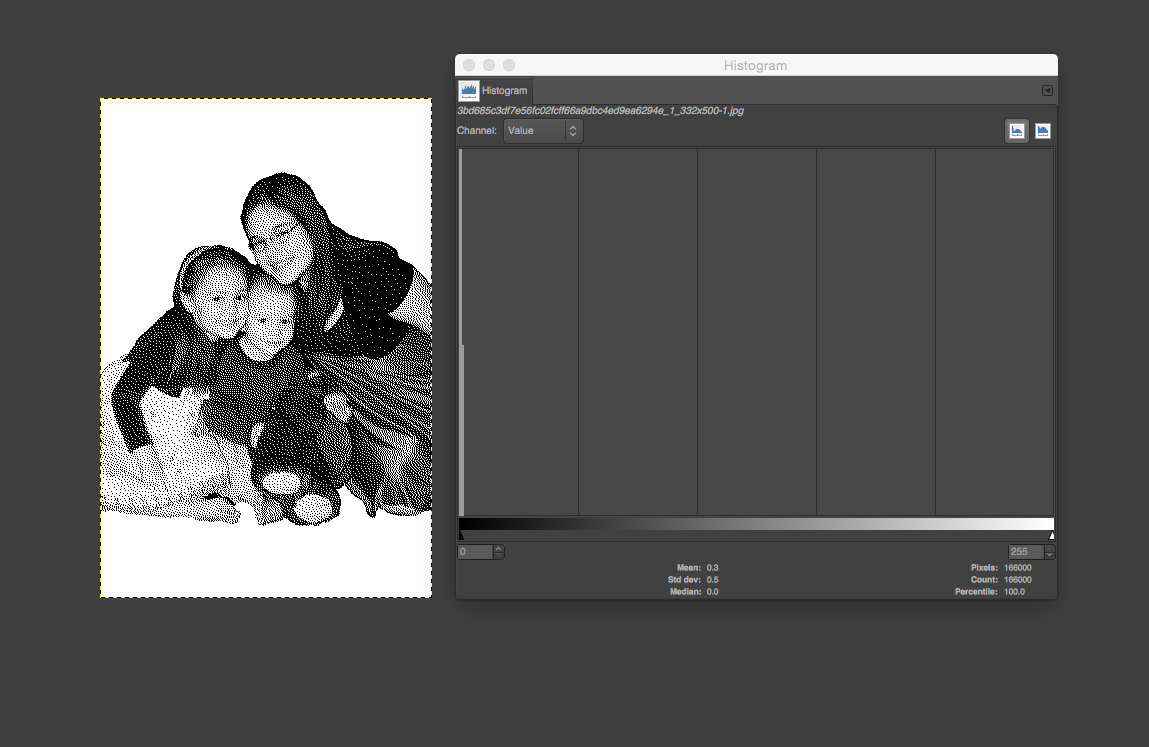
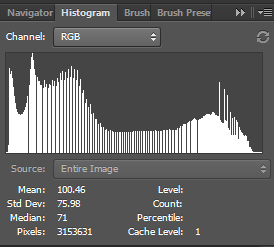
I think I might have found something interesting via @mpipes histogram analysis. I looked at the image that I actually used this morning and found it DID save with transparency. However the histogram shows a small spike at 255 where the rest is relatively uniform. I didn’t have time to find the hotspot before we left for the amusement park. Hopefully I’ll have time when we get home tonight.
3 Likes
I rarely use photoshop for editing (I use Lightroom) - but I wonder if there is a way to turn on clipping indicators in Photoshop? Clipping indicators highlight areas that are either completely black or completely white (0 or 255).
2 Likes
This is an excellent topic and great discussion. We’ve touched on all these issues in many places but until you put all the pieces together with a Glowforge, it is hard to really understand.
For example, the title of this topic alone allows for ambiguity. From the title alone one might not know that you are you talking about the color in a bitmap photo/image and not about engraving closed vector paths that are filled with different colors and the Glowforge then can engrave these at different settings. These are two totally different ways of managing a print on a Glowforge.
I’ve learned a lot here, especially about histograms and how to read them better.
1 Like
Here’s what the image looks like with manual dithering. The way the detail is lost in the faces and bleed together looks pretty similar to the actual engraving.
1 Like
Yeah. I purposefully made it grayscale and NOT b&w to see what happens. Do we know for sure what dithering algorithm the Glowforge uses?
When I get home I want to find the hotspot in my image and eliminate it and see what happens.
The “hot spot” in your original image is the white background. If you knock that part out in Photoshop you will see the histogram update with more detail through the other shades.
However, when I dithered this image today, I tried both the original image and a version with the white background knocked out (ie: Alpha channel for the layer turned on) so it was transparent. It made no difference between the two. That makes sense because the only color present in a dithered greyscale image is 100% black.
I don’t know what algorithm glowforge uses but I can tell you I only have 3 options available in GIMP, and the one that I uploaded was the only one that worked.  Or I should say, was the only one that produced a result that was not a blob of mud.
Sorry I wasn’t clear. The imageI I used DID retain transparency. I just didn’t realize at first. So the hotspot is elsewhere. Unless the histogram looks at all layers instead of just visible. But that would be silly.
@Jules, you don’t know how bad you got me with your bug. The first time I saw it was months ago, but I thought something had gotten in my monitor. It is so real looking and acting. 
3 Likes
Don’t encourage her. 
5 Likes
Tee-hee-hee. ![]()
3 Likes
Okay… So! I found my white spot. It actually didn’t exist! It looks like white was forced into the palette at some point. So, I just switched to Indexed Color and did NOT force Black & White (used Exact instead) and the histogram removed my mysterious white hotspot.
Histogram including White:

Histogram after using Exact:
What a difference that made!
About to print the new version. Will report back shorty…
Additional: Man, it’s SO weird working with the GFUI sizing. I REALLY wish it allowed you to change x independent of y. But I, without fail, instinctively hold shift down when resizing to maintain aspect. 
12 Likes
This is very true.
In the hopper is auto-processing photos, but in the mean time, you want to increase contrast and sharpen well past the point that the original image looks good.
Thank you![quote=“Tom_A, post:38, topic:8555”]
I would think it would have been appropriate to have a photo waiting in the GFUI to show what a “proper” photo engrave can look like and then maybe generally point out why that photo works well. They did not do that. And, as a matter of fact, I’m going to suggest they do. They walked you specifically through other things, why not that.
[/quote]
Great suggestion!
For whatever reason, folks at GFHQ only rarely engrave photos. Most operations here are cutting, actually. That’s probably because time’s always a factor - it’s a workday or laser thursday, there’s a lot going on, and you don’t want to leave something engraving for hours at a time. As a result, photos likely have not received as much love from us as they should have in documenting.
But oh, the time we’ve spent optimizing them in hardware & software! There’s a few photos we’ve optimized really well. ![]()
If you dither the image, you will not get as accurate a reproduction. Of course, you may choose to halftone it for visual effect.
In general, vector gradients are not supported.
Now to the overall question: why do greyscale bitmaps look different than solid grey bitmaps?
I’m not going to dive into the many frustrating reasons. Because we’re going to make them go away. The “low power mode” update will change things quite a bit. I think you’ll like it.
18 Likes
Thanks, this is what I’ve been trying to say but your prose are better than mine… Plus they carry more weight. ![]()
4 Likes