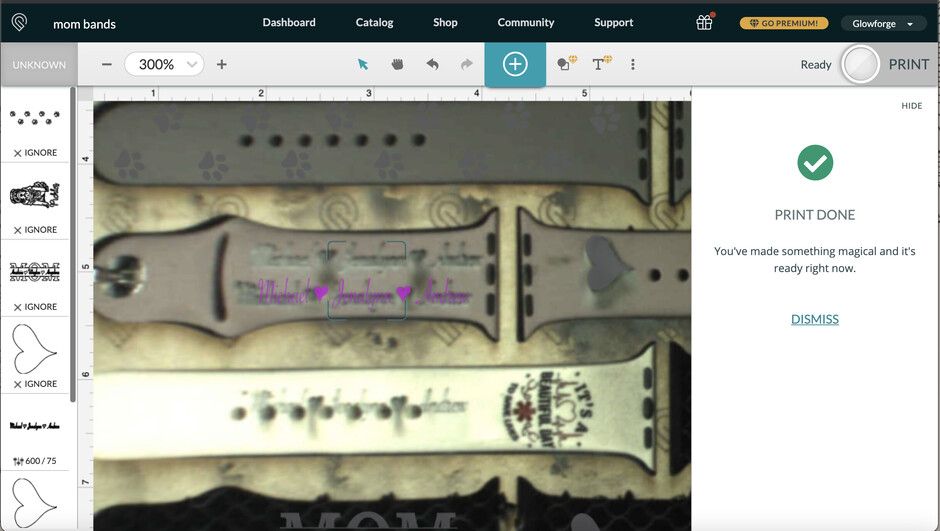
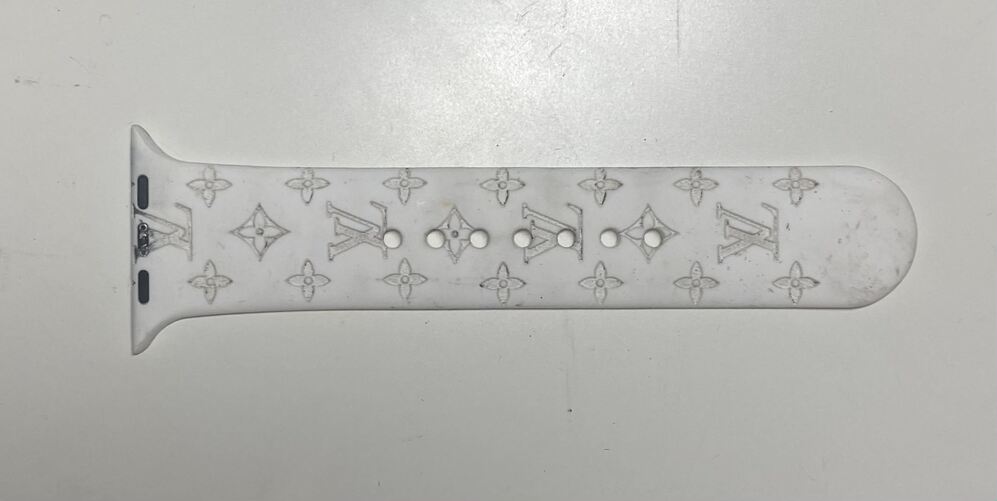
Almost every time I engrave on a watch band it’s not centered. I only do 1 band at a time because I thought it wouldn’t focus perfectly if I had multiple but it changes the location of what I want to engrave. I even tried setting the focus on a band and it still engraved in the wrong spot. I have recalibrated my machine so many times that I ran out material for it to engrave on and I clean both cameras every time I use it. On all of these bands, I had my image I wanted to engrave centered but only 1 out of lots of tries gets it in the correct spot. The white band and the purple (screenshot) I centered it but it engraved too far to the left.
1 Like
I would like to know also i have to line up 5/8 of an inch to the right of where the center is
Might try putting in a piece of cardboard or poster board, have the Glowforge engrave a straight line longer than the watch band, then line up the watch band over the engraved line to center it.
2 Likes
i have not tried engraving on a watch band, but i do these steps when i want my engraves or cuts to be where i want them (like i have a colored image printed on cardstock and i want to cut around the image with 2 or 3 mm white around it). it might work for you – just need to tweak it a little.
-
i tape down my material (cardstock) on a flat surface like a 3mm piece of wood or even an old Seklema mat. i place tracing paper over the area where i want the cut or engrave to be in and then tape the edges too.
-
i do a Set Focus, and then place my artwork over the area.
-
i do a score – 500 speed, power 1. this will make my GF score the design on the tracing paper without marking my material underneath.
-
once it’s done, i wait a bit and then look at where the design is. i eyeball it and then adjust the artwork on the GUI.
-
once i have the artwork exactly where i want GF to engrave/cut on my material, i open the lid and VERY carefully remove the tracing paper, avoiding moving my material underneath it. and then i choose cut or engrave (the actual settings) then hit the Ready button again.
95% of the time this works. the other 5% of the time, it doesn’t because i find after like half an hour of using the machine, the camera alignment goes off (not too much but it’s noticeable to me) and i have to turn off the machine for a few minutes and turn it back on again.
i hope this helps somehow!
4 Likes
Create a jig or template? Have a file with a cut outline in the shape of the band with your engrave already where you want it placed in it. In the example below imagine it the red line is the watch band.
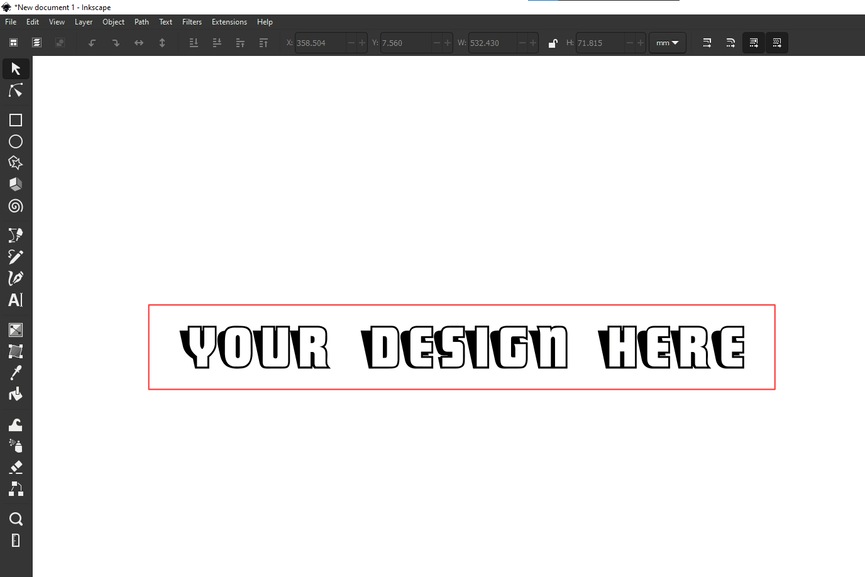
Step 1 cut the red line
Step 2 Set the cut to ignore and place watch band in area you just cut out without moving the jig or design on the dashboard.
Step 3 use set focus on the band, the engrave may appear to change locations but as long as you have not moved anything in the machine or on the dashboard since the first cut the engrave will be where you want it.
Step 4 engrave.
I do this all the time with 100% success. Just have to know when to ignore the camera changes and trust it is in the correct spot with the proper workflow. I use copy paper for my jigs, super cheap. Not ideal but its a very effective work around and would stop you from wasting material doing calibrations. You can also cover the same board with new masking and re run the calibration without using another piece of material.
9 Likes
I agree with @primal_healer. I think a jig would work the very best for you. What you see on the screen is misleading when you need a more exact placement. The other thing I have done in the past is to figure out how far off my placement is. i.e. 2 clicks up and 3 clicks over makes it centered regardless of what it looks like on the screen-so I do that every time. The jig is the best solution though.
2 Likes
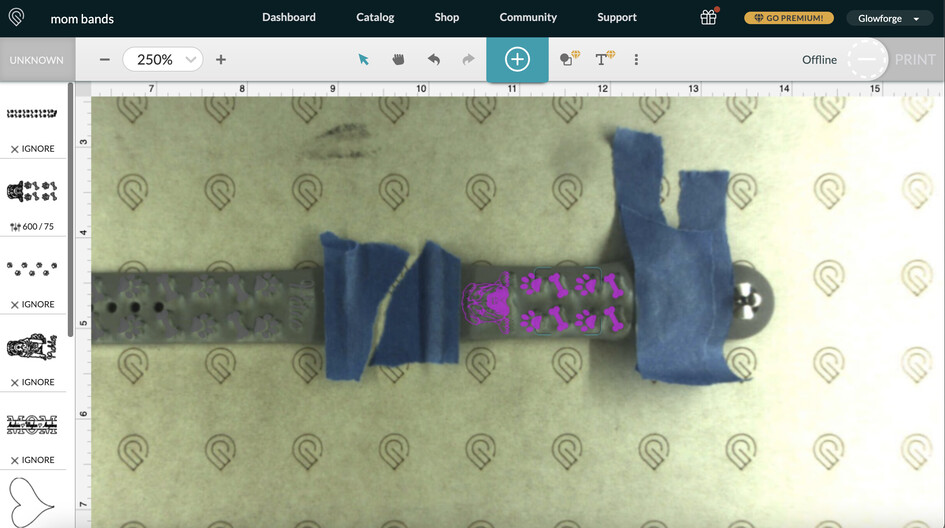
I have found that just taping down my bands to a piece of draftboard and setting focus on only 1 band is working and the bands are only shifting a tiny bit to the right. I was using a jig before but now it’s not working for me so I’ll just do 1 band at a time so I can get the most accurate focus. And if I press set focus and line it up in the middle of my design it’s been doing a great job.
You know, I wonder if those watch bands are light weight enough to get blown by the air assist fan?
(A lot of people seem to have trouble with them shifting.)
Taping them down might well be the answer. 
1 Like
Hi @3tiaras - I’m sorry to hear you’re running into this trouble, thanks for reaching out.
I pulled some data from printer and see you’ve tried recalibrating the camera recently, that’s a great step.
@primal_healer 's suggestion to create a jig could be a great solution here to try and have more precise control over things.
I would like to just double check general behavior from your printer and run a controlled test print. Could you please try the following?
- Print two copies of the Gift of Good Measure on Proofgrade material, and set up the print under the following conditions:
- Use Set Focus
- Place the Gift of Good Measure design twice, once centered on your focal point, and the second copy placed to the left of the first design you’d centered on your focal point.
Once this print is done let me know and we’ll review how things came out.
I am also having the same trouble. I just cleaned my machine for the first time (got it a month ago) one mirror was slightly covered with remnants of dust and dirt.
My alignment was way off from my computer screen which I thought was strange, since I’ve done the same thing as I normally done in the last month, and all of a sudden only one band ends up having off alignment. So weird.
Following to see if the above solutions worked out for you!
This topic was automatically closed 30 days after the last reply. New replies are no longer allowed.