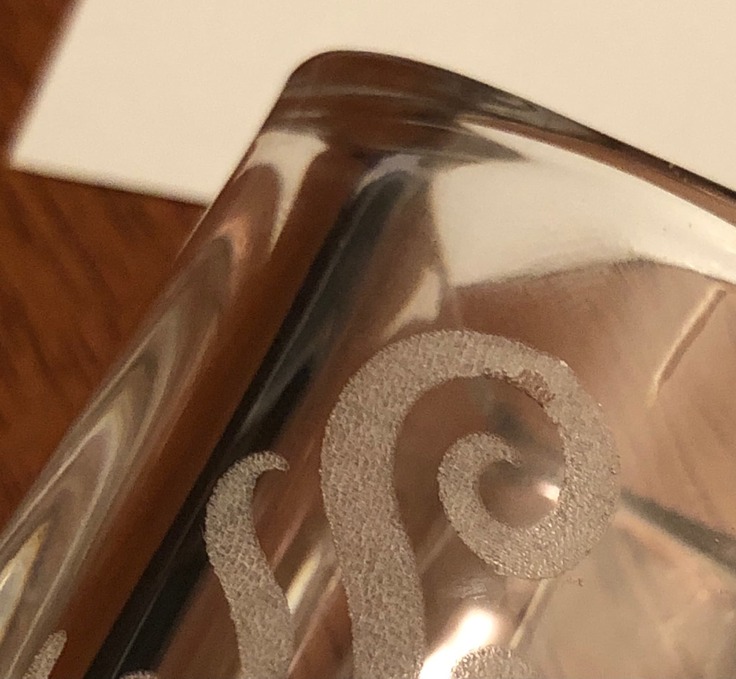
Hi, all! I’m engraving on glass shot glasses, and I thought they were coming our beautifully until my husband picked one up, mentioned the design felt sharp, and then noted that it peeled off if he touched it. I’m not sure what exactly is peeling off - maybe pieces of glass? I used the settings 700/full/340lpi - recommended on another thread I saw. I also used dish soap on the surface before engraving. Any help would be appreciated; I wasted a lot of glasses before he showed me the problem!
2 Likes
Glass engraves by fracturing off little pieces, so yes you are feeling glass dust or small glass particles. Wash the glass after engraving to remove the glass dust.
3 Likes
Thank you! I don’t want to hurt myself getting the pieces off - maybe I’ll try a plastic scraper. I’m worried though that this means the settings aren’t right, because underneath the pieces it doesn’t look like the design is very noticeable 
1 Like
A firm toothbrush is better than a scraper. There are two tricks with glass to reduce (but not eliminate) spalling-- drape a damp paper towel over the object (this can futz with focus, though) or apply a thin coating of dishwashing soap (my preferred method).
Good luck!
8 Likes
Is this a vector or a bitmap?
I would recommend converting it to a bitmap and then either reducing the dot density in manual settings, or before converting it to a raster image changing it to like a 70% black rather than pure black.
Glass is a bunch of microfractures and doing the above will reduce how much it’s fracturing. As far as engraving a vector file, it’s a constant on beam so it’s hitting the glass really, really hard.
9 Likes
Your settings are a bit too high, you’ve over cracked the surface and now it’s spalling. I’d do a few experiments at lower power to see.
6 Likes
I would increase speed and decrease power. It is also best to test settings even if you find others say they use the same. Even if the material has the same name (i.e. glass), there are differences in the manufacturing process depending on the source. Others settings are usually a good place to start but you might need to edit them once you test it out.
5 Likes
I will convert it to a bitmap - thank you!
1 Like
Thank you - I’ll try that! I did test it and adjust settings several times, but unfortunately I thought these settings looked great without realizing what I was seeing was actually spalling… and I engraved a bunch. Now I know I need to go back to the drawing table! At least I have a lot of pieces to use as testers, now. 
1 Like
do it all the time drop down to 225 lpi then use a razor blade and gently scrape all the junk will fall off what’s
left looks like frosted glass We sell these in our business
6 Likes
Welcome to the forum.
Thanks for the info.
2 Likes
Any time you chip glass the result will be sharp edges. They are correct that the pieces coming off are the chips that fast heating cause, that is how it works Unlike things that burn you will not dig through the glass like you are cutting it as that you cannot do. ![]()
The famous “glue-chip” glass makes bigger chips, but they are also very sharp, Washed and scrubbed with a stiff (even stainless steel) brush will get rid of the sharper edges, and the steel will even knock a bit of the edge.
All the ones you have already done are fine once you knock off the pieces and any sharp edges, Once scrubbed, you can even rub them with a small bit of metal and you should be able rub your hands on it without feeling sharpness,
3 Likes
Laser-etched glass is always going to be rough. I greatly prefer to use a glass etching cream. You can use your Glowforge to cut your masking material, remove the area you want etched, then 10 mins of the cream, rinse off, and it’s gorgeously frosted.
6 Likes
Wondering what materials it might be using? Hydrofluoric acid is common and nasty.
That’s a neat idea - thank you! What masking material would you recommend I use? I’m seeing the suggested material with that cream is vinyl, and I know we shouldn’t use that in the Glowforge.
Any laser-safe tape that you don’t have to overlap should work fine. (The liquid will seep between the layers.) I tend to use blue tape for everything.
And like another poster said, the cream is nasty, please avoid skin contact!
2 Likes
I spent 15 minutes trying to scrape with a hard bristled tooth brush and a plastic scraper, and I got maybe 5% of the etching off. What was under it is really hard to see on the glass - the frosted look is gone.
Sorry for all the questions! I’m trying to figure out how to use the Glowforge to cut out the design if it’s on tape that doesn’t have a backing and instead rolls onto itself. Should I cut some tape and put it on something that will act as a backing so I’m able to cut my design into it? Maybe some kind of plastic sheet?
ETA: Now that I think about it, if I unroll masking tape onto the crumb tray, it would probably stay in place well enough to cut onto it. And I’d be able to lift it off and put it onto a glass. 
2 Likes
I made a rather large set of spice jars. They are all rough from the etching. I use Cumin a lot so this one is showing the most wear on it (had to hold the jar so the Cumin would be behind the letters making it easier to see). It is just wearing off due to all the use. Glad I didn’t start up a business making them because that would be a bummer to get them all back eventually.
Couple of months ago I tried to use Cermark on my practice one but wasn’t really satisfied with the result. I think it was the original Cermark — but if I remember right they came out with one specific for glass. Was wondering if anyone has used it on something they use a lot and were they able to get a good result out of it (and does it rub off)???
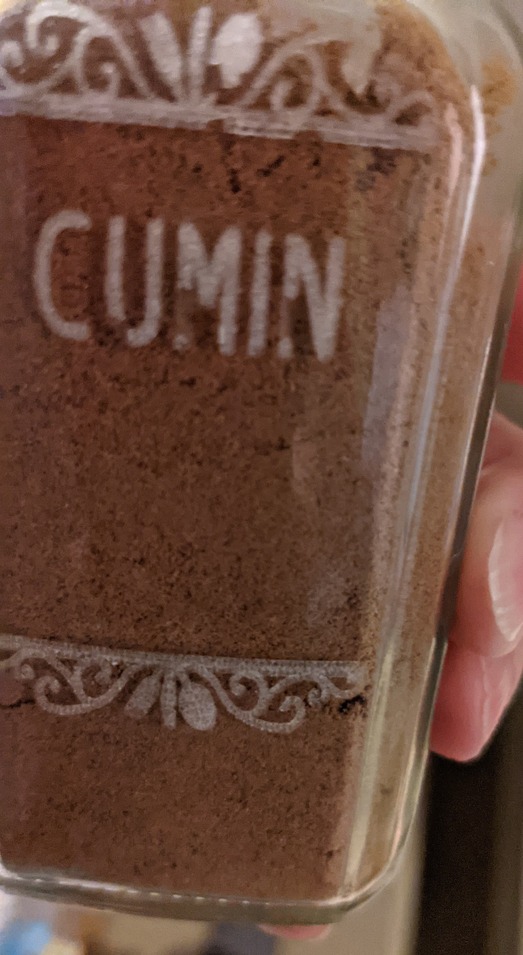
NOTE: Helps if I remember to upload the picture. I’m really tired.
Not all glass is equal, and not all materials are suitable. Test, test, then possibly find another product.
I found settings that worked perfectly for a particular shot glass. Yay.
I could not find acceptable settings for the lids of glass snap-close spice jars. I ended up making two-color acrylic labels to stick over the failed engraves instead.
1 Like