I’ve been having this problem for a while, but have finally given up trying to work around it. Can anyone tell me if they’ve had a similar problem, and how they fixed it?
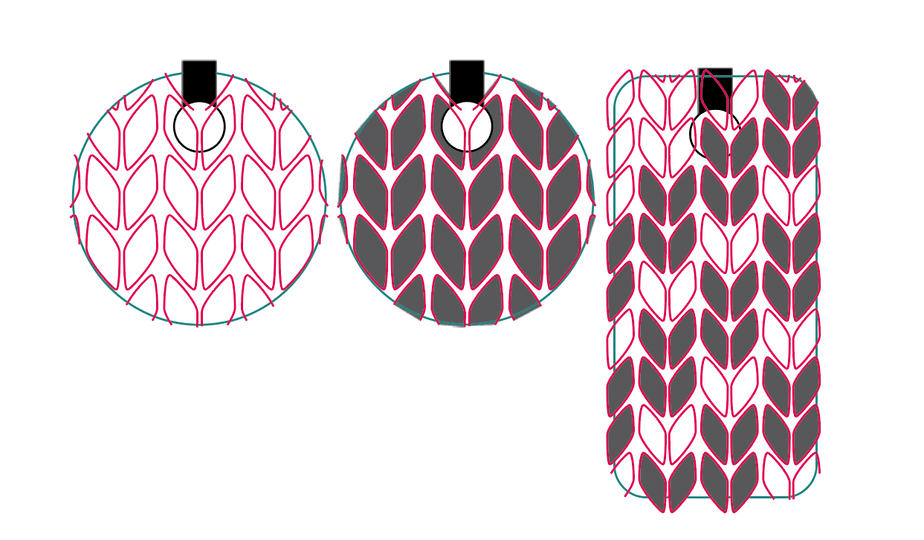
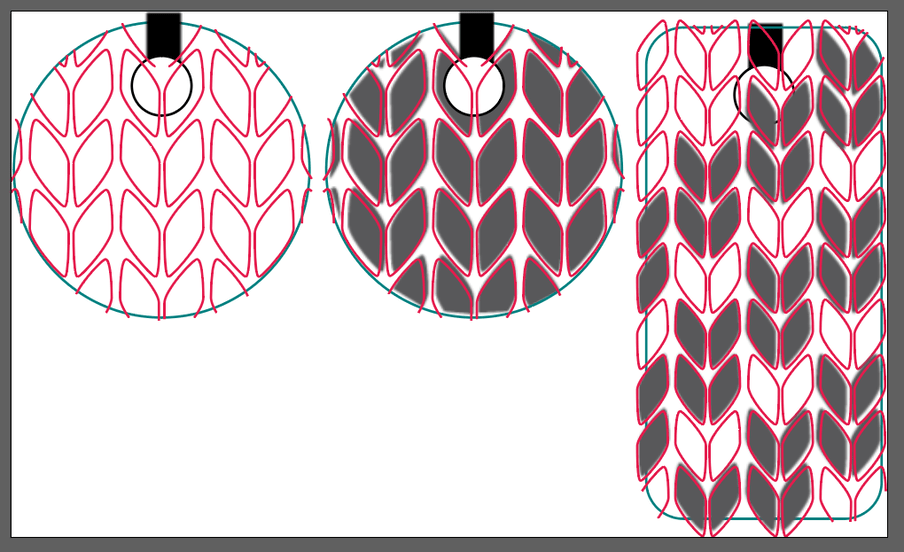
I want to do engraves, that are outlined either by score lines or cut lines. When I upload my .svg file, both cut and score lines look correct but the raster image is shifted/oddly compressed. Which can lead to some really annoying hairline-thin ridges on the outside edges of my pieces.
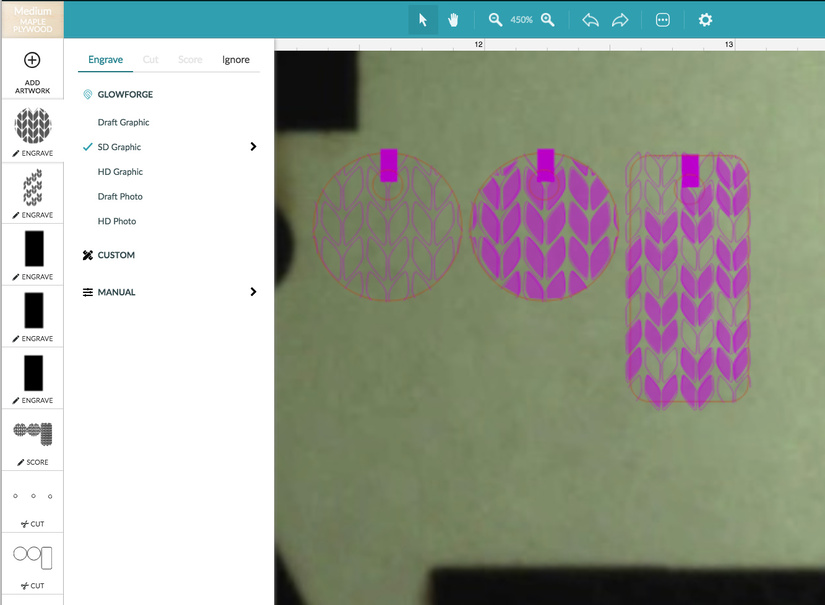
See how the engraving is shifted? When I proceed with the print anyway, I get what is in the preview, not what the file originally had. Which makes me think that it’s a software and not a hardware problem.
Is Illustrator (v 22.1, CC2018) doing something weird to the image when it rasterizes the gray areas? I am using the default settings for rasterize, CMYK, high res, transparent background, no special options. Or is something happening in the GFUI when it renders the design for printing?
Instead of using a raster image try stacking vectors as different colors,
A closed vector can be engraved or cut/scored so you can engrave one color and score the other. or even run the print once as a score and then make the vector an engrave and it should land exactly where it went the first time
Looking through the SVG code, it appears that the document doesn’t have height or width tags specified, which usually means that it was saved with “Responsive” checked when you saved the settings. This can cause odd scaling of files when uploaded into the UI. But, I’d be surprised if it caused the misalignment; I think it should scale the vector and raster elements together. Either way, you should make sure going forward that Responsive is not checked.
It also looks like something was scaled or transformed after it was rasterized; I noticed that the PPIs of the embedded images ranges a bit, 308, 310, 348. Those are just odd values for pixels per inch, which you would normally only see what an image is scaled/transformed. I imagine you probably rasterized it to 300PPI? Which means that the images were scaled slightly down at some point. (On a separate note, with such small, fine details, I would recommend using 600ppi).
You might have slightly better luck by just leaving the fills as vector fills. Copy the ones you want to fill and paste them into the exact same place (CTRL/CMD+C, then CTRL/CMD+F). While they are still selected, give the copies a Fill color but remove the stroke. That should set things up correctly with the stroked lines underneath the engrave, and it’s better to run the score first and then engrave in this instance. If you try to score into an engraved hole, it’s going to be too flamey.
That way you can avoid any pixel resizing issues that might be happening.
That’s essentially what I’ve been doing, but I didn’t realize that the GF would see a closed vector as something that could be engraved. That will certainly simplify things!! Does it take a longer time for the machine to actually etch a vector fill vs a raster image?
I think you’re right, though just now I tried unticking those boxes, and after saving and re-uploading it didn’t seem to make a difference in the placement. Keeping it a vector with a fill does solve the problem though.